Sagem LASER PRO 341 Скачать руководство пользователя страница 1

S

TELECOM

User Manual

SAGEM

LASER PRO 341

E

Société anonyme à directoire et conseil de surveillance au capital de 36.044.360 

 - 562 082 909 R.C.S. PARIS

27, rue Leblanc - 75512 PARIS CEDEX 15 - FRANCE

http://www.sagem.com

Data subject to change without notice

User Manual Ind. A

Couvertures.fm  Page 1  Jeudi, 3. avril 2003  2:12 14

Содержание LASER PRO 341

Страница 1: ...me directoire et conseil de surveillance au capital de 36 044 360 562 082 909 R C S PARIS 27 rue Leblanc 75512 PARIS CEDEX 15 FRANCE http www sagem com Data subject to change without notice User Manua...

Страница 2: ...rature humidity the average number of pages per print operation the type of paper used etc WELCOME Congratulations for purchasing this SAGEM new generation communication terminal Your Laser Fax Machin...

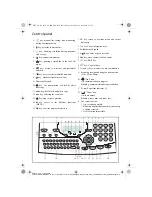
Страница 3: ...MENU 15 OK key confirm displayed selection 16 C key return to previous menu and correct data entry 17 5 or 6keys navigation keys 18 Alphabetical keypad 19 key enter or go to next line 20 key erase cha...

Страница 4: ...MFL_251 270 819 A_LASER PRO 341 GB book Page 2 Mercredi 23 avril 2003 2 55 14...

Страница 5: ...LQJ WKH RULJLQDO GRFXPHQW RXWSXW VWDFNHU 1 11 RDGLQJ SDSHU 1 11 RDGLQJ SDSHU PDQXDOO 1 13 QVWDOOLQJ WKH VHFRQG SDSHU FDVVHWWH XQLW RSWLRQ 1 14 RQQHFWLRQV 1 15 7HOHSKRQH FRQQHFWLRQ 1 16 3RZHU OLQH FRQQ...

Страница 6: ...2 URP WKH GLUHFWRU 5 2 URP WKH UHGLDO NH 5 3 7R PXOWLSOH QXPEHUV 5 3 7UDQVPLVVLRQ RYHU WKH 3XEOLF 6ZLWFKHG 7HOHSKRQH 1HWZRUN 3671 5 4 PPHGLDWH WUDQVPLVVLRQ 5 4 6HQGLQJ LQ WKH HFR PRGH 5 4 HOD HG WUDQ...

Страница 7: ...LQJ WKH IHDWXUHV RI D 0 5 17 3ULQWLQJ WKH FRQWHQWV RI D 0 5 17 HOHWLQJ D 0 5 17 3ULQWLQJ WKH 0 OLVW 5 17 0 GHSRVLW LQ RXU ID 5 17 0 GHSRVLW LQ D UHPRWH ID 5 18 0 SROOLQJ IURP D UHPRWH ID 5 18 0 17 1 1...

Страница 8: ...R37 and CTR21 it is designed for connection to the Public Switched Telephone Network PSTN In case of any problems first contact your Supplier The mark CE attests that the products comply with the esse...

Страница 9: ...ides you with the long service life for which it is designed Double check to make sure that the location you select has the following characteristics Choose a location that is well ventilated When ins...

Страница 10: ...for using the terminal Never turn the terminal off or open any of its covers during a print operation Never place flammable gasses liquids or objects that generate magnetic forces near the terminal W...

Страница 11: ...er the terminal emits unusually high amounts of heat smoke an unusual odor or noise immediately turn it off unplug it and contact your dealer Failure to take this imme diate action creates the danger...

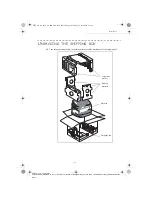
Страница 12: ...K MFL_251 270 819 A_LASER PRO 341 GB_EXPORT Installation Gb fm 813 1 7 6 33 1 2 Take the protection profiles the packing material and the machine out of the shipping box profiles Protection Packing Ma...

Страница 13: ..._EXPORT Installation Gb fm 813 1 7 0 1 3 576 Remove the plastic bags and check for the parts depicted below 1 Scanner output stacker 2 Printer output stacker 3 Printer paper feed tray 4 AC power cord...

Страница 14: ...ux en cours MFL MFC MFK MFL_251 270 819 A_LASER PRO 341 GB_EXPORT Installation Gb fm Peel off the three strips of shipping tape from the front of the terminal Pull out the two pads from the paper feed...

Страница 15: ...n cours MFL MFC MFK MFL_251 270 819 A_LASER PRO 341 GB_EXPORT Installation Gb fm Press the paper size guide on the right in order to push both paper size guides to the left or to the right Pull out th...

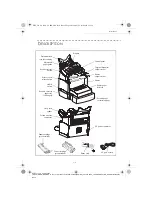
Страница 16: ...Printer Printer paper feed tray Second paper cassette option Scanner AC power connector Drum cartridge pre installed Toner cartridge pre installed Phone cord AC power cord Scanner release button Print...

Страница 17: ...s MFL MFC MFK MFL_251 270 819 A_LASER PRO 341 GB_EXPORT Installation Gb fm 167 1 7 5 029 3 576 This section details the installation of the terminal s removable parts 167 1 7 35 17 5 3 3 5 75 Using th...

Страница 18: ...order to insert its clips into the notches located on the upper part of the printer Release the stacker so that it recovers its initial shape If necessary push at the base and at the centre of the st...

Страница 19: ...ut stacker on the upper front part of the terminal by inserting its two toes into the notches provided 2 1 3 3 5 Press the paper size guide on the right in order to push both paper size guides to the...

Страница 20: ...A_LASER PRO 341 GB_EXPORT Installation Gb fm Fit the paper tray cover into place Caution Do not add paper in the paper tray while the machine is printing Supported types of paper Auto feed cassette 6...

Страница 21: ...18 When printing on special paper such as 60 to 160 g m max colour paper or transparent film laser printer compatible you should load the paper manually one sheet after the other To do so Insert your...

Страница 22: ...e Place the printer on top of the base unit Make sure to align the coupling pins of the base unit with the holes located underneath the printer Remove the cover from tray 2 Press down on the paper lif...

Страница 23: ...2003 Sct31nt3 BE31 DOC DOC 31 En cours Travaux en cours MFL MFC MFK MFL_251 270 819 A_LASER PRO 341 GB_EXPORT Installation Gb fm Remark be sure to use both hands whenever tray 2 is removed from or ins...

Страница 24: ...11 7 21 1 6 7 21 Caution Refer to safety procedures in the Safety Chapter Plug end of the main power cord 2 into the connector E on the fax machine and the other end in the wall outlet Set the On Off...

Страница 25: ...O 341 GB_EXPORT Getting started fm 77 1 67 57 1 9 7 21 0 7 2 6 35 6 17 7 21 The navigator gives you access to the menus visible on screen 7KH QDYLJDWRU This navigator has 5 keys and allows you to move...

Страница 26: ...ILHOG 7R 8VH NH 6 PERO XVHG Enter the main menu M Select the next line in a menu 6 Select the previous line in a menu 5 Confirm entry and go to the following menu OK Return to the previous menu C Con...

Страница 27: ...dden lines of the menu 3 4 etc 66 72 81 7 216 Access to functions may be achieved in two ways Menu driven access Direct function access 0HQX GULYHQ DFFHVV You may print the functions list to know the...

Страница 28: ...CANCEL Delete a record or a list p 4 5 M 15 OK PRINT Print the directory p 4 5 M 16 OK SAVE LOAD Store the directory on a chip card 161 OK SAVE Save the directory to a chip card p 4 1 162 OK LOAD Loa...

Страница 29: ...ll a mailbox p 5 18 M 37 OK BROADCAST Broadcast transmission p 3 5 M 38 OK FAX ANSW Control of fax answering machine p 3 4 MAIN MENU 5 PRINT XQFWLRQV XQFWLRQ GHVFULSWLRQ 3DJH M 51 OK FUNCTIONS LIST Pr...

Страница 30: ...OK LOCK KEYBD Activate keyboard lock p 5 15 813 OK LOCK NUMBER Activate dialling lock p 5 15 M 82 OK COUNTERS See the activity counters p 5 13 821 OK PRINTED PG Printed pages counter p 5 13 822 OK LO...

Страница 31: ...M 21 OK SETUP DATE TIME Enter the numbers of the required time and date one after another for example November 8 2003 at 9h33 press 0 8 1 1 0 3 0 9 3 3 and press OK to confirm RXU ID QXPEHU RXU QDPH Y...

Страница 32: ...e country M 201 OK SETUP GEOGRAPHICAL COUNTRY Select the required option and press the OK key to confirm Remark if the required language does not appear select the setting Others 1HWZRUN This setting...

Страница 33: ...a local prefix do not add it to the numbers stored in the directory it will be automatically dialled with each number HILQLQJ WKH PLQLPDO VL H DQG WKH ORFDO SUHIL M 252 OK SETUP TEL NETWORK PREFIX Yo...

Страница 34: ...mmunications The economy period via the telephone network at off peak hours is preset by default from 7 00 pm to 7 30 am Nevertheless you may change this time slot Modifying the economy period M 233 O...

Страница 35: ...reception reception mode WITHOUT PAPER your fax saves the incoming messages in the memory reception mode WITH PAPER your fax refuses all incoming subscribers To select the reception mode M 241 OK SETU...

Страница 36: ...mber of pages of your documents before transmitting Activate relay by pressing key The document in the feeder will be relayed either immediately or at a later time according to your choice to the remo...

Страница 37: ...e page in progress 8 ECO ENERGY 1 WITHOUT 2 DELAY 5 MIN 3 DELAY 15 MIN 4 DELAY 30 MIN 5 STDBY PERIOD Choosing the printer standby delay the printer will switch to standby after a delay in minutes of N...

Страница 38: ...en cours 23 avril 2003 Sct31nt3 BE31 DOC DOC 31 En cours Travaux en cours MFL MFC MFK MFL_251 270 819 A_LASER PRO 341 GB_EXPORT Setting your machine fm MFL_251 270 819 A_LASER PRO 341 GB book Page 8 M...

Страница 39: ...ed to contact your reseller and purchase the optional Directory card This gives you access to functions 161 and 162 refer to paragraph Functions list page 2 4 To proceed you need to contact your resel...

Страница 40: ...of the 6or 5 keys and press OK to confirm If need be select the appropriate transmission speed to send your faxes and confirm your choice by pressing the OK key 5 7 1 68 6 5 56 676 A subscriber list i...

Страница 41: ...bscriber records included in this list There are three ways detailed in the table below to choose and add one or more subscribers to your list Then confirm your choice by pressing OK For every subscri...

Страница 42: ...3 OK DIRECTORY MODIFY The directory appears in alphabetical order Use the 5 or 6 keys to select the subscriber list L you wish to modify and press OK to confirm Modify the line or lines in the subscri...

Страница 43: ...lphabetical order Use the 5 or 6 keys to select the subscriber record or subscribers list L you wish to delete and confirm with OK Press again OK to confirm your deleting The record or list is deleted...

Страница 44: ...n cours 23 avril 2003 Sct31nt3 BE31 DOC DOC 31 En cours Travaux en cours MFL MFC MFK MFL_251 270 819 A_LASER PRO 341 GB_EXPORT Directory Gb fm MFL_251 270 819 A_LASER PRO 341 GB book Page 6 Mercredi 2...

Страница 45: ...e will receive a blank page Remark Since the addressee s number is generally on the document to be transmitted you may also dial before positio ning the document Place your original documents in the d...

Страница 46: ...be used for photogra phic documents To select the resolution mode Press key as many times as necessary to select the required mode A g icon on the screen shows the current mode RQWUDVW You can set the...

Страница 47: ...ber among the last ten fax numbers you just dialled before RU D ID QXPEHU 7HO LQ WKH LUHFWRU Press key The screen displays the last number called Use keys 5 or 6 of the navigator to select your desire...

Страница 48: ...the end of transmission the initial screen is displayed HOD HG WUDQVPLVVLRQ This function allows you to transmit a document at a later time To program a postponed transmission you need to identify the...

Страница 49: ...te fax tone the line is clear and you can start the transmission Press to start the document transmission If your machine is set in order to print a transmission report refer to paragraph Main setting...

Страница 50: ...u may now modify the parameters of the given document then confirm your modifications by pressing key PPHGLDWHO SHUIRUP WUDQVPLVVLRQ IURP WKH ZDLWLQJ TXHXH M 61 OK COMMANDS PERFORM Select the document...

Страница 51: ...erased from the transmission queue To cancel transmission in progress Press key A message will ask you to confirm cancellation by pressing the key a second time Press key to confirm cancellation in pr...

Страница 52: ...s 5 or 6 and press OK to confirm 63 23 6 77 1 6 When the copy quality is no longer satisfactory you can perform a calibration To do so refer to paragraph Scanner calibration page 6 15 Moreover a high...

Страница 53: ...o reduce or magnify a specific part of a document from 25 to 400 Enter the desired zoom value with the numerical keypad ZOOMING Confirm your setting by pressing key OK VVHPEO Choose the copy type betw...

Страница 54: ...3ULQWHU VHWWLQJV 3DSHU Select the type of paper NORMAL or THICK with keys 5 or 6 Confirm your setting by pressing key OK Remarks 1 When the THICK type of paper is selected the printing speed is slowe...

Страница 55: ...with the following information date and time of the incoming or outgoing document subscriber s number or E mail address transmission mode Norm Fine SFine or Photo number of pages sent or received call...

Страница 56: ...keys you will execute the registered sequence 7R UHJLVWHU D VHTXHQFH IRU H DPSOH LQ NH F1 Press key MENU then F1 you will enter the menu option From this moment all the key pressings are memorized in...

Страница 57: ...VANCED FCT COUNTERS RECEIVED PG 326 7 1 32 1 You may deposit a document in your fax and keep it available to one or more subscribers who can obtain a fax of this document by calling your fax with the...

Страница 58: ...the type of poll you should 2 6 There are restrictions to the use of your fax To lock the printing of received documents refer to paragraph Fax answering machine page 3 4 locking the keyboard locking...

Страница 59: ...is function allows you to prevent access to non authorised persons An access code must be entered each time a person wants to use the machine To access the keypad unlocking menu M 812 OK ADVANCED FCT...

Страница 60: ...d it becomes empty delete an MBX only if the MBX is initialised and empty print the the list of your fax machine s MBX s You may receive and send through an MBX in complete confidentiality The deposit...

Страница 61: ...number of a free MBX directly 1 31 Enter the code of the MBX if there is one and confirm with OK All documents found in the MBX are printed and the MBX is emptied HOHWLQJ D 0 Before deleting an MBX yo...

Страница 62: ...t before transmitting Confirm the transmission request to a remote MBX fax by pressing key In the case of an immediate transmission the document is sent immediately If the document is set for a postpo...

Страница 63: ...e please respect the following rules Never leave the cover open unless required Protect the machine from direct sunlight Do not attempt to oil the machine Always gently close the cover and avoid vibra...

Страница 64: ...ter replacing a consumable item in the printer you need to inform the machine about its features For this purpose the chip card supplied with each toner cartridge must be read by the machine each time...

Страница 65: ...Maintenance Gb fm Caution The fusing unit located inside the printer may become very hot during operation To avoid injury do not touch 2 Remove the old toner cartridge Caution In order to protect the...

Страница 66: ...e arrows in the diagram below 4 Holding the cartridge by its handle slide it into the printer Ensure that the four pins two on either side are properly aligned with the grooves in the printer Remark U...

Страница 67: ...ours MFL MFC MFK MFL_251 270 819 A_LASER PRO 341 GB_EXPORT Maintenance Gb fm The cartridge will click into position once it is correctly installed 5 Shut the upper cover by pressing it down gently but...

Страница 68: ...llowing is displayed on the scanner control panel screen Press OK Once the chip card has been read the display shows Remove the card Caution If the following is displayed check that you have inserted...

Страница 69: ...ceed as shown below When the display shows 1 Press the release button of the upper cover to open it Caution The fusing unit located inside the printer may become very hot during operation To avoid inj...

Страница 70: ...70 819 A_LASER PRO 341 GB_EXPORT Maintenance Gb fm Caution In order to protect the environment do not throw away the used drum cartridge Used cartridges should be disposed of in accordance with local...

Страница 71: ...fm 4 Install the drum cartridge into the printer ensuring that the pins on the cartridge are aligned with the grooves in the printer Remark Use the colour coded stickers marked 1 which are located bo...

Страница 72: ...the printer Ensure that the four pins two on either side of the cartridge are properly aligned with the grooves in the printer Remark Use the colour coded stickers marked 2 which are located both on t...

Страница 73: ...K MFL_251 270 819 A_LASER PRO 341 GB_EXPORT Maintenance Gb fm The toner cartridge will click into position once it is correctly installed 6 Shut the upper cover by pressing it down gently but firmly u...

Страница 74: ...ng is displayed on the scanner control panel screen Press OK Once the chip card has been read the display shows Remove the card Caution If the following is displayed check that you have inserted the c...

Страница 75: ...nter regularly Caution Use a soft cloth to clean the printer Never use abrasive or corrosive detergents The fusing unit can become very hot during operation To avoid injury do not touch Wait for at le...

Страница 76: ...per cover 3 Remove the toner cartridge and the drum cartridge 4 Use a soft cloth to clean the paper feed roller Caution The fusing unit inside the printer can become very hot during operation To avoid...

Страница 77: ...documents is no longer satisfactory M 80 OK ADVANCED FCT CALIBRATION Insert a blank page into the sheet fed scanner and press OK to confirm Remark Since the page you insert will be used to define the...

Страница 78: ...has been stopped by the user pressing the key Code 04 Non programmed number A number saved as a one touch key or abbreviated number is not valid check it Example a delayed transmission was programmed...

Страница 79: ...a document in a subscriber s mailbox The mailbox number does not exist Code 16 No Relay Bcst list Nr x You requested a document relay from a remote fax but the fax has not programmed the list of subsc...

Страница 80: ...icated Replacing the drum cartridge page 6 7 CLOSE COVER Close the front cover of the printer DRUM NEAR END The drum is nearly worn out 10 use left TONER NEAR END The toner cartridge is nearly worn ou...

Страница 81: ...hot during operation To avoid injury do not touch Press the upper cover release button and open the upper cover Remove the toner cartridge and the drum cartridge Clear the paper misfeed using one of t...

Страница 82: ...and press it down gently but firmly until it locks into place 3DSHU MDP DW WKH IHHGHUV DQG WUD V The figures below show different type of paper jam you might experience when using your machine Remove...

Страница 83: ...PRO 341 GB_EXPORT Maintenance Gb fm 6 11 5 1 176 6FDQQHU SDSHU MDP When a paper jam occurs the following message appears on the control panel screen REMOVE DOCUMENT If jams often occur in a specific p...

Страница 84: ...aux en cours MFL MFC MFK MFL_251 270 819 A_LASER PRO 341 GB_EXPORT Maintenance Gb fm Open the scanner cover by pressing key A Remove the jammed paper B without tearing it Then close the scanner cover...

Страница 85: ...Check that the telephone line cable is correctly plugged in and that there is a tone signal on the telephone line by means of the key You receive a blank page Make a photocopy of a document if it is c...

Страница 86: ...GB_EXPORT Maintenance Gb fm 4 Put the machine in the plastic bag and then in the original package with all the original packing material Put all the documentation User s Manual and printed documents i...

Страница 87: ...per hour Original document size Width 216 mm max Height 297 mm Thickness 0 05 to 0 15 mm Document feeder Max capacity sheet stack height 3 mm ie a normal capacity of 30 pages 80 g m2 Reception size A...

Страница 88: ...s MFL MFC MFK MFL_251 270 819 A_LASER PRO 341 GB_EXPORT Maintenance Gb fm Encoding type MH Modified Huffman MR Modified Read MMR Modified Modified Read Specifications may change for improvement withou...

Страница 89: ...nding on the model the unit s mains plug may be the only way to disconnect the unit from the power network Therefore you must respect the following Your unit must be connected to a mains outlet locate...

Страница 90: ...7 2 Safety Date en cours 23 avril 2003 MFL_251 270 819 A_LASER PRO 341 GB book Page 2 Mercredi 23 avril 2003 2 55 14...

Отзывы: