6
Menu navigation on the device:
Navigation between the menu items of the device is done using the arrow keys (left, right, up, and down). You can validate your choices by pressing
,
or cancel your action by pressing
ESC
.
Alphanumeric keyboard:
The different modes of the alphanumeric keyboard can be accessed through the
IN
button :
[Aa]
- first letter is Upper case, the rest of the text is lower case
[a]
- lower case letters
[A]
- upper case letters
[123]
-
numbers
[symbol]
- symbols
The
OUT
button inserts a space
The left deletes the text
The key with the symbol
is referred to as the
IN
key.
The key with symbol is referred to as the
OUT
key.
LANGUAGE SETTINGS
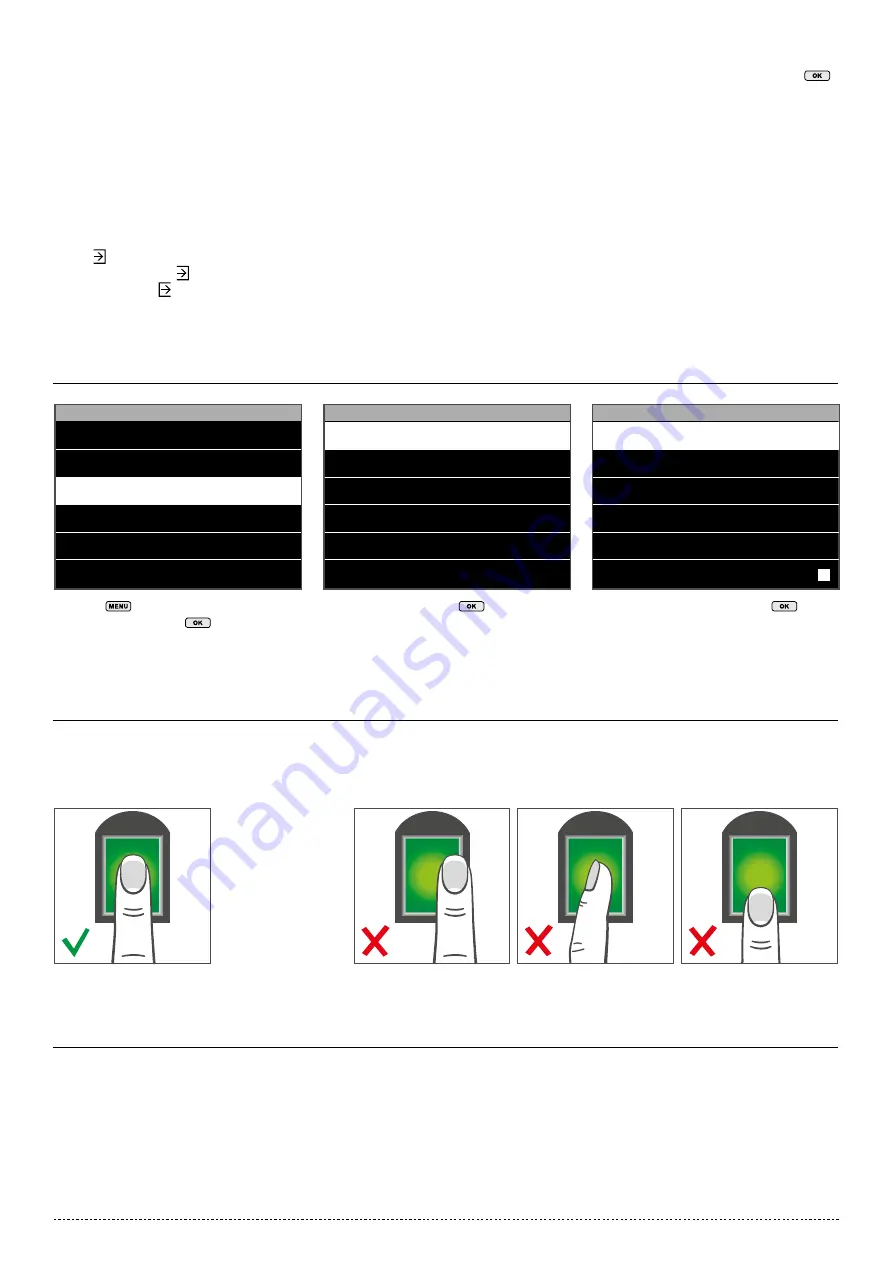
1.4 FINGERPRINT PLACEMENT
Recommended fingers: the index finger, middle finger and the ring finger usually give the best results for registering a fingerprint template.
Proper finger placement:
Improper finger placement:
1.5 INSTALLING THE TERMINAL IN YOUR NETWORK
Network connection
Your terminal can be connected to your network, using either Ethernet (Wired LAN) or WiFi (Wireless LAN), depending on the model. First of all, your
terminal needs to get an IP address from your network router. To find a free IP address on your network you can use the DHCP protocol, whereby your
terminal is automatically assigned an IP address. If you do not wish to use DHCP, you can also manually assign a fixed IP address to your device. First you
need to check the IP address of your computer (make sure it is connected to the same network as the terminal!), as the terminal needs to connect to the
same IP address range.
Press
, navigate to COMM using the
arrow keys and press
.
Select Ethernet. Press
.
Highlight IP address and press
.
1.
3.
2.
Main Menu
User Mgt.
User Role
COMM.
System
Personalize
Data Mgt.
COMM.
Ethernet
PC Connection
Wireless Network
ADMS
Ethernet
IP Address
192.168.1.201
Subnet Mask
255.255.255.0
Gateway
0.0.0.0
DNS
0.0.0.0
TCP COMM. Port
4370
DHCP


