© SF Mobile-Vision Inc. | SEPTEMBER 2020
Part #: 700-1211 R2.0
Installing a TB-100
TB-100 Software Installation and Configuration Guide
9
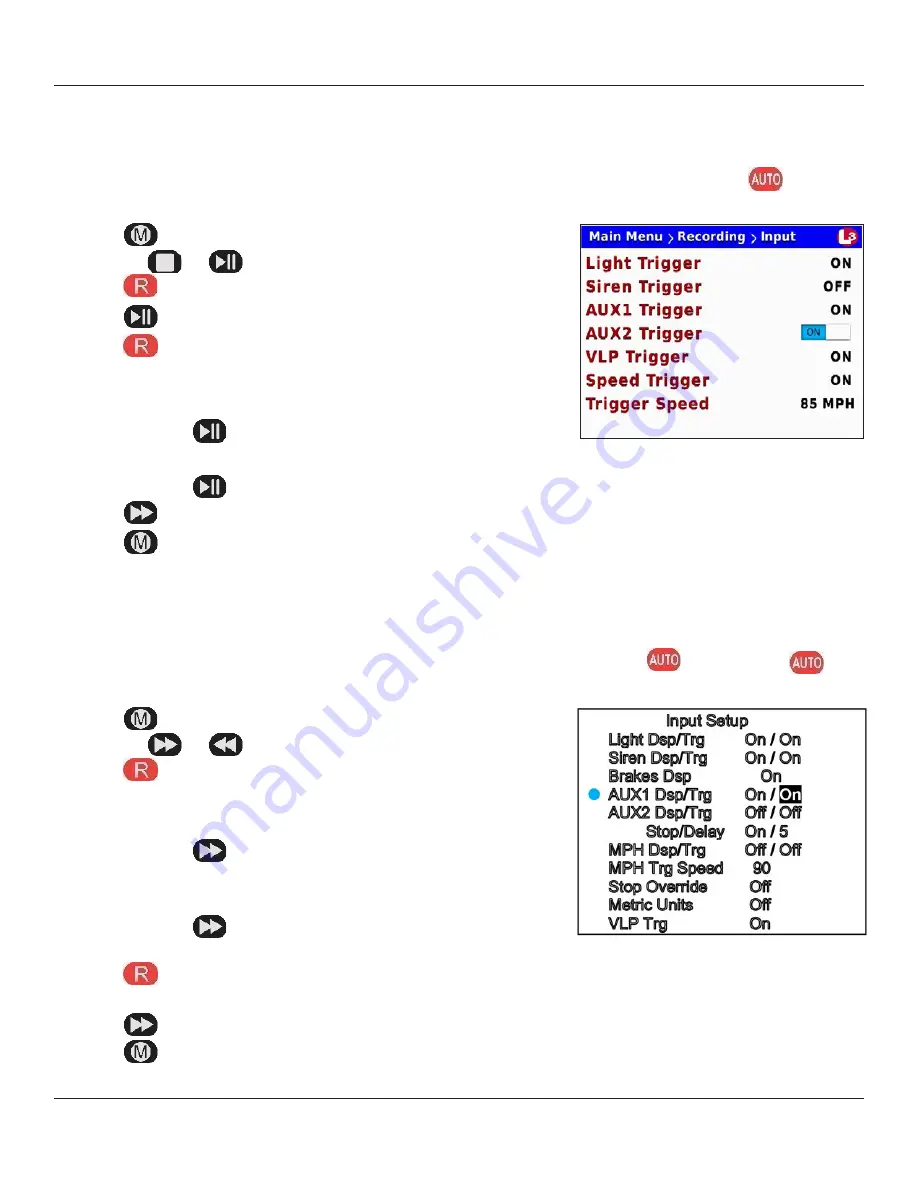
From Flashback3 or FlashbackHD:
1.
Turn the vehicle ignition
On
. Once the Flashback has finished booting, proceed to step b.
2. Make sure the door to your DVR is open and Auto mode is
Off
. (If necessary, press the button until the
light turns
off.)
3.
Press
. The
Flashback Main Menu
displays.
4.
Press the
or
button until
Recording
is highlighted.
5.
Press
to select the
Recording
option. The
Recording
menu displays.
6.
Press
twice to advance to the
Input
option.
7.
Press
to select the
Input
option. The
Input
screen displays.
8. Highlight the
Flashback
connection you used for the
TO DVR AUX 2
connection:
From Flashback 2:
1.
Turn the vehicle ignition
On
. Once the Flashback has finished booting, proceed to step 2.
2. Make sure the door to your DVR is open and
Auto
mode is
Off
. (If necessary, press the
button until the
light
turns off.)
3.
Press
. The
Flashback2 Main Menu
displays.
4.
Press the
or
button until
Input Setup
is highlighted.
5.
Press
. The
Input Setup
screen displays.
6. Highlight the
Flashback
connection you used for the
TO DVR AUX 2
connection:
For
Aux 1
, press
six times to advance to the
AUX1 Dsp/Trg
field.
—OR—
For
Aux 2
, press
eight times to advance to the
AUX2 Dsp/Trg
field.
7.
Press
. A blue dot displays to the left of the
AUX1 Dsp/Trg
or
AUX2
Dsp/Trg
field.
8.
Press
to toggle the field value from
OFF
to
ON
.
9.
Press
three times to save your changes and exit this option.
For
Aux 1
, press
two times to advance to the
AUX1 Trigger
field.
—OR—
For
Aux 2
, press
three times to advance to the
AUX2 Trigger
field.
9.
Press
to toggle the field value from
OFF
to
ON
.
10.
Press
twice to save your changes and exit this option.


