background image

RVS Systems

8

Product Picture & Function

c) Power Supply

Plug the camera charger into the cigarette lighter in vehicle and start  en-

gine. The device will automatically power on and start recording.

Tip:

For best performance, charge the battery for 8 hours before first use. When disconnected

from power, the internal battery only lasts a few minutes. This battery is intended for emergency

situations when the camera gets accidentally removed from power (i.e during a vehicle accident).

A few minutes therefore is all that's necessary to capture the rest of the accident.

Note: 

There are two Mini USB ports, one is on the device, another is on the  camera mount. If you

connect the car charger to the Mini USB port on the device, the power supply will be to device

only. If you connect the car charger with Mini USB port on the camera mount, the power supply

will be to the device and to the GPS/Speed camera detector. So, if you want to use the GPS/Speed

Camera Detector Module, the car charger needs to be plugged into the mini USB port on the cam-

era mount.

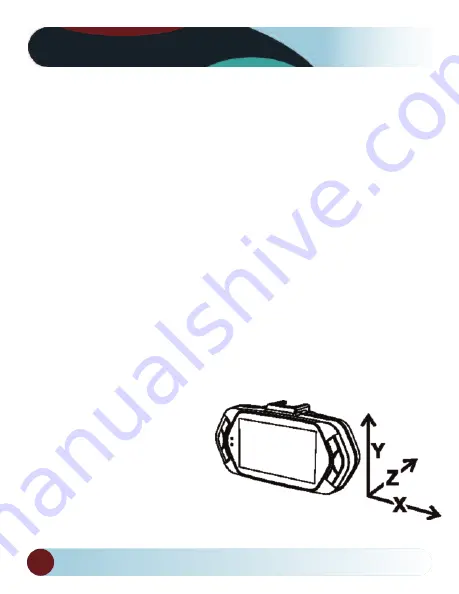
d) G-Sensor Function

The G-sensor will detect any abrupt movements or stops to the vehicle.

When it senses a sudden stop or an impact on the vehicle, it will activate

"protection mode". This will protect the video files from being over-written

by the loop-recording, saving

the most important video.

e) Motion Detection 

To activate motion detection,

select the motion sensitivity

from the menu and then turn off

the recording. The recording will

then resume automatically when

the camera senses motion. 

Содержание RVS-DC1075

Страница 1: ......

Страница 2: ...ion 6 a SD Card Installation 6 b GPS Installation 7 c Power Supply 8 d G sensor Function 8 e Video Mode 9 f Taking Pictures 9 g Playback Mode 10 Menu Setting 11 a Video Mode 11 b Playback Mode 12 Conn...

Страница 3: ...isplay 2 HDMI Port 12 Up Button 3 LED Light 13 OK Button 4 Lens 14 Down Button 5 Speaker 15 Power Button 6 Status Light Blue 16 Mount Clip 7 Charging Light Red 17 Photo Button 8 Menu Button 18 USB Por...

Страница 4: ...standby or playback mode to pull up a menu of camera modes When the device is in recording mode press this button to change the flash settings File Protection Button In video mode when device is recor...

Страница 5: ...In playback mode press this button to choose previous file OK Button In video mode press this button to start stop recording In playback mode press this button to play pause video file In menu settin...

Страница 6: ...ht Blue Charging Light Red Status Flash On Off On Off Meaning Device is in Recording Device is in standby or Playback Mode Device is off Charging Battery Charging complete Basic Operation a SD Card In...

Страница 7: ...or suction cup mount When the power is on the device will automatically start to catch GPS signal If it doesn t receive the GPS signal GPS icon will be shown on LCD display If it successfully catches...

Страница 8: ...car charger to the Mini USB port on the device the power supply will be to device only If you connect the car charger with Mini USB port on the camera mount the power supply will be to the device and...

Страница 9: ...deo Mode In video mode in standby status LCD display will be shown as below In video mode in recording status LCD display will be shown as below g Taking Pictures In video mode at any time press photo...

Страница 10: ...view video picture file Use the direction button to control play back operation Up Button Previous file Down Button Next file OK Button Confirm Menu Button Enter menu list File Protection Button Lock...

Страница 11: ...Detect Off On Flicker Auto 50Hz 60Hz White Balance Auto sunny cloudy tungsten flourescent Contrast Standard High Low Sharpness Standard High Low EV 2 1 7 1 3 1 0 7 0 3 0 0 3 0 7 1 1 3 1 7 2 Quality Su...

Страница 12: ...No Yes Software Version TRCMA7_50_V1 9 9 b In playback mode Back to Previous Level File Protection Operation Protect Current File Protect All File Unprotect Current File Unprotect All File Auto Play...

Страница 13: ...o equipment TV or Monitor and to the device 3 Power on the device 4 Adjust the channel of the video equipment to HDMI input 5 Installation complete b Connect to Computer 1 Insert SD card to device 2 C...

Страница 14: ...comes preloaded onto the device Simply insert SD card into the device and then insert SD card into the computer to install software The DVR player will be shown as below Pressing this button video fil...

Страница 15: ...ion Wide Dynamic Range Good Night Recording Audio Built in Microphone can be turned off in menu Still Image 2688x1512 4M LCD 2 7inch 16 9 LCD Display GPS Logger GPS Logger for path position speed and...

Страница 16: ...on the car window UV Lens Protect the DVR lens Lit Keyboard for Night Operation Uniterrupted Recording Over writes first file if memory is full no interruption between Video File File Protection Funct...

Страница 17: ...c system after partial failure or use with improper accessories Warranty Performance DURING THE ABOVE WARRANTY PERIOD SHOULD YOUR RVS Systems PROD UCT EXHIBIT A DEFECT IN MATERIAL OR WORKMANSHIP SUCH...

Страница 18: ...at your vehicle can maneuver safely RVS Systems and or its affiliates shall have no responsibility or lia bility for damage and or injury resulting from accidents occurring with vehicles having some o...

Страница 19: ...19 table of contents If you have any questions about this product contact RVS SYSTEMS Inc 1797 Atlantic Avenue Brooklyn NY 11233 888 881 2601 BETTER CAMERAS BETTER SERVICE IT S OUR GUARANTEE...

Отзывы: