background image

DMS-3.1 Test Procedure 

5

 of 

64 


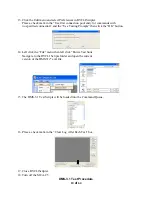
6. Then “Welcome to Found New Hardware Wizard” should display.  
    Click “No, not this time” button. Then click the “Next” button. 


7. Select “Install form a list or specific location” then click “Next”. 


8. Select “Search for the best driver in these locations. 
    Place a checkmark in “Include this location in Search” 
    Navigate to where the “Russound USB Driver” folder is located. 
    Then click “Next”. 


Содержание DMS-3.1

Страница 1: ......

Страница 2: ... concepts ideas and information are proprietary and may not be disclosed to third parties All Rights Reserved Printed in the United States of America This document or parts thereof may not be reproduced in any form by photographic electrostatic mechanical or any other method for any use including information storage and retrieval without written permission from the publisher Page 1 ...

Страница 3: ...DMS 3 1 Digital Media Streamer Installation Manual DMS 3 1_Manual Rev 0 indd 1 DMS 3 1_Manual Rev 0 indd 1 9 30 11 12 12 PM 9 30 11 12 12 PM ...

Страница 4: ...h is in the Off position the appliance is not completely disconnected from the main power The main power plug is used as the disconnect device and shall remain readily operable When installing the product ensure that the plug is easily accessible 13 Non Use Periods The power cord of the appliance should be unplugged from the outlet when left unused for a long period of time 14 Attachments Only use...

Страница 5: ...he antenna manufacturer for proper installation instructions The diagram gives a general depiction of how an outdoor antenna should be grounded For complete guidelines on antenna grounding procedures please consult the National Electrical Code Section 810 ANSI NFPA No 70 1984 Antenna Lead In Wire Grounding Conductors Ground Clamps Electric Service Equipment Power Service Grounding Electrode System...

Страница 6: ...9 11 Audio Connections with C Series Controllers 12 Ethernet Connections 13 AM FM Connections 12V Trigger In Out 14 USB Device Playback 15 Menu Navigation with Russound User Interfaces 16 SIRIUSXM Internet Radio 17 vTuner Internet Radio 18 Digital Music File Playback 19 20 Technical specifications 21 Warranty 22 TABLE OF CONTENTS DMS 3 1_Manual Rev 0 indd 4 DMS 3 1_Manual Rev 0 indd 4 9 30 11 12 1...

Страница 7: ... for access to digital audio content If used with a C Series controller and a supported user interface the DMS 3 1 can access and playback digital audio files from LAN connected DLNA UPnP media servers Additionally if connected to the internet and used with a C Series controller and supported user interface the DMS 3 1 can stream content from SIRIUS Internet Radio service and have access to thousa...

Страница 8: ...NEL Ethernet Port Line Output RCA AUX USB Port FM Antenna Connection DMS 3 1 Rear Panel DMS 3 1 Front Panel Power Switch AC Input Power LED USB Playback Port AM Antenna Connection USB Playback Port Stream 1 DMS 3 1_Manual Rev 0 indd 6 DMS 3 1_Manual Rev 0 indd 6 9 30 11 12 12 PM 9 30 11 12 12 PM ...

Страница 9: ...Once released firmware files and update procedures are available for download from the Support Center at www russound com 12VDC trigger in out The 12VDC Trigger input is not used at this time for the DMS 3 1 but any connection made to this will be passed through to the output Audio output There are 4 sets of stereo RCA audio outputs to connect the DMS 3 1 to an audio system One for each of the thr...

Страница 10: ...lay speakers from you can stream content to Additionally users can assign a custom name for each stream through its own web portal using the following steps On the AirPlay enabled source press the AirPlay button to select the stream on the DMS 3 1 which you wish to send content to Note that iTunes permits streaming of content to one or multiple AirPlay speaker locations while iPod touch iPhone and...

Страница 11: ...b browser as it provides simplified access to devices using Bonjour such as the DMS 3 1 Within the Safari browser first select Bookmarks as shown The Safari browser shows collections of bookmarks including devices that are discovered using the Bonjour service By selecting Bonjour in the Collections list all devices discovered will be listed in the Bookmark list Select Bookmarks in Safari Browser S...

Страница 12: ...ark list the DMS 3 1 stream will serve up its web portal The third option is AirPlay This displays the DMS 3 1 stream name as seen when using AirPlay To change the name simply enter the new name in the AirPlay Speaker Name text box and hit the Apply button to save Select DMS 3 1 Stream Select AirPlay and rename stream Step 3 Step 4 AirPlay NAMING DMS 3 1_Manual Rev 0 indd 10 DMS 3 1_Manual Rev 0 i...

Страница 13: ...ming module which would primarily be used for troubleshooting The second option in the web portal is Profiles This displays the device name and network profile information for the selected DMS 3 1 streaming module This is primarily used for troubleshooting Status Information Profile Information AirPlay NAMING DMS 3 1_Manual Rev 0 indd 11 DMS 3 1_Manual Rev 0 indd 11 9 30 11 12 12 PM 9 30 11 12 12 ...

Страница 14: ...iple locations Use standard RCA audio patch cables to connect the audio outputs of the DMS 3 1 to the source inputs on the C Series controller For proper operation with C Series controllers the DMS 3 1 source ID switches need to be set to correspond to the source inputs used on the C Series controller These settings must match the C Series controller system configuration programmed through SCS C5 ...

Страница 15: ...content from any online services The DMS 3 1 requires a DHCP enabled router to obtain its IP address on the LAN as it does not directly support configuration of a static IP address The LAN must support a minimum of 10 100 BASE T Ethernet and is recommended to have a firewall enabled for security purposes A standard CAT5 Ethernet patch cable that is terminated with RJ45 ends in a straight through a...

Страница 16: ...AX connection on the back panel by pushing the F type quick connect termination of the antenna onto the FM connection It is recommended to use an external outdoor or attic mounted long wire antenna for best performance for FM reception Attach the desired length of 75 ohm coax cable directly to the FM connection on the unit AM loop antenna FM antenna DSM 3 1 Streamer AM FM ANTENNA CONNECTIONS 12V T...

Страница 17: ...am 3 have USB ports on the back panel Content connected to a particular USB port is only available to its associated stream output The USB storage device used must be formatted for a FAT16 or FAT32 file system These are the most common file storage systems used today Note The menu structure for DMS 3 1 navigation of a USB storage device is determined by that device The DMS 3 1 filters the files ba...

Страница 18: ...rough the menu levels Pressing Next I or OK will enter the menu selection Use Plus and Minus buttons to move up and down within a menu list While navigation within each mode is highly similar if not the same differences can exist as the particular service provider of content can determine the menu structure Stream 2 12 00 PM Now Playing Menu Media Server USB Internet Radio SiriusXM OK VOL VOL HOME...

Страница 19: ... and much more plus expert sports talk and analysis You also get exclusive entertainment talk comedy family programming local traffic and weather and news from your most trusted sources There are a variety of programming packages available including the option of adding The Best of XM programming to the SiriusXM Internet Radio service The Best of XM service is not available to Sirius Canada subscr...

Страница 20: ...account for the vTuner online web portal users will need to provide the Access Code of their DMS 3 1 as well as a valid email address and a password Select the Get access code option within the Internet Radio menu to display the access code Stream 1 12 30 PM Podcast Location Internet Radio New Stations Most Popular Stati Podcast Genre Shared Get Access Code Stream 1 12 30 PM WUNH 91 3 FM use for s...

Страница 21: ...th DRM Digital Rights Management can t be played back AAC and AAC file formats which are used by Apple for music purchased through iTunes can also be played AirPlay can be used for streaming content from iTunes media player on a computer but users can also install UPnP DLNA media server software on their computers This will allow access and control of iTunes library content from a Russound user in...

Страница 22: ...e presented by the source of the content Essentially the list of folders and files being determined by the storage device can vary based on the particular device and organization method used when storing files on them Because of this some folders may be visible that aren t related to music such as Photos or Movies but only compatible music files within them will be displayed by the DMS 3 1 for sel...

Страница 23: ...It is prohibited to copy decompile disassemble reverse engineer hack manipulate or otherwise make available any technology or software incorporated in receivers compat ible with the SiriusXM Internet Radio Systems SiriusXM Internet Radio Service is available to those at least 18 years of age and live in the USA PR or Canada SELF INSTALLATION instructions and tips are provided for your convenience ...

Страница 24: ...ensure that customers obtain proper support and service Any Russound product purchased from an unauthorized dealer or other source including retailers mail order sellers and online sellers will not be honored or serviced under existing Russound warranty policy Any sale of products by an unauthorized source or other manner not authorized by Russound shall void the warranty on the applicable product...

Страница 25: ...23 Russound DMS 3 1 Installation Manual NOTES DMS 3 1_Manual Rev 0 indd 23 DMS 3 1_Manual Rev 0 indd 23 9 30 11 12 12 PM 9 30 11 12 12 PM ...

Страница 26: ...ective owners Specifications are subject to change without notice Russound is not responsible for typographical errors or omissions AirPlay the AirPlay logo iPhone and iPod touch are trademarks of Apple Inc registered in the U S and other countries iPad is a trademark of Apple Inc DMS 3 1 Digital Media Streamer Installation Manual DMS 3 1_Manual Rev 0 indd 24 DMS 3 1_Manual Rev 0 indd 24 9 30 11 1...

Страница 27: ...SMS_USB_ _PWR_LED_Front_RevA_7_19_10 sch 1 Wed Jul 28 15 07 39 2010 ...

Страница 28: ...2 SPI1_NPCS3 D20 PC20 K4 EF100 D21 PC21 M4 TCLK5 D22 PC22 N3 D23 PC23 K1 D24 PC24 L3 D25 PC25 L2 D26 PC26 N4 D27 PC27 P4 D28 PC28 R3 D29 PC29 P3 D30 PC30 M2 D31 PC31 H16 NTRST E16 GNDBU D16 VDDBU B17 WKUP C17 SHDN G16 RTCK F14 OSCSEL F15 BMS H14 VDDCORE M1 VDDCORE N15 PA30 SCK2 RXD4 N14 PA31 SCK0 TXD4 U3 PCK1 AD2 PC2 U4 SPI1_NPCS3 AD3 PC3 C12 NCS7 IRQ0 PC12 R5 ISI_D10 TXD5 PB12 P6 ISI_D11 RXD5 PB1...

Страница 29: ...RAS 16 WE 19 CS 9 VDDQ 43 VDDQ 49 VDDQ 6 VSSQ 12 VSSQ 46 VSSQ 52 VSSQ 14 VDD 54 VSS 35 A11 21 BA1 U14 C81 0 1uF R35 1k C70 0 1uF R29 470K 1 2 J28 325 0059 CON2 1 A0 2 A1 3 A2 4 GND 5 SDA 6 SCL 7 WP 8 VCC U22 M24C02 WDW6TP 1 2 R215 1k 1 2 R216 1k C190 0 1uF 18 WE 6 NC 37 VCC 9 CE 8 RE 20 NC 19 WP 5 NC 1 NC 2 NC 3 NC 4 NC 21 DNU 22 DNU 23 NC 24 NC 7 R B 26 NC 27 NC 28 NC 29 I O0 34 VCC 35 NC 36 VSS ...

Страница 30: ...C129 01uF C130 0 1uF 1 IN 2 GND 3 OUT U10 L7809CD2T C82 10pF C86 1uF C154 1uF C156 22uF R37 120K C159 4 7uF R42 30 0K 8 C1M 9 GND 7 VOUT 1 EN 5 VIN 6 C1P 3 C2M 4 C2P 10 FB 2 PG U29 TPS60500DGS C167 0 1uF C168 0 1uF D10 DL4002 TP11 C169 0 1uF C170 100uF C171 100uF 1 2 FB6 HI1206N101R 10 3 IN 2 GND 1 OUT U16 205 0121 L78L33ACUTR C47 100uF C172 01uF C173 0 1uF 6 VREF 8 VCC 2 SYNC 4 COMP 1 OUT 3 INH 7...

Страница 31: ... AV1DATA3 78 AV1DATA2 80 AV1DATA1 82 AV1DATA0 84 GND 86 AV2CTRL1 88 GND 90 AV2CLK 92 GND 94 AV4DATA1 96 AV4DATA0 98 GND 100 ETH_LED_ACT 102 ETH_LED_SPEED 104 MIICRS 106 MIICOL 108 MIITXER 110 MIITXCLK 112 MIITXD0 114 MIITXD1 116 MIIRXD0 118 MIIRXD1 120 GND J1 225 0042 1 IO 2 V 3 IO 6 IO 5 V 4 IO D22 NUP4301MR6T1G 1 2 F2 MiniSMDC050 4 MCLK 3 LRCK 2 SCLK DEM 1 SDATA 6 FILT 9 VA 7 AOUTL 10 AOUTR 5 VQ...

Страница 32: ...UT0 70 VCO0 72 AV3CLK 74 AV0CTRL0 76 AV1DATA3 78 AV1DATA2 80 AV1DATA1 82 AV1DATA0 84 GND 86 AV2CTRL1 88 GND 90 AV2CLK 92 GND 94 AV4DATA1 96 AV4DATA0 98 GND 100 ETH_LED_ACT 102 ETH_LED_SPEED 104 MIICRS 106 MIICOL 108 MIITXER 110 MIITXCLK 112 MIITXD0 114 MIITXD1 116 MIIRXD0 118 MIIRXD1 120 GND J3 225 0042 1 2 3 4 J4 325 0045 1 IO 2 V 3 IO 6 IO 5 V 4 IO D1 NUP4301MR6T1G 1 2 F1 MiniSMDC050 4 MCLK 3 LR...

Страница 33: ...T0 70 VCO0 72 AV3CLK 74 AV0CTRL0 76 AV1DATA3 78 AV1DATA2 80 AV1DATA1 82 AV1DATA0 84 GND 86 AV2CTRL1 88 GND 90 AV2CLK 92 GND 94 AV4DATA1 96 AV4DATA0 98 GND 100 ETH_LED_ACT 102 ETH_LED_SPEED 104 MIICRS 106 MIICOL 108 MIITXER 110 MIITXCLK 112 MIITXD0 114 MIITXD1 116 MIIRXD0 118 MIIRXD1 120 GND J14 225 0042 1 2 3 4 J15 325 0045 1 IO 2 V 3 IO 6 IO 5 V 4 IO D2 NUP4301MR6T1G 1 2 F3 MiniSMDC050 4 MCLK 3 L...

Страница 34: ... KS8995XA C6 0 1uF R10 3 01K C2 0 1uF C3 0 1uF C4 22uF C20 0 1uF C16 0 1uF C14 0 1uF C15 0 1uF 1 2 R8 1k 1 2 R7 1k C13 22uF C18 22uF 1 2 FB1 HZ1206D102R C9 0 1uF C5 22uF C7 0 1uF C8 0 1uF C10 0 1uF C19 22uF C11 0 1uF C12 0 1uF C17 0 1uF C29 0 1uF C52 0 1uF C53 0 1uF 1 A0 2 A1 3 A2 4 GND 5 SDA 6 SCL 7 WP 8 VCC U2 M24C02 WDW6TP 1 2 Y5 25MHZ 1 2 R64 330R 1 2 R65 330R K A D13 Green K A D14 Red 1 2 R54...

Страница 35: ...77 120k C120 10uF 1 3 L 2 R J8 325 0098 C121 10uF 1 2 R78 100k C122 10uF 1 2 R79 100k 1 2 R80 100k 1 2 R81 100k 2 3 1 U9 A TS462CDT 6 5 7 U9 B TS462CDT C123 10uF C124 10uF 1 2 R82 100 1 2 R83 100 1 2 R84 68 0k 1 2 R85 120k C133 10uF 1 2 R88 68 0k 1 2 R89 120k C134 10uF 1 3 L 2 R J2 325 0098 C135 10uF 1 2 R90 100k C136 10uF 1 2 R91 100k 1 2 R109 100k 1 2 R110 100k 2 3 1 U11 A TS462CDT 6 5 7 U11 B T...

Страница 36: ...48 P7_0 SCK3_2 49 P7_1 RXD2 50 P7_2 TXD2 28 P7_4 TMRIV 29 P7_5 TMCIV 30 P7_6 TMOV 41 P8_5 42 P8_6 43 P8_7 11 OCS1 10 OCS2 4 X1 5 X2 12 VCC 3 AVCC 6 VCL 9 VSS 7 RES 8 TEST 35 NMI 13 P5_0 WKP0 14 P5_1 WKP1 19 P5_2 WKP2 20 P5_3 WKP3 21 P5_4 WKP4 22 P5_5 WKP5 ADTRG 26 P5_6 SDA 27 P5_7 SCL U23 205 0127 DF36079LFZV 1 2 C142 0 1uF C143 0 1uF 1 2 3 4 J21 CON4 R119 4 7k C144 22pF Y3 7 3728 MHK 1 A0 2 A1 3 ...

Страница 37: ... MMBT3904 1 2 R194 1K K A D18 LED 1 2 R195 4 7K Q16 MMBT3904 1 SCL 3 SDA 5 MISO 7 SCLK MDC 9 SS 2 GND 4 NC 5V 6 NC 5V 8 MOSI MDIO 10 GND J20 325 0167 R196 0 OHM R197 4 7k R198 0 OHM R199 0 OHM R200 4 7k R201 4 7k R202 0 OHM R203 4 7k R204 0 OHM R205 0 OHM R206 4 7k R207 4 7k 1 2 R208 1K 1 2 R209 4 7K Q17 MMBT3904 J27 1 J27 2 1 2 3 J32 CON3 1 2 3 4 5 6 J33 R237 4 7k 1 2 3 4 5 6 7 8 J24 325 0064 1 2...

Страница 38: ...ocument 550 0047 DXF 2D FileRussound Vaulted Document 550 0047 STEP 3D FileRussound 4 1 810 0064 1 SILKSCREEN FRONT SMART MUSIC STREAMER D File Type Vault Vaulted Document DMS 3 1 Front_Screen_122110 pdf Artwork Silk ScreensRussound 3 2 560 0014 1 LENS TRIM FRONT MOULDING MUSIC STREAMER 2 File Type Vault Vaulted Document 560 0014 DXF 2D FileRussound Vaulted Document 560 0014 STEP 3D FileRussound 3...

Страница 39: ... Document Capacity C1005 C5750 C2005 1411 pdfDatasheetRussound TDK CEC2SNKDE105 3 12 202 0069 1 C155 CAP SMT 0 01UF CER 2000V X7R 1825 0 File Type Vault Vaulted Document aphvc pdfDatasheetRussound AVX 1825GC103KAT1A File Type Vault Vaulted Document C1812X103K202T pdfDatasheetRussound ANJOU CO LTD C1812X103K202T 3 13 202 0001 5 C162 C164 C165 C170 C171 CAP SMD 100UF ELEC 10V 20 SIZE D 1 File Type V...

Страница 40: ... Capacity 0805 Old spec pdf DatasheetRussound Vaulted Document Capacity C1005 C5750 C2005 1411 pdfDatasheetRussound Vaulted Document Capacity 0805 Old spec pdf DatasheetRussound Vaulted Document Capacity C1005 C5750 C2005 1411 pdfDatasheetRussound TDK CEC2SNKGE104 3 31 202 0060 2 C96 C176 CAP SMT 330UF 6 3V 7343 1 File Type Vault Vaulted Document NEC PSLD0J337M pdfDatasheetRussound NEC TOKIN PSLD0...

Страница 41: ... Document lw1143 pdfDatasheetRussound HANLIM ELECTRONICS CORP LW1143 02 3 48 325 0068 1 J16 CONN TH RJ45 RA 1PORT WITH LEDS ONE GREEN ONE YELLOW SHIELDED 1 File Type Vault Vaulted Document JACK RJ45 1x1 TH RA SHIELDED LEDS KINSUN 3046S 01xxxx pdfDatasheetRussound KINSUN INDUSTRIES INC 3046S 18831 File Type Vault Vaulted Document JACK RJ45 1X1 TH RA SHIELDED TYCO 406549 pdfDatasheetRussound TYCO EL...

Страница 42: ...t SMTDRRI125 470M 47uHAlt pdfDatasheetRussound 3L Coils SMTDRRI125 470M 3A File Type Vault Vaulted Document 744771147 pdfDatasheetRussound Wurth Elektronik eiSos GmbH Co KG 744771147 3 64 210 0018 2 L4 L5 IND SMT 10UH 10 450MA 1210 0 File Type Vault Vaulted Document IND TDK nlcv32 pdfDatasheetRussound TDK NLCV32T 100K PF 3 65 210 0007 1 L6 IND SMT 47UH SHIELDED DR125 2 File Type Vault Vaulted Docu...

Страница 43: ... R180 RES SMT 1 5K OHM 5 0 125W 0805 0 File Type Vault Vaulted Document THICK FILM CHIP RES pdfDatasheetRussound Panasonic ERJ 6GEYJ152V 3 84 201 0000 13 R1 R16 R122 R124 R139 R143 R144 R182 R187 R190 R217 R219 R235 RES SMT 10K OHM 5 0 10W 0603 0 File Type Vault Vaulted Document THICK FILM CHIP RES pdfDatasheetRussound Panasonic ERJ 3GEYJ103V File Type Vault Vaulted Document Resistance spec pdfDat...

Страница 44: ...6 R36 R40 R50 R51 R210 R212 RES SMT 10 0K OHM 1 0 10W 0603 0 File Type Vault Vaulted Document ERJ PRECISION CHIP RES pdfDatasheetRussound Panasonic ERJ 3EKF1002V File Type Vault Vaulted Document VISHAY THICK FILM pdfDatasheetRussound Vishay CRCW060310K0FKEA 3 100 201 0105 1 R62 RES SMT 6 8K OHM 1 0 10W 0805 0 Yageo 9T08052A6801FBHFT File Type Vault Vaulted Document Resistance spec pdfDatasheetRuss...

Страница 45: ... TI TPS60500 pdfDatasheetRussound TEXAS INSTRUMENTS TPS60500DGS 3 125 205 0118 1 U3 IC SMT QOS SWITCH 5 PORT 10 100 128 PIN PQFP 0 File Type Vault Vaulted Document ks8995XA pdfDatasheetRussound MICREL KSZ8995XA 3 126 205 0117 3 U4 U6 IC SMT D A CONVERTER 24 BIT 192KHZ 10 TSSOP STEREO 0 File Type Vault Vaulted Document CS4344 45 46 48_F1 pdfDatasheetRussound CIRRUS LOGIC CS4345 CZZ 3 127 205 0116 1...

Страница 46: ...CU 20 QFN 0 File Type Vault Vaulted Document 20110323101301530 pdf DatasheetRussound Vaulted Document ch11 0366_46_SVHC_Declaration_Letter pdfDatasheetRussound Vaulted Document MFI341S2164 Combined pdf DatasheetRussound Vaulted Document REACH_341S2164 pdf DatasheetRussound AVNET MFI341S2164 3 631 302 0052 1 C206 CAP TH 3300UF ALUM LOW ESR 6 3V ELECT 0 File TypeVault Vaulted Document ABA0000CE108 p...

Страница 47: ...QANTAS TECHNOLOGY LTD QT 6300 003 B 3 5 325 0096 1 J2 CONN TH HEADER 4 POS VERT 2 50MM CENTERS WAFER TYPE 1 File Type Vault Vaulted Document LWB0640 N_all jpgDatasheetRussound HANLIM ELECTRONICS CORP LWB0640 04 File Type Vault Vaulted Document W256V11T000 pdfDatasheetRussound Conn Top Component Inc W256V04T000 N File Type Vault Vaulted Document 22 03 5045 pdfDatasheetRussound Molex 22 03 5045 3 6 ...

Страница 48: ...0015 2 CONN WIRE HOUSING 2 POS 2 50 SPCNG 28AWG 22AWG 250V 2 File Type Vault Vaulted Document CRIMP TERMINAL AND HOUSING MOLEX 5263 AND 5264 N pdfDatasheetRussound Molex 50 37 5023 ECI 2580H 02 File Type Vault Vaulted Document TERMINAL HOUSING HANLIM CHB0640 N pdfDatasheetRussound HANLIM ELECTRONICS CORP CHB0640 02 4 2 425 0014 4 CONN CRIMP TERMINAL 28AWG 22AWG 250V 1 File Type Vault Vaulted Docum...

Страница 49: ...NNAE 1 7 575 0037 2 RACK EAR 25MMX44MMX68MM 1U 0 File Type Vault Vaulted Document 575 0037 DXF 2D FileRussound 1 8 590 0009 1 BAG POLY CLEAR 65MMX122MM 0 FOR BOTH RACK EARS 1 9 610 0000 6 SCREW MACHINE PAN HEAD PHILIPS M3X6 STEEL BLACK OXIDE 0 FOR ASSEMBLING RACK EARS TO CHASSIS File Type Vault Vaulted Document M3X6MM PHILIPS PAN HEAD SCREW pdf 2D FileRussound 1 10 590 0008 1 BAG POLY CLEAR 52MMX8...

Страница 50: ...at091807 pdf DocumentRussound 1 23 830 0001 0 CONFIDENTIALITY STATEMENT 0 File Type Vault Vaulted Document Confidentiality Statement txt DocumentRussound 1 24 830 0000 0 DROP TEST SPECIFICATIONS 0 File Type Vault Vaulted Document Drop Test Spec zip DocumentRussound 1 25 830 0009 0 TEST PROCEDURE DMS 3 1 2 File Type Vault Vaulted Document DMS 3 1 Test Procedure 1 4 doc DocumentRussound 1 26 830 001...

Страница 51: ...ripter Page 9 6 SAM BA Page 11 7 Putty Page 12 8 RVCLI App Page 14 9 Prepare USB Flash Drive Page 16 10 Load Firmware Page 17 11 Load BridgeCo Module Page 24 Russound Personnel Start at Section 12 12 DLNA Storage Device Setup Page 33 13 Initial Test Setup Page 35 14 Set MCA C5 Sources Page 37 15 Turn On DMS 3 1 Page 40 16 IP Address MAC ID Page 41 17 ID Switches Page 45 18 ID Switches Position Che...

Страница 52: ...mparing it to the list on the outside of the box Equipment needed 1 1 Russound DMS 3 1 2 1 Russound MCA C5 Controller w 1 MDK C5 Keypad 3 1 Russound Advanced Programming Cable 4 1 Russound SRC 2 Remote Control 5 1 Russound RVCLIScripter 6 1 Russound USB Driver 7 1 Russound rcvli exe rcvli app 8 1 SAM BA 9 1 Putty 10 3 BC Magic USB Thumb Drive Russound provides 11 4 2 Gig USB Flash Drive 12 3 RJ45 ...

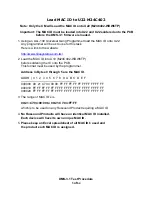
Страница 53: ...ore soldering the IC onto the PCB This format must be used by the programmer Address in Bytes 0 through 5 are the MAC ID ADDR 0 1 2 3 4 5 6 7 8 9 A B C D E F 000000 00 21 C7 04 00 00 FF FF FF FF FF FF FF FF FF FF 000010 FF FF FF FF FF FF FF FF FF FF FF FF FF FF FF FF 000020 FF FF FF FF FF FF FF FF FF FF FF FF FF FF FF FF 3 The range of MAC ID s is 00 21 C7 04 00 00 to 00 21 C7 04 FF FF which is to...

Страница 54: ...zip created by FTDI USB products 2 Plug a USB A to B cable from your IBM PC to the USB Port in the front panel of the MCA C5 Controller 3 Turn on the MCA C5 4 If the Found New Hardware balloon displays momentarily go to Step 6 If you do not see the balloon below go to Step 5 5 If the Found New Hardware balloon does not display then Check Windows Device Manager for a USB Serial Port If a USB Serial...

Страница 55: ...o not this time button Then click the Next button 7 Select Install form a list or specific location then click Next 8 Select Search for the best driver in these locations Place a checkmark in Include this location in Search Navigate to where the Russound USB Driver folder is located Then click Next ...

Страница 56: ...Procedure 6 of 64 9 Click Continue Anyway on the next dialog 10 This dialog will display showing the USB Serial Converter is being installed 11 The Completing the Found New Hardware Wizard displays and click Finish ...

Страница 57: ...ays Ensure Install the software automatically is selected and click Next If the USB Serial Port Driver is not installed as described in the next step then click the back button and select Install from a list or specific location and navigate to the location you chose in Step 8 14 The following dialog appears showing the USB Serial Port is being installed ...

Страница 58: ...You are finished installing the USB Driver 17 Check Device Manager in the System Properties dialog Expand the Ports COM LPT and you should see USB Serial Port COM8 This shows you loaded the driver correctly Note The USB Serial Port COM8 will only display when the MCA C5 is connected to the USB port of the computer The Port listed may not be on COM8 and this is ok ...

Страница 59: ...f RVCLIScripter 10 In the Connection Pool window click the button next to the Com Port window and select the Com Port the USB cable connects to then click the Add to Pool button below the Add to Pool button below the COM Port window Again click the button next to the Com Port window and select the Com Port the serial cable connects to then click the Add to Pool button below the COM Port window In ...

Страница 60: ...connection and the Use Testing Prompts then click the OK button 14 Left click the File menu then left click Entire Test Suite Navigate to the RVCLI Scripts folder and open the current version of the DMS31v xml file 15 The DMS 3 1 Test Scripts will be loaded into the Command Queue 16 Place a check mark in the Clear Log After Each Test box 17 Close RVCLIScripter 18 Turn off the MCA C5 ...

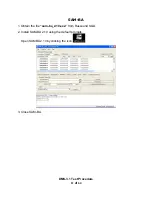
Страница 61: ...DMS 3 1 Test Procedure 11 of 64 SAM BA 1 Obtain the file sam ba_2 10 exe from Russound SQA 2 Install SAM BA 2 10 using the default prompts Open SAMBA 2 10 by clicking the icon 3 Close SAM BA ...

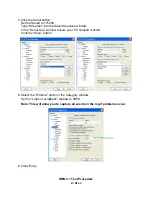
Страница 62: ...e file putty exe from Russound SQA 2 Putty is an executable file Copy Putty to your desktop 3 Open Putty The Warning Message will display Click the Always ask before opening this file to remove the checkmark 4 The Putty Configuration dialog will open ...

Страница 63: ...r into the Saved Sessions window In the Serial Line window ensure your PC comport is listed Click the Save button 6 Select the Window option in the Category window Set the Lines of scrollback window to 9999 Note This will allow you to capture all events in the log if problems occur 6 Close Putty ...

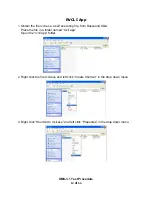
Страница 64: ...elf executing file from Russound SQA Place the file in a folder named rvcli app Open the rvcli app folder 2 Right click the file rvcli exe and left click Create Shortcut in the drop down menu 3 Right click Shortcut to rvcli exe and left click Properties in the drop down menu ...

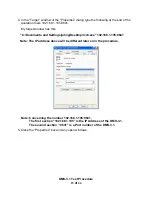
Страница 65: ...dow has this C Documents and Settings johng Desktop rvcli exe 192 168 1 105 9641 Note The IP address above will be different later on in the procedure Note Concerning the number 192 168 1 105 9641 The first section 192 168 1 105 is the IP Address of the DMS 3 1 The second section 9641 is a Port number of the DMS 3 1 5 Close the Properties box and any open windows ...

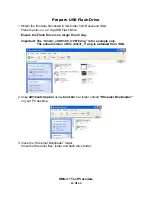
Страница 66: ...Drive Ensure the Flash Drive is no larger than 2 Gig Important The dms31_v00 01 00_r72678 img is for example only The actual version of the dms31_v img is obtained from SQA 2 Copy at91bootstrap bin and u boot bin to a folder named Streamer Bootloader on your PC desktop 3 Close the Streamer Bootloader folder Close the Streamer files folder and flash drive folder ...

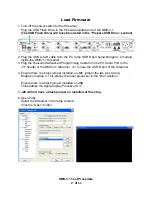
Страница 67: ...treamer 3 Plug the Russound Advanced Programming Cable from the PC Serial Port to the J11 header of the DMS 3 1 Streamer J11 is near the USB B port of the Streamer 4 Ensure there is a black jumper installed on J21 jumper the two pins facing BridgeCo module 3 This places the tuner processor in the Run position Ensure there is a black jumper installed on J34 This enables the Apple Airplay Processor ...

Страница 68: ...OOT will display in Putty This step was to confirm the ATMEL Processor U7 is alive Install the jumper on J28 8 Open SAM BA v2 10 Select the usb ARM0 this sets the USB port to load firmware Select the at91sam9g20 ek processor Read the next step before continuing ...

Страница 69: ... 19 of 64 9 Click the Connect button when both windows are set as shown 10 The SAM BA v2 10 window displays 11 In the Scripts window select Enable NandFlash and click the Execute button The main window will display as shown ...

Страница 70: ...e in Step 10 The Address window will display 0x0 Click the yellow folder next to the Send File button to display the Open dialog Navigate to the Streamer Bootloader folder and select the at91bootstrap bin file then click the Open button Click the Send File button 14 The main window will show the bootstrap file has been sent ...

Страница 71: ...ick the yellow folder next to the Send File button to display the Open dialog Navigate to the Streamer Bootloader folder and Select the uboot bin file then click the Open button Click the Send File button 16 The main window will show the u boot bin file has been sent 17 Turn off the DMS 3 1 Close SAM BA ...

Страница 72: ...DMS 3 1 Test Procedure 22 of 64 18 Monitor the Putty window Turn on the DMS 3 1 19 Many messages will fill the Putty window These are a few examples ...

Страница 73: ...1 then remove the USB Flash Drive from the DMS 3 1 21 Turn on the DMS 3 1 while monitoring the Putty window The DMS 3 1 has installed firmware correctly when you see this login window You will see the Version number just below the Russound name 22 Turn off the DMS 3 1 Note BridgeCo modules could be installed before or after loading firmware ...

Страница 74: ... by Russound and is a Linux image Each Drive will have a label named BC Magic 4 Plug the BC Magic USB Flash Drive into the following USB Slots of the DMS 3 1 The Front Panel USB Port The Stream 2 USB Port The Stream 3 USB Port 5 Install a BridgeCo module into all 3 slots J1 J3 and J14 of the DMS 3 1 Top View of DMS 3 1 PCB 6 Plug the Russound Advanced Programming Cable from the PC Serial Port to t...

Страница 75: ...essages will be displayed in the Putty window as the DMS 3 1 boots up Once you see the Russound Welcome screen display at the bottom type root and enter Type the Password once prompted to The Password is 10 The Putty screen will look as shown with the sign showing you are logged in 11 Obtain the IP Address of the DMS 3 1 by typing ifconfig and enter at the root prompt ...

Страница 76: ...of the eth0 section The inet addr 192 168 1 102 line is the IP address for this DMS 3 1 your IP may be different 13 Open another Putty window Host Name window has the IP address in previous step entered Port Window is set for 22 SSH is selected in the Connection type Click the Open button ...

Страница 77: ...ine 15 Type mfgUpgrade to the right of the prompt Many messages will display during the Upgrade Process This will take approximately 3 minutes Many messages will be displayed do nothing until you see the message in the next step Using username root root 192 168 1 102 s password root dms31 0021c70400035 mfgUpgrade Login as root root 192 168 1 102 s password root dms31 0021c70400035 ...

Страница 78: ...l the Putty window The MAC Address is being programmed into the BridgeCo module The MAC Address for that module will be confirmed Then the next BridgeCo Module will begin upgrading its firmware automatically Note If you do not remove the USB Stick for USB Module 1 then press c you will be required to enter the MAC ID Manually This will be described at the end of this section Remove USB drive from ...

Страница 79: ...l the Putty window The MAC Address is being programmed into the BridgeCo module The MAC Address for that module will be confirmed Then the next BridgeCo Module will begin upgrading its firmware automatically Note If you do not remove the USB Stick for USB Module 2 then press c you will be required to enter the MAC ID Manually This will be described at the end of this section Remove USB drive from ...

Страница 80: ...s will fill the Putty window The MAC Address is being programmed into the BridgeCo module The MAC Address for that module will be confirmed Note If you do not remove the USB Stick for USB Module 3 then press c you will be required to enter the MAC ID Manually This will be described at the end of this section 22 Do nothing until you see the message in the next step Remove USB drive from Module 3 Th...

Страница 81: ... the MAC ID of each module in Step 6 and place in a spreadsheet Confirm the Img Version Cne Version and BSL Version are current versions The Current Versions are supplied by Russound SQA check with them UPGRADE STATUS Module 1 Img Version 20110207 CNE Version 20110207 BSL Version 20100927 MAC Address 00 07 F5 2E EA 34 Module 2 Img Version 20110207 CNE Version 20110207 BSL Version 20100927 MAC Addr...

Страница 82: ... be programmed since BIST was not installed Module 3 was not installed 27 At the root prompt type the following setmac 1 for Module 1 setmac 2 for Module 2 or setmac 3 for Module 3 Type in the MAC Address listed on the label for that BridgeCo module After it is finished type bcinfo at the root prompt and confirm the MAC ID is correct for all modules UPGRADE STATUS Module 1 Img Version 20110200 Err...

Страница 83: ... section 2 This procedure uses the Iomega 34337 1TB Home Media Network Storage Drive You must first set up the drive before plugging it into the DMS 3 1 system 3 Plug the drive into a switch or router connected to a Windows PC Load the Software with the drive Open the Iomega Home Storage Manager it will detect the drive and display this box 4 Open the music icon Create a Music folder and place sev...

Страница 84: ...the left Under the Name section go to the music folder ensure it is set to Everyone Then set the Music folder for DLNA under the Multimedia section Note If you have another brand DLNA Storage Device ensure the Music Folder is set for DLNA 6 Close the Iomega Home Storage Manager 7 Continue by performing the Initial Test Setup section ...

Страница 85: ...A C5 Source 2 DMS 3 1 Stream 2 is connected to MCA C5 Source 3 DMS 3 1 Stream 3 is connected to MCA C5 Source 4 DMS 3 1 Tuner is connected to MCA C5 Source 5 3 Connect an AM and FM antenna to the DMS 3 1 antenna connectors 4 Connect the DMS 3 1 12VDC Trigger Input to the MCA C5 12VDC Trigger Output 1 using a cable with 3 5mm mono jack on each end 5 Connect an MDK C5 Keypad to the MCA C5 Keypad Por...

Страница 86: ... Network Storage Drive 7 Take 3 USB Flash Drives and place several MP3 songs on each drive Note Each USB Drive can be no larger than 2 Gig 8 Install a USB Flash Drive in the following ports of the DMS 3 1 a The Front Panel USB Port b The Stream 2 USB Port c The Stream 3 USB Port 9 Connect an auto ranging Multi Meter set for DC to the DMS 3 1 12VDC Trigger Output jack 10 Continue by performing the ...

Страница 87: ...play Controller 1 Source 1 2 Plug a USB cable from the IBM PC to the MCA C5 front USB port 3 Open RVCLIScipter 4 If the Command Queue window displays the DMS 3 1v Test Scripts go the next step If DMS 3 1v is not displayed Click File the Open Entire Test Suite and Navigate to where the DMS 31v is located and open it ...

Страница 88: ...Command Queue window This will select Enable Sources and highlight it in Blue Left click once the Test All button The You are about the run the test Enable Sources dialog will display Left click once the OK button 7 Wait until the You are now testing group DMS 3 1 IP Address displays then proceed to the next step Note Once the Enable Sources Test has finished the MCA C5 has been set up for Sources...

Страница 89: ...llowing There should not be a scroll bar to the right of the Source Screen MCA C5 Tuner Stream 1 Stream 2 Stream 3 DMS 3 1 Tuner 10 If you see a scroll bar to the right of the 5 Sources in Step 9 perform a Factory Init the next to last test of the DMS 3 1 Then repeat the Set MCA C5 Sources section until the scroll bar is not seen and the correct names for the 5 Sources are listed 11 Proceed to the...

Страница 90: ...d 4 are optional but will help in determining a problem if a Stream is not working There are six LED s on the PCB D14 D4 and D6 are Red LED s D13 D3 and D5 are Green LED s About the same time the Ethernet Link and Traffic LED s illuminate The 3 Red LED s will Blink momentarily then The 3 Green LED s will Blink momentarily then All six LED s will be dark Looking from the Rear of the DMS 3 1 you can...

Страница 91: ...IP Address 2 Press the space bar at the You are about to run the test IP Address 3 An RVCLIScripter command will be sent to the MCA C5 to return the IP Address of the DMS 3 1 The Logging Window will return its IP Address The example IP address in the picture below is 192 168 1 105 Your IP Address may be different ...

Страница 92: ...in the IP address recorded during Step 3 In the Port Window type in 22 it may be automatically set In the SSH button ensure it is selected Click the Open button Your IP Address may be different than the example shown below 5 The 192 168 1 104 Putty window will open Click the Yes button if the Warning message appears ...

Страница 93: ...e this Using username root root 192 168 1 104 s password root dms31 0021c7040003 bcinfo Aquiring information Module 0 IP Address 192 168 1 103 MAC Address 00 07 F5 2E EA 34 Img Version 20101222 Cne Version 20101222 BSL Version 20100927 SPI Comms DISABLED Module 1 IP Address 192 168 1 101 MAC Address 00 07 F5 2E EA 36 Img Version 20101222 Cne Version 20101222 BSL Version 20100927 SPI Comms DISABLED...

Страница 94: ...section Note There are 4 MAC ID s 3 ID s for the BridgeCo Modules 1 ID for the DMS 3 1 root dms31 0021c7040003 ifconfig eth0 Link encap Ethernet HWaddr 00 21 C7 04 00 03 inet addr 192 168 1 104 Bcast 192 168 1 255 Mask 255 255 255 0 UP BROADCAST RUNNING MULTICAST MTU 1500 Metric 1 RX packets 1966 errors 259 dropped 0 overruns 0 frame 0 TX packets 2196 errors 259 dropped 0 overruns 0 carrier 259 co...

Страница 95: ...Switch to Position 1 for Stream 1 Press the space bar at the You are about the run the test Position 1 8 Stream 1 4 RVCLIScripter will send the Stream 1 ID Switch command 8 times Turn the screwdriver 1 turn each time a value is returned in the Logging Window The Logging Window will appear as shown if the ID Switch Test passes There is a 1 second wait period each time the ID Switch command is sent ...

Страница 96: ...s Turn the screwdriver 1 turn each time a value is returned in the Logging Window The Logging Window will appear as shown if the ID Switch Test passes There is a 1 second wait period each time the ID Switch command is sent 7 Each Stream ID Switch has 16 positions The test passes only when the Logging Window displays all 16 positions Set the ID Switch for Stream 1 to position 2 ...

Страница 97: ...m 2 Continue to Step 9 when the Logging Windows displays as shown below Set the ID Switch for Stream 2 to position 3 9 Set Stream 3 ID Switch to position 1 Repeat Steps 6 through 7 for Stream 3 Continue to Step 10 when the Logging Windows displays as shown below Set the ID Switch for Stream 3 to position 4 ...

Страница 98: ...D Switch to position 1 Repeat Steps 6 through 7 for the Tuner ID Switch Continue to Step 11 when the Logging Windows displays as shown below Set the ID Switch for Tuner to position 5 11 Continue by performing the ID Switches Position Check section ...

Страница 99: ... the ID Switch Position check passes If the Logging window does not appear as shown recheck each switch position then repeat this test until it passes and the Logging Window appears as shown Line 1 returns a value of 1 which is Source 2 Line 3 returns a value of 2 which is Source 3 Line 5 returns a value of 3 which is Source 4 Line 7 returns a value of 4 which is Source 5 4 Continue by performing ...

Страница 100: ...put jack to the DMS 3 1 Trigger 100mA In jack indicated by the Green Line Connected a DC Multi meter positive tip to the DMS 3 1 Trigger 100mA Out jack indicated by the Red Line 2 The FM Radio Dial should be displayed on the MDK C5 Keypad indicating the MCA C5 is on The Multi meter will measure 12VDC 10 5VDC 12VDC is good To DC Multi meter Positive Tip ...

Страница 101: ...nt a command to turn on The third time the Trigger In command is sent returns a value of 1 The Trigger In test passes when the Logging window appears as shown Line 1 must return a value of 1 and Line 5 must return a value of 0 and Line 9 must return a value of 1 for the Trig In Out Test to Pass 6 Your Multi meter must measure 12VDC with a value of 1 and measure 0VDC with a value of 0 Note If you d...

Страница 102: ...ress below matches the IP address obtained in Section 16 IP Address MAC ID RVCLIScripter will display 192 168 1 105 9651 use 9641 and not 9651 Type 192 168 1 105 9641 in the Target window at the end of the quotation mark The Target window will be exactly as show below with a different IP Address C Documents and Settings johng Desktop rvcli exe 192 168 1 105 9641 Note Your IP address will be differ...

Страница 103: ...li exe window does not stay open then recheck the DMS 3 1 IP address and enter it into the Target window of the Properties box of Shortcut to rvcli exe 6 Type R 6 6 1 3 0 in the black area then press the enter key It will return a value of 00000200 The Apple Airplay IC is alive and well Important If any other value is returned then this test has failed and the Apple Airplay IC is dead Consult Russ...

Страница 104: ... C5 displays the Home screen button then This selects highlights Sources OK button then The 5 Sources are displayed button then Stream 1 is selected highlighted OK button then Stream 1 display screen appears 3 Stream 1 is displayed Continue with next step to select a stream Note If you don t see the word Stopped below the clock this is ok Continue by performing the next step Power button ...

Страница 105: ...ess and release the OK button then The Music Photos and Videos folder screen displays Note A message may appear displaying the name of the Network Storage Device you are using Press the OK button again and continue 6 Press and release the OK button then The Genre List displays button twice then This selects All Tracks OK button Then all songs on the Storage Device are listed ...

Страница 106: ... Confirm you are hearing this song from both speakers Raise or Lower the volume as needed on the MDK C5 Sound from both speakers should be clear and free of distortion Confirm this until completion of the test procedure 10 Press and release the Menu button The Stream Music List displays Menu button The Stream Menu displays button until USB is selected ...

Страница 107: ...wer the volume as needed on the MDK C5 Sound from both speakers should be clear and free of distortion Confirm this until completion of the test procedure 13 Repeat Steps 2 through 12 for Stream 2 follow the same directions except substitute Stream 2 from Steps 2 to 12 Continue to Step 14 if all tests pass for Stream 2 14 Repeat Steps 2 through 12 for Stream 3 follow the same directions except sub...

Страница 108: ...s the or and change to an FM Station in your area Confirm that RDS information appears across the keypad display Confirm you are hearing this station from both speakers Raise or Lower the volume as needed on the MDK C5 Sound from both speakers should be clear and free of distortion Confirm this until completion of the test procedure Then change to another FM Station in your area Confirm sound is o...

Страница 109: ...ing this station from both speakers Raise or Lower the volume as needed on the MDK C5 Sound from both speakers should be clear and free of distortion Confirm this until completion of the test procedure Then change to another AM Station in your area Confirm sound is ok The examples below change from 680Khz to 1270Khz to Confirm the AM can tune more than one station 4 Continue by performing the Fact...

Страница 110: ...SB Port Plug the USB Flash Drive into the Aux USB Port located next to the Ethernet Port 3 Open a SSH Putty Window using the IP address of the DMS 3 1 under test Type root and enter Type the password and enter Type ls media sda1 Do not type capital letters 4 The SSH Putty Window will display the files on that disk The files listed will be the MP3 files you copied to the USB Flash Drive ...

Страница 111: ...following Note If you are uncertain of the ID Switch positions repeat Section 16 ID Switches Position Check Stream 1 ID Switch to Position 2 Stream 2 ID Switch to Position 3 Stream 3 ID Switch to Position 4 Tuner ID Switch to Position 5 2 You have finished testing the DMS 3 1 Box the product and check the packaging ...

Страница 112: ... then after a few minutes stop blinking and momentarily remain illuminated then it will blink slowly for about 15 minutes The BridgeCo modules are updating 5 Once the Front Panel LED stops slowly blinking and remains illuminated continue to the next step 6 Remove the USB Stick form the Aux USB Port 7 Turn off the DMS 3 1 for 3 seconds and turn it on again 8 Wait a minute for the DMS 3 1 to boot up...

Страница 113: ...ld Refer to the example picture in Step 9 this is not the current firmware 11 Type bcinfo at the prompt The Img Cne and BSL version of the BridgeCo modules will be listed Check with Russound SQA to make sure you have the current Versions Refere to the example picture in Step 9 this is not the current firmware 12 You have successfully updated the DMS 3 1 ...

Страница 114: ...er sections renumbered accordingly Both sections allow testing of U17 Apple Airplay IC Changes made from Rev 1 3 to Rev 1 4 on July 22 2011 Review the complete document Minor corrections are added in addition to the Section 10 16 and 23 Steps below Section 10 Load Firmware Step 4 adds a line to ensure a jumper is Installed on J34 This enables the Apple Airplay Processor Section 16 IP Address MAC I...

Страница 115: ... Duck Jean Enterprise Co Ltd Namdong ku 97B 7L 664 6 Gojan dong INCHON SOUTH KOREA AC 100 240V 50160Hz 35W Class I Russound OMS 3 1 Additional information if necessary may also be reported on page 2 Les informations complementa1res si necessaire peuvent etre 1nd1ques sur Ia page Re issuance of CB Certificate US TUVR 6130 due to 2nd modification alternate components See associated test report for d...

Страница 116: ......
Отзывы: