


3. Installation Procedures
RuggedCom® RuggedMAX™
19
Installation Guide Rev 1.1
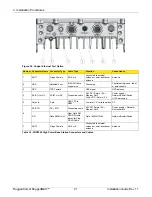
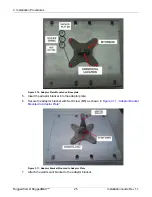
3. Lift the base station by the eye bolts and secure it to the mounting bracket. At the top of the
unit and mounting bracket, use NC 1/4" × 1/2" hex screws (Item 8) and NC 1/4" flat washers
(Item 9). At the bottom of the unit and mounting bracket, use 5/16" flat washers (Item 6), 5/16"
spring washers (Item 7), and NC 5/16" × 1/2" screws (Item 13).
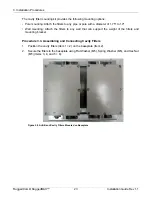
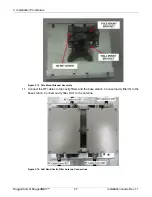
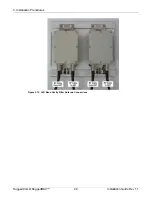
4. Complete the wiring connections.
Seal all connectors with self-fusing electrical tape or insulating putty suitable for
use in the unit’s installation environment
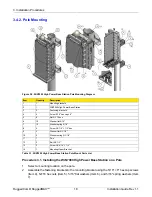
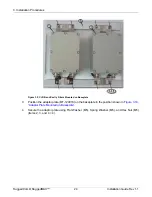
3.4.3. Wall Mounting
Figure 3.3. WiN7000 High Power Base Station Wall Mounting Diagram
Item
Quantity
Description
1
1
Mounting brackets
2
1
WiN7000 High Power Base Station
3
4
Screw NC 1/4" × 1/2" hex
4
4
Washer flat NC 1/4"
5
4
Washer spring NC 1/4"
6
2
Bolt NC 1/4"
7
4
Screw 5/16" hex cap × 2"
8
4
Washer flat 5/16"
9
4
Washer spring 5/16"
10
4
Dowel 5/16"
11
1
Mounting upper bracket
Table 3.2. WiN7000 High Power Base Station Wall Mount Parts List