103
9.
Tap
down
on the keypanel keys you want to be activated when the master key is selected.
The selected keys turn green
.
To
delete a key group
, do the following:
1.
On the KP 32 CLD keypad, press
MENU
.
The Top Level menu appears
.
2.
Using the 3(
↑
)
or 6(
↓
)
,
select
Key Options
.
3.
Press the
SEL
button.
The Key Options submenu appears.
4.
Using the 3(
↑
)
or 6(
↓
)
,
select
Key Groups
.
5.
Press the
SEL
button.
Group 1, Group 2, Group 3 and Group 4 appear in the panel display.
6.
Using the 3(
↑
)
or 6(
↓
)
,
select the
Group
(1-4) you want to delete.
7.
Press the
SEL
button.
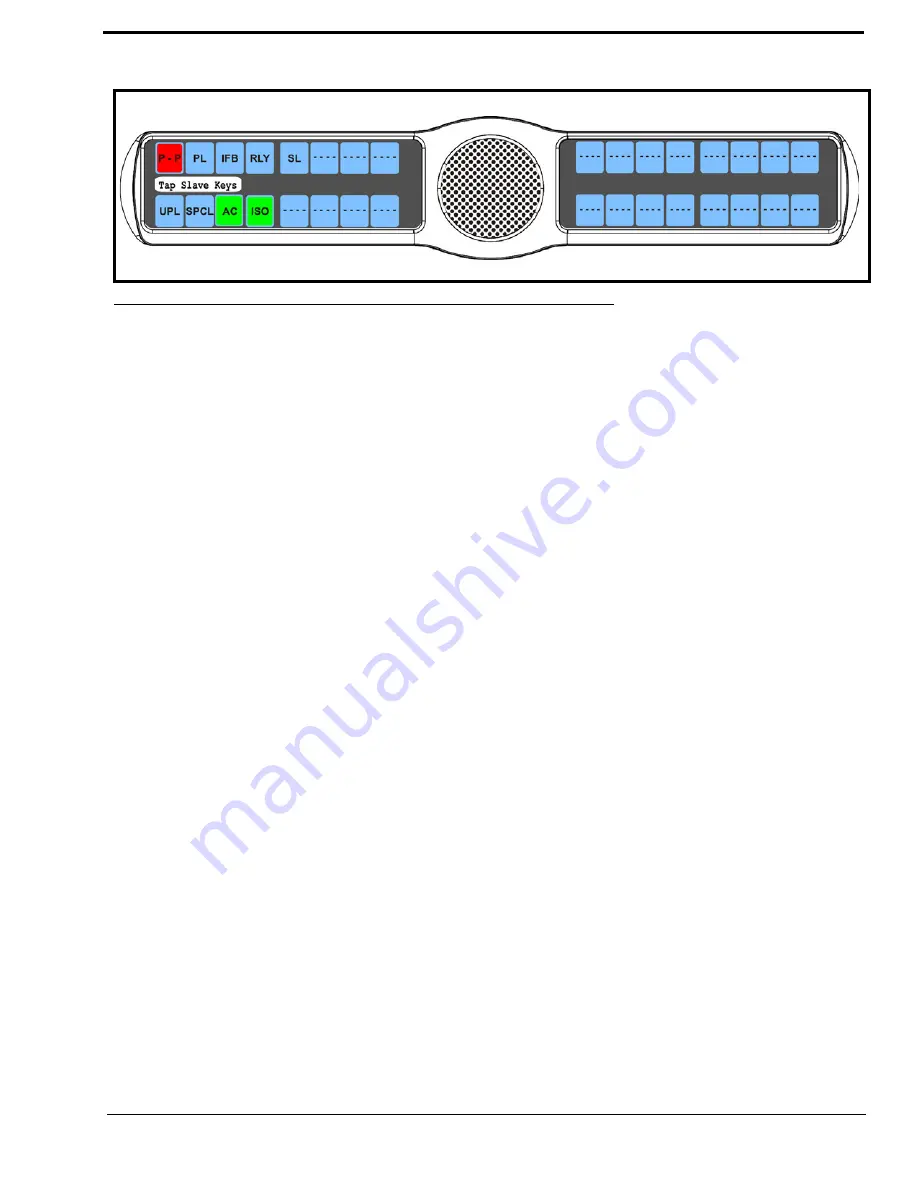
Tap the Master Key appears in the display window.
8.
Tap
down
on the red keypanel key you configured as the master key.
The selected key returns to the unassigned state (light blue color) and Tap Slave Key(s) appears in the display
window
.
9.
Tap
down
on the keypanel keys you want to be activated when the master key is selected.
The selected keys turn green
.
Key Options Menu, Latching
Latching
is used to enable or disable the keypanel key to stay ON when pressed. When Latching is enabled, the talk function
stays on after the talk key is pressed. Otherwise, the talk function only works when the button is pressed.
By default,
latching is enabled
.
To
set latching on a keypanel key
, do the following:
1.
On the KP 32 CLD keypad, press
MENU
.
The Top Level menu appears
.
2.
Using the 3(
↑
)
or 6(
↓
)
,
select
Key Options
.
3.
Press the
SEL
button.
The Key Options submenu appears.
4.
Using the 3(
↑
)
or 6(
↓
)
,
select
Latching
.
5.
Press the
SEL
button.
Disabled and Enabled appear in the display window.
FIGURE 102.
Key Options Menu - Creating Master and Slave Keys
Содержание CLD Color Keypanel Family DKP 16 CLD
Страница 1: ...CLD Color Keypanel Family User Manual 93507858000 Rev B 8 2008 KP 32 CLD DKP 16 CLD EKP 32 CLD...
Страница 8: ......
Страница 11: ...5 KP 32 CLD Block Diagram FIGURE 1 KP 32 CLD Block Diagram...
Страница 26: ...20...
Страница 47: ...41 NOTE The KP 32 CLD resets itself once the firmware download is complete...
Страница 52: ...46...
Страница 55: ...49 FIGURE 23 Main Audio Options Menu...
Страница 59: ...53 FIGURE 28 Frequency Response Preset 3 900Hz to 2100Hz FIGURE 29 Frequency Response Preset 4 2100Hz to 4500Hz...
Страница 142: ...136...
Страница 143: ...137 CHAPTER 8 Keypanel Menu Quick Reference...
Страница 146: ...140 FIGURE 144 Service Menu for the KP 32 CLD with GPI 32 CLD Option card installed...
Страница 148: ...142 FIGURE 146 Display Key Assign and Key Options Menu for the KP 32 CLD without GPI 32 CLD Option card installed...
Страница 150: ...144...
Страница 154: ...148...
Страница 156: ...150...
Страница 160: ......


