


ROZUM ROBOTICS
PULSE robotic arm
Page
14 | 23
3.
Check the appearance of the robotic arm and other components for any damages or defects.
If you find any obvious damages or defects or find out that any of the supply package
components is missing, contact the dealer or the manufacturer.
When unpacking and installing the robotic arm, make sure not to move or rotate the
robot joints manually because this can cause damage to the arm.
Installation of the PULSE robotic arm requires completing the following two steps:
1.
Mechanical integration
2.
Electrical integration
Continuous power supply requirement
For safety reasons, the integrator shall be obliged to provide continuous power supply to the robotic
arm (e.g., installing an uninterruptible power supply, a redundancy circuit, etc.). Otherwise, we
cannot guarantee that the robotic arm maintains its position during a power outage, which may
result in serious damage to its components.
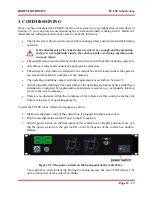
2.2. Mechanical integration
Pinching hazard! When performing mounting works, keep your fingers away from
the arm joints to avoid entrapment. Do not wear loose clothing or jewelry. Make sure
long hair is tied back.
2.2.1. Mounting the robotic arm
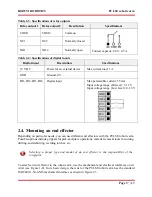
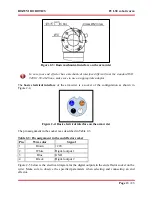
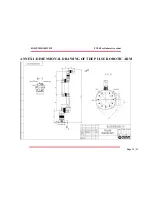
Though the footprint of the PULSE robotic arm is as small as 120 mm (see Figure 2-1), you need
to account for the arm workspace (Figure 1-4) when choosing a mounting location. This is
important to exclude collisions with other equipment or objects.
The recommended mounting position for the PULSE robotic arm is
vertical,
on a
horizontal
immovable surface
. The mounting surface should be:
flat, solid, and stable
able to sustain 8 times the weight of the robotic arm (see Table 1-2)
The installation procedure includes the following steps:
1.
Position the robot arm vertically.
2.
Holding the arm tight, fix it on the mounting surface with four M8 bolts using the four 9-mm
dia. holes in the mounting plate (see Figure 2-1).


