background image

CLEANING AND MAINTENANCE 

It is recommended to wash the appliance regularly. Before 

start of cleaning of the appliance or before performance 

of any repair or maintenance work, it is necessary to 

disconnect the appliance from the power supply and 

wait until it has cooled down. Do not use for washing any 

caustic cleaners, such as cleaning powders, agents with 

alcohol content, thinners, diluents, etc., and do not allow 

water to enter the appliance interior. Never immerse the 

appliance, cord or plug in water or any other liquid. It is 

forbidden to clean the device with a water jet. The interior 

of the device should be cleaned with a disinfectant suitable 

for the food industry. To clean, use a damp, soft cloth and 

then dry thoroughly. Dry the surface with a soft, dry cloth. 

The following actions should be taken if the machine is not 

used for a long period of time: Disconnect the appliance 

completely from the power supply and remove all food 

products from it. Then wash the entire appliance with 

a damp, soft cloth and mild cleaning agent, rinse with clean 

water and dry thoroughly, for some time leave the door 

open, so that the appliance will be completely dry. From 

time to time, check that the cable is not damaged. Do not 

use the appliance if the cable is damaged. A damaged cable 

must be replaced by a service or a qualified electrician. In 

the event of damage or malfunction, please contact your 

dealer or our service. Maintenance and repair work must 

be done only by qualified personnel using original spare 

parts and accessories. Attempts to make repairs on your 

own can lead to a direct threat to life or health, and will 

void the warranty!

Remember to regularly remove dust and dirt from the 

condenser.  Significant  soiling  of  the  condenser  may 

damage the device. Clean the condenser with moist, soft 

cloth. Remove stubborn stains, e.g. grease, with a neutral 

detergent. The device must be dried after each cleaning.

Regularly inspect the water drain hole, to ensure it is not 

jammed by deposited dirt or other objects. The drain pipe 

must be regularly checked for leaks. 

CHECK REGULARLY THE DEVICE

Check  regularly  that  the  device  doesn  ́t  present  any 

damage. If there is any damage, please stop using the 

device. Please contact your customer service to solve the 

problem.

What to do in case of a problem?

Please contact your customer service and prepare following 

information:

• 

Invoice number and serial number (the latter is to be 

found on the technical plate on the device).

• 

If relevant, a picture of the damaged, broken or 

defective part.

• 

It will be easier for your customer service clerk to 

determine the source of the problem if you give 

a detailed and precise description of the matter. 

The more detailed your information, the better the 

customer service will be able to answer your problem 

rapidly and efficiently!

CAUTION: Never open the device without the authorization 

of your customer service. This can lead to a loss of warranty!

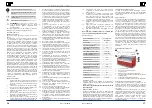
First start up. 

1. 

Unpack the whole appliance.

2. 

Make sure that no packing material has been left in 

the compressor chamber.

3. 

Remove all documents and other accessories from 

the inside of the appliance.

4. 

Install all additional components of the appliance.

5.  Align wheel chocks to prevent the device from 

moving or ensure it is on a level surface.

6. 

Clean and dry the interior 

7. 

Close the door of the appliance. 

8. 

Connect the appliance plug to the socket.

9. 

Set refrigeration according to requirements.

10.  Load the device once the pre-set temperature has 

been reached.

Height adjustment / levelling:

Do adjust the height or level the device, slightly screw out 

(but not entirely) or in device feet.

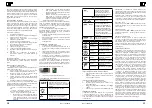
ASSEMBLING THE DEVICE

• 

Installing the glass shelf

It is possible to install a glass shelf in the device. To do so, 

proceed as follows:

1. 

Bolt the supports to the glass cover, on the left and 

on the right side.

2. 

Bolt the supports to the glass shelf, on the left and 

on the right side.

3. 

Bolt the glass shelf to the pin fitted in the centre of 

the upper part of the glass cover.

• 

Installing transparent sliding door 

The included transparent sliding door must be installed in 

the device. This will make it easier to maintain the required 

temperature inside the device.

The sliding door consists of three parts. 


 – left – with a left-hand side opening and a guide at 

the top


 – middle – slightly higher, with opening on both 

sides and a guide at the top


 – right – with a right-hand side opening and a guide 

at the top

1. 

Install the left door, first inserting it into the 

lower guiding rail, located closer to the inside 

of the device, and then into the top one, 

located closer to the inside of the device.

2. 

Install the right door, first inserting it into the 

lower guiding rail, located closer to the inside 

of the device, and then into the top one, 

located closer to the inside of the device.

3. 

Install  the  middle  door,  first  inserting  it  into 

the lower guiding rail, located further from the 

inside of the device, and then into the top one, 

located further from the inside of the device.

• 

Installing two glass covers

The  glass  covers  are  to  be  fitted  inside  the  slot,  located 

behind the oblong fan, located near the front glass cover. 

The covers should be installed horizontally and slightly 

tilted towards the foodstuffs displayed in the device.

• 

Changing the door opening direction

It is possible to change the direction of the door opening 

in the bottom section of the device. To do so, proceed as 

follows: 

1.  Undo the bolts that connect the hinges to the 

enclosure of the device.

2. 

Remove the door and turn them upside down, or 

swap the left and the right door.

3. 

Bolt the door with the hinges to the enclosure of the 

device.

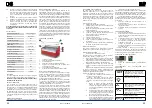
TURNING THE DEVICE ON

1. 

Close the door of the device

2. 

Make sure that the device switch is in the [O] position 

and plug the power lead of the device to the mains.

3. 

The device will start operation once it is plugged to 

the mains, but the controller of the device remains 

inactive until it is activated with the I/O switch. 

4. 

Put the I/O switch in the [I] position to turn on the 

controller of the device. The current temperature 

inside the device will be displayed.

The device will start cooling down to the preset temperature, 

and will cyclically defrost a certain number of times per day, 

depending on the value set in the programming mode (by 

default, every 4 hours).

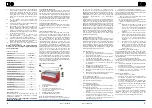
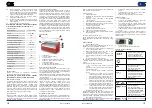
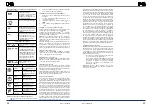
CONTROL PANEL DESCRIPTION 

1. 

Device controller

2. 

On/Off button (I/O respectively)

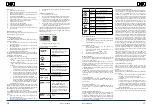
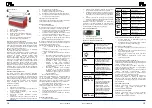
DEVICE CONTROLLER OPERATION:

Button functions

Displaying settings. In service 

programming mode – select 

parameter and conform 

changes.
Enables lighting

Scroll list of parameters (in 

service programming mode)/

Increase set value
Scroll list of parameters (in 

service programming mode)/

Decrease set value/Enables 

manual defrosting

BUTTON COMBINATIONS

Lock/unlock buttons

Initiate service programming 

mode – ATTENTION! IT IS 

RECOMMENDED NOT TO 

INITIATE THE SERVICE MODE – 

all the factory parameters were 

set in this mode and changes 

may result in incorrect device 

operation.
Return to ambient temperature 

display.

SYMBOL

MODE

DESCRIPTION

ON

Compressor is active

Flashing

Prevention of short operation 

periods activated

ON

Active defrosting

Flashing

Active dripping

ON

Unit of temperature

Flashing

Programming mode

ON

Unit of temperature

Flashing

Programming mode

DISPLAYING SETTINGS

1. 

Briefly press the SET button and the current setting 

will be displayed.

2. 

To return to the standard screen briefly press SET or 

wait for approximately 5 seconds.

CHANGING SETTINGS

1.  Press and hold down the SET button for 

approximately 3 seconds 

2. 

The current setting will be displayed and °C or °F 

diode will flash.

3. 

Change the setting using 

 or 

.

4. 

To accept changes press the SET button.

MANUAL DEFROST

The device shall require a defrost if internal ice build-up 

occurs. This may happen due to too frequent opening of 

the doors for long periods. 

Press and hold down the 

 button for at least 5 

seconds – defrost will start and an appropriate message 

will appear in the display.

ATTENTION: Manual defrost resets the automatic defrost 

schedule. The next automatic defrost will start 4 hours after 

manual defrost ends.

ATTENTION! Do not use electrical devices (such as a hair 

dryer) or open fire to defrost the device. Plastic elements 

of the interior may melt and a spark or flame may ignite 

the fumes.

LOCKING BUTTONS

Press and hold down the 

 and 

 buttons for at 

least 3 seconds. „OF“ will be displayed – the buttons are 

now locked.

UNLOCKING BUTTONS

Press and hold down the 

 and 

 buttons for at 

least 3 seconds. „on“ will be displayed – the buttons are 

now active.

TRANSPORTATION AND STORAGE

During transport, the machine should be protected from 

shaking, falling and turning upside down. Store it in 

a properly ventilated place with dry air and without any 

corrosive gas. All the glass elements are to be transported 

with extra caution. For transport, they must be wrapped in 

such a way as to prevent damage.

11

10

Rev. 11.01.2018

Rev. 11.01.2018

1

2

Содержание RCKV-AMS

Страница 1: ...expondo de BEDIENUNGSANLEITUNG User manual Manuel d utilisation Istruzioni per l uso Manual de instrucciones Instrukcja Návod k použití RCKV AMS REFR DISPLAY UNIT ...

Страница 2: ...TUNG Der Stecker des Geräts sollte an einer Stelle an die Steckdose angeschlossen werden wo er leicht und schnell herausgezogen werden kann 22 ACHTUNG Die Installation muss von einer qualifizierten Person durchgeführt werden 23 Kinder dürfen nicht mit dem Gerät spielen 24 Lagern Sie keine explosionsgefährlichen Stoffe in dem Gerät z B Dosen mit komprimiertem brennbarem Gas 25 Lagern Sie keine gefr...

Страница 3: ... werfen Sie keine Produkte in das Gerät hinein Es ist darauf zu achten dass die Regale des Geräts keine Anzeichen von Überlastung aufweisen wie zum Beispiel Biegen Knarren Rissbildung Wenn Sie Anzeichen von Überlastung bemerken reduzieren Sie die Belastung der Regale oder stellen Sie die Benutzung des Geräts ein Erste Inbetriebnahme 1 Entpacken Sie das gesamte Gerät 2 Stellen Sie sicher dass sich ...

Страница 4: ...G Es wird empfohlen das Gerät regelmäßig zu reinigen Bevor Sie das Gerät reinigen oder Reparatur oder Wartungsarbeiten durchführen trennen Sie es von der Stromversorgung und warten Sie bis es abgekühlt ist Verwenden Sie keine scheuernden Reinigungsmittel z B Reinigungspulver Reinigungsmittel auf Alkoholbasis Verdünner usw und lassen Sie auch kein Wasser in das Gerät eindringen Tauchen Sie das Gerä...

Страница 5: ...perly grounded Never use a defective power cable Do not open the unit in damp or wet environment or if your hands or body are damp or wet Protect the unit from solar radiation Use the device in a protected place to avoid damaging the equipment or putting at risk others Make sure the device is able to cool and avoid placing it too close to other devices that produce heat Before cleaning the machine...

Страница 6: ...es and a guide at the top right with a right hand side opening and a guide at the top 1 Install the left door first inserting it into the lower guiding rail located closer to the inside of the device and then into the top one located closer to the inside of the device 2 Install the right door first inserting it into the lower guiding rail located closer to the inside of the device and then into th...

Страница 7: ...agających wkładania rąk do urządzenia ręce były suche ponieważ w przeciwnym wypadku może to skutkować uszkodzeniem skóry od mrozu 16 UWAGA Otwory wentylacyjne urządzenia powinny być zawsze wolne od blokad 17 UWAGA Nie należy używać żadnych urządzeń elektrycznych lub maszyn w celu przyspieszenia rozmrażania 18 UWAGA Należy zwróć szczególną uwagę aby nie uszkodzić elementów obiegu chłodziwa 19 UWAGA...

Страница 8: ...towane poziomo i być lekko nachylone w stronę produktów spożywczych eksponowanych w urządzeniu Zmiana kierunku otwierania się drzwi Istnieje możliwość zmiany kierunku otwierania się drzwi dolnej części urządzenia W tym celu należy 1 Odkręcić śruby łączące zawiasy z obudową urządzenia 2 Zdjąć drzwi i obrócić je do góry nogami lub zamienić pozycjami lewe z prawymi 3 Przykręcić drzwi wraz z zawiasami...

Страница 9: ...ení na vlhkém nebo mokrém místě ani mokrýma nebo vlhkýma rukama Chraňte zařízení před přímým slunečním světlem Zařízení vždy používejte na bezpečném místě tak aby nikdo nemohl stoupnout na kabel zakopnout o něj a nebo ho poškodit Před zahájením čištění zařízení vytáhněte zástrčku ze zásuvky a k čištění používejte pouze vlhký hadřík Nepoužívejte čisticí prostředky a dávejte pozor aby se jakákoliv k...

Страница 10: ...ýrobky vkládejte do zařízení opatrně neházejte je do zařízení Všímejte si zda police zařízení nemají známky přetížení jako jsou ohnutí praskání popraskání 1 2 3 4 5 6 7 POPIS OVLÁDACÍHO PANELU 1 Ovladač zařízení 2 Tlačítko zapnout vypnout označení I O Zobrazení nastavovacího bodu V servisním programovacím režimu výběr parametru a potvrzení zavedených změn Zapnutí osvětlení Rolování soupisu paramet...

Страница 11: ...fin de pouvoir la consulter plus tard en cas de besoin Utilisez toujours une prise électrique reliée à la terre et avec la bonne tension secteur v Guide ou plaque signalétique Dans le cas où vous auriez des doutes quant au raccordement de votre appareil veuillez faire vérifier votre installation par un électricien qualifié N utilisez jamais de câble électrique défectueux N ouvrez pas l appareil da...

Страница 12: ...on poids et à son contenu Prévoyez une distance d au moins 10 cm entre l appareil et le mur ou d autres objets afin d assurer une ventilation adéquate Une mauvaise ventilation due au manque d espace autour de l appareil peut affecter le processus de réfrigération et raccourcir la durée de vie du compresseur L appareil de doit pas être utilisé dans des endroits où le vent souffle à plus de 0 2 m s ...

Страница 13: ...s l appareil Protégez vous contre les chocs électriques et ne plongez jamais l appareil le câble ou la fiche dans l eau ou dans d autres liquides N utilisez pas un jet d eau sous pression pour nettoyer l appareil car l appareil n est pas adapté au nettoyage et la pulvérisation directe avec le jet d eau Vous pouvez nettoyer les compartiments de la porte et les tiroirs de l intérieur avec un nettoya...

Страница 14: ...ina dell apparecchio deve essere collegata ad una presa facilmente accessibile in modo da poter rimuovere la spina velocemente se necessario 22 ATTENZIONE L installazione deve essere eseguita da personale qualificato 23 I bambini non devono giocare con l apparecchio 24 Non conservare sostanze esplosive all interno del dispositivo Ad esempio lattine contenenti gas compresso infiammabile 25 Non stiv...

Страница 15: ... DISPOSITIVO Funzione dei pulsanti Indicazione del valore teorico Nel programma di assistenza selezionare i parametri e confermare le modifiche immesse Accensione dell illuminazione Scorrimento della lista dei parametri nel programma di assistenza Aumentare il valore di impostazione Scorrimento della lista dei parametri nel programma di assistenza Aumentare il valore impostato Accensione sbrinamen...

Страница 16: ...r primera vez verifique que el tipo de corriente y el voltaje de la conexión que va a utilizar coinciden con los datos indicados en la placa de características del dispositivo Por favor lea detenidamente este manual de instrucciones Está prohibido tirar dispositivos eléctricos al contenedor de basura doméstico El producto cumple con la normativa CE Atención Peligro de accidente ADVERTENCIA En este...

Страница 17: ...ducidos en el refrigerador deben ser colocados con cuidado no lance los productos sobre el dispositivo Debe prestar atención para garantizar que no se produzca sobrecarga en las estanterías a indicios tales como partes vencidas crujidos o grietas Si nota signos de sobrecarga reduzca la carga en los estantes o deje de utilizar el equipo Primera puesta en servicio 1 Desempaquete el equipo totalmente...

Страница 18: ...y húmedo La suciedad difícil de eliminar como la grasa debe eliminarse con un detergente neutro El aparato debe secarse después de cada limpieza Revise regularmente el drenaje del agua fundida para asegurarse de que el conducto no haya sido bloqueado por suciedad residual u otros elementos no deseados La tubería de desagüe debe revisarse regularmente para comprobar su impermeabilidad REVISIÓN PERI...

Страница 19: ... 61000 3 2 2014 EN 61000 3 3 2013 EN 55014 2 2015 Diese Erklärung bezieht sich nur auf die Maschine im Zustand in dem sie auf dem Markt eingeführt wurde und schließt keine Komponenten die vom Endverbraucher hinzugefügt wurden und keine vom Endverbraucher durchgeführten Tätigkeiten Umbauarbeiten ein Die technische Dokumentation befindet sich im Firmensitz von EXPONDO Polska sp z o o sp k und über i...

Страница 20: ...iejszym potwierdzamy że urządzenia opisane w tej instrukcji są zgodne z deklaracją CE IT Con la presente documentazione si certifica che i dispositivi descritti all interno del manuale sono conformi alle vigenti norme CE ES Por la presente confirmamos que los dispositivos detallados en este manual son conformes con las normativas de la CE CZ Tímto potvrzujeme že všechy produkty uvedené v této uživ...

Страница 21: ...ng stehenden Möglichkeiten der Rückgabe oder Sammlung von Altgeräten 1 RICHTLINIE 2002 96 EG DES EUROPÄISCHEN PARLAMENTS UND DES RATES ÜBER ELEKTRO UND ELEKTRONIK ALTGERÄTE 2 Gesetz über das Inverkehrbringen die Rücknahme und die umweltverträgliche Entsorgung von Elektro und Elektronikgeräten Elektro und Elektronikgerätegesetz ElektroG Umwelt und Entsorgungshinweise Utylizacja produktu Produkty el...

Отзывы: