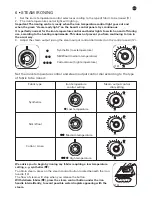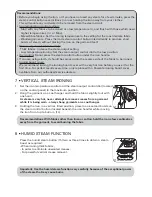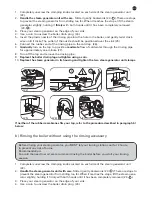
1. Completely unscrew the clamping knobs located on each side of the steam generator unit
(22).
2.
Handle the steam generator unit with care.
Slide it gently backwards (23 - 1 ). There are stops
to prevent the steam generator from sliding too far. When it reaches the stops, lift the steam
generator slightly, holding it
firmly
with both hands until it has been completely removed
(23 - 2 ).
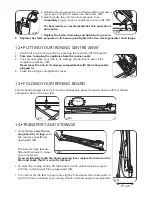
3. Place your steam generator on the edge of your sink.
4.
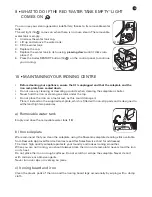
Use a coin to unscrew the boiler drain plug (24).
5.
Insert the plastic nozzle of the rinsing pipe into the hole in the boiler, and gently twist clock-
wise until it locks. The outlet of the nozzle should be positioned over the sink (25).
6.
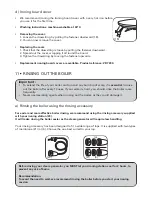
Connect the rubber end of the rinsing pipe to the cold tap (26).
7.
Gradually
turn on the tap to provide a
moderate
flow of cold water through the rinsing pipe
for approximately one minute (27).
8.
Turn off the tap and remove the rinsing pipe.
9.
Replace the boiler drain plug and tighten using a coin.
10.
Replace the steam generator in its housing and tighten the two steam generator unit clamps.
1
2
(22)
If neither of the rubber membranes fits your tap, refer to the procedure described in paragraph b)
below:
b) Rinsing the boiler without using the rinsing accessory
Before rinsing your steam generator, you MUST let your ironing station cool for 2 hours,
to prevent any risk of burns.
Recommendation:
To avoid the need to wait, we recommend rinsing the boiler before you start your ironing
session.
1. Completely unscrew the clamping knobs located on each side of the steam generator unit
(22).
2.
Handle the steam generator unit with care.
Slide it gently backwards (23 - 1 ). There are stops to
prevent the steam generator from sliding too far. When it reaches the stops, lift the steam gene-
rator slightly, holding it firmly with both hands until it has been completely removed (23 - 2 ).
3.
Place your steam generator on the edge of your sink.
4. Use a coin to unscrew the boiler drain plug (24).
(23)
(24)
(25)
(26)
(27)
ENG
Содержание Pro Active IC7100
Страница 1: ...instructions for use 032621 IC7100 50 03 ...


