N
L - E
N - F
R
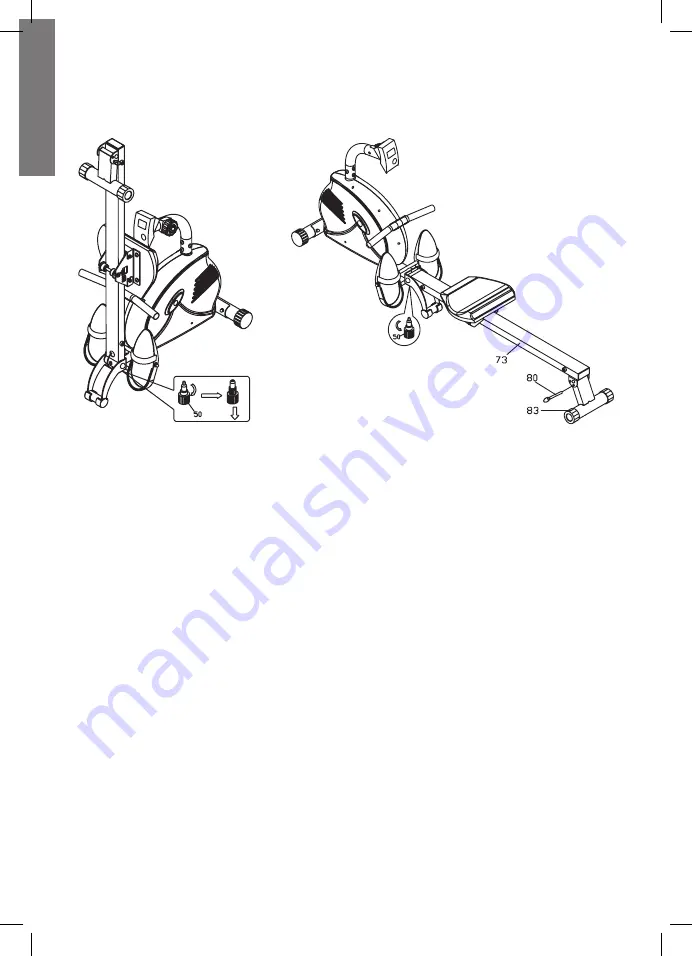
Draai de knop (50) totdat de conus volledig uit de glijrail (73) komt en trek dan de knop zo ver
mogelijk naar buiten. Duw de glijrail met de andere hand in een hoek totdat de knop meegaat
met de glijrail. Laat dan de knop weer los, zoals aangegeven in D.
Wanneer de glijrail op de vloer wordt gezet, zal de knop automatisch in het gat van de glijrail
vallen. Schroef de knop vast zoals aangegeven in fig. E. Trek de pin (80) uit de glijrail, klap de
staander (83) naar beneden en staak de pin terug in het juiste gat.
Unscrew the knob (50) until the taper completely withdraws from the sliding rail (73) and at the
same time draw the knob down until it cannot move anymore. Then pull up the sliding rail by
the other hand to an angle until the knob breaks away from the sliding rail. You can now release
the knob as shown in D.
When the sliding rail is put downward to the floor, the knob will automatically fit into the hole
on the sliding rail. Tighten the knob as shown in fig E. Pull the broaching (80) out and adjust the
stay tube (83) upward. Put the broaching back in the proper hole.
Dévisser le pommeau (50) jusqu’à ce que le cône se retire complètement de la jointure coulis-
sante sur rail (73), et en même temps tirer le bouton vers le bas jusqu’à ce qu’il ne bouge plus.
Puis tirez la glissière de l’autre main à un angle jusqu’à ce que le bouton se détache de la glissiè-
re, vous pouvez relâcher le bouton comme indiqué dans D.
Lorsque la glissière est mis à la baisse sur le sol, le bouton est automatiquement s’insérer dans un
trou, après cela, visser le bouton serrés comme indiqué dans fig E. Tirez la broche (80) du rail de
guidage, appuyez sur le montant (83) et arrêter la broche dans le trou correct.
De glijrail omlaagklappen
Fold the sliding rail down
Plier la glissière
D
E
Содержание Speedpower 021120
Страница 2: ...Opengewerkte tekening Exploded view Vue d ensemble NL EN FR...
Страница 32: ......


