


47
© ROPOX 2014
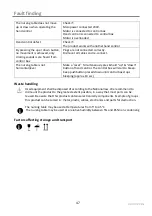
Fault finding
The nursing table does not move
up or down when operating the
hand control
Check if:
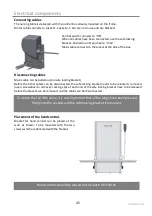
Main power connected 230V.
Motor is connected to control box
Hand control is connected to control box
Motor is overloaded
Hand control defect
Check if:
The product works with another hand control
By pressing the up or down button,
no movement is achieved, only
clicking sounds is are heard from
control box
Plugs are not connected correctly.
Dismount all cables and re-connect.
The nursing table is not
horizontal/level
Make a
”
reset
”:
Simultaneously pres & hold ”up” & ”down”
button of hand control. The control box will start to bleep.
Keep pushbutton presed down until control box stops
bleeping (approx 10 sec.)
Waste handling
Used equipment shall be disposed of according to the National law. We recommend to
dismount the product to the greatest extent possible, in a way that most parts can be
reused. Be aware that this product contains electronically components. Example of
groups
this product can be sorted in: metal, plastic, cables, electronics and parts for destruction.
The nursing table may be used at temperatures from 5° to 45°C
The nursing table may be used at a relative humidity between 5% and 85% non-condensing.
Factors affecting storage and transport
i
i
Содержание Vario 40-306 Series
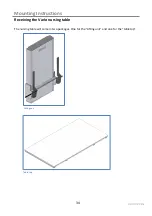
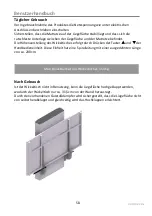
Страница 10: ...10 ROPOX 2014 Montageanvisning Forberedelse af montage Fjern afd kningspladen p toppen af l fteenheden...
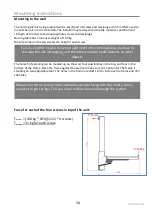
Страница 13: ...13 ROPOX 2014 Montageanvisning Monter l fteenheden til v ggen med skruer i top og bund...
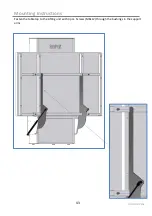
Страница 14: ...14 ROPOX 2014 Montageanvisning Skyd frontpladen tilbage i l fteenheden...
Страница 15: ...15 ROPOX 2014 Montageanvisning Monter afd kningspladen p toppen af l fteenheden...
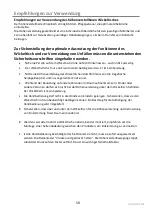
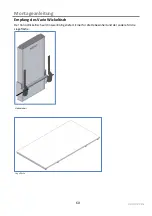
Страница 16: ...16 ROPOX 2014 Montageanvisning Montage af liggeflade Skyd liggefladen ned mellem l fteenhed og de 2 arme...
Страница 17: ...17 ROPOX 2014 Montageanvisning Monter liggefladen til l fteenhedens 2 arme Der bruges 4stk M8x12...
Страница 39: ...39 ROPOX 2014 Mounting Instructions Mount the lifting unit to the wall with screws at the top and buttom...
Страница 40: ...40 ROPOX 2014 Mounting Instructions Slide the front plate back into the Lifting unit...
Страница 41: ...41 ROPOX 2014 Mounting Instructions Mount the cover plate on the top of the lifting...
Страница 65: ...65 ROPOX 2014 Montageanleitung Die Hebeneinheit oben und unten mit Schrauben an der Wand montieren...
Страница 66: ...66 ROPOX 2014 Montageanleitung Die Frontplatte in der Hebeeinheit schieben...
Страница 67: ...67 ROPOX 2014 Montageanleitung Die Abdeckplatte oben auf die Hebeneinheit monteren...
Страница 69: ...69 ROPOX 2014 Montageanleitung Die Liegefl che an den St tzarmen der Hebeneinheit mit 4 Stck M8x12 befestigen...


