20
Rollerdor RD77 Installation Guide, Edition 2022/01
11. OPTIONAL EXTRAS - INSTALLATION
RDEORM EXTERNAL OVERRIDE KIT
1
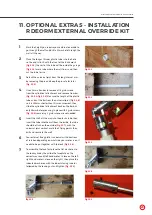
Mark the height you require your external override to
go through the wall and drill a 25mm hole through the
wall all the way.
2
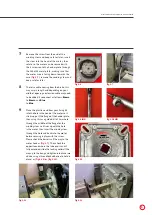
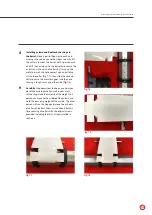
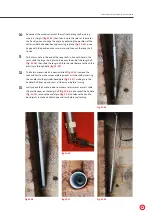
Place the longer thinner plastic tube into the hole
so the end is flush with the front of the brick work
(fig.11.1)
the rest of the tube will be inside the garage
(fig.11.2)
mark tube where the wall line is and then
cut the tube to size.
3
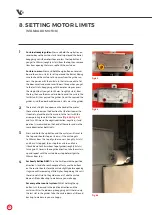
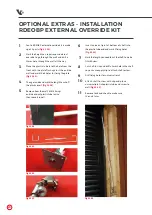
Detach the universal joint from the long internal arm
by removing the pin and keep the pin safe for later
(fig.11.3)
.
4
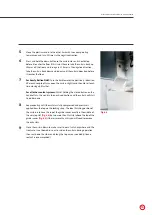
Use a 2mm allen key to remove all 4 grub screws
from the cylindrical attachment and remove from bar
(fig.11.5 & fig.11.6)
.Measure the length of the plastic
tube and cut the bar from the universal joint
(fig.11.4)
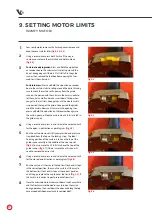
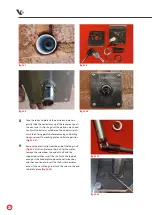
so it is 120mm shorter than this measurement, then
slide the cylindrical attachment back on the bar but
only 20mm before securing in place with 2 grub screws
(fig.11.6)
remaining 2 grub screws are not needed.
5
Insert the shaft all the way into the plastic tube, then
insert the tube into the wall from the inside, the tube
should be flush on the outside
(fig.11.7)
, with the
universal joint vertical, mark the 2 fixing points then
drill and secure to the wall.
6
Your external fixing plate is universal with directions
of rotation depending on what side your motor is on, it
needs to be put together with the lock
(fig.11.8)
.
7
To assemble the lock first place the flat washer onto
the lock cylinder, then slide the faceplate on the
correct way round (left hand motor = close on the left,
right hand motor = close on the right), then place the
indented washer on with the indents facing inwards
followed by the locking nut and tighten
(fig.11.9)
.
fig.11.1
fig.11.2
fig.11.3
fig.11.4
fig.11.5
fig.11.6

