rolleaseacmeda.com
© 2017 Rollease Acmeda Group
CREATING SCENES:
Once you have completed the pairing process for the Wi-Fi bridge and linked all of your shades to the
application, you can create scenes to set a treatment or group of treatments to specific heights.
1.
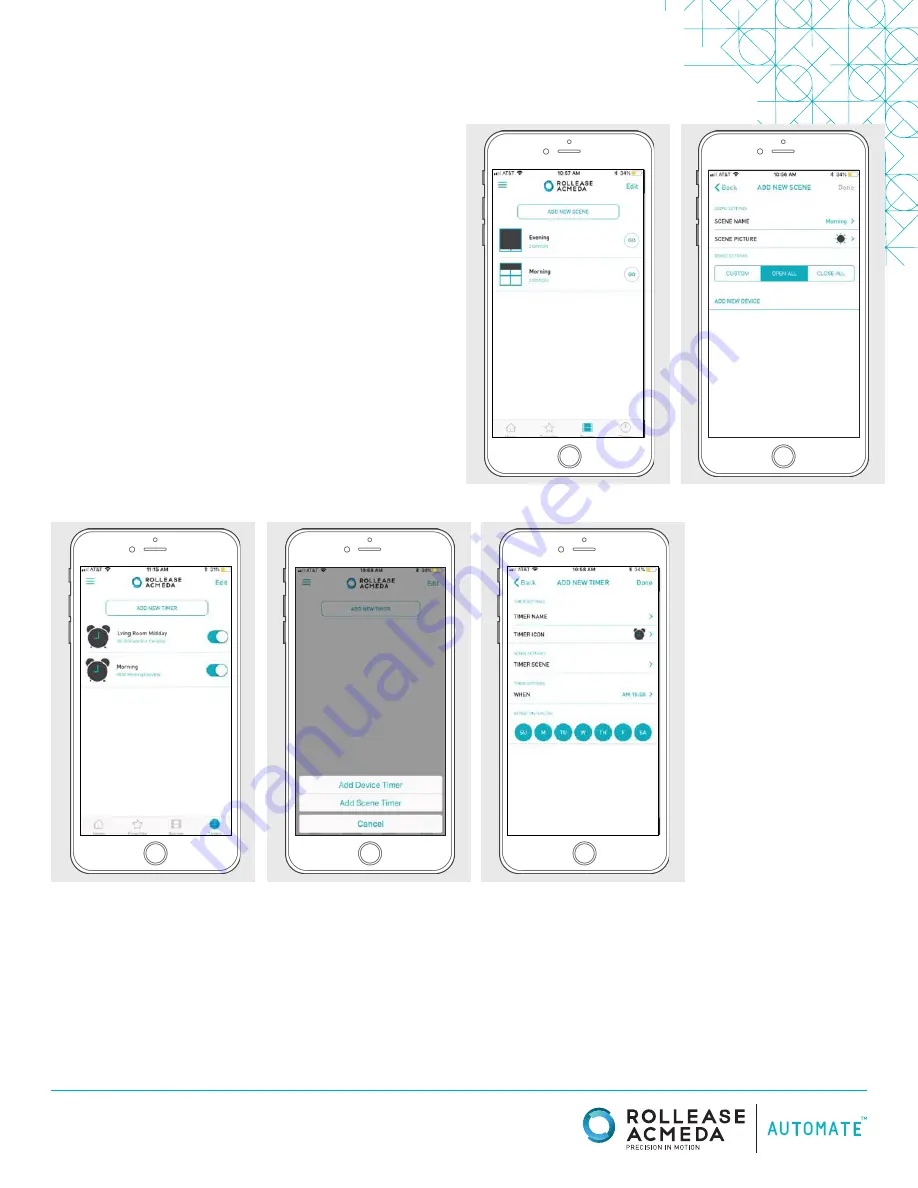
On the lower menu bar select the Scene icon. This will take you to
the scene homepage.
2.
Select “Add New Scene” to begin programming your desired scene.
3.
Input your scene name and select a scene picture.
4.
You can choose custom heights (by %) or set open/closed for
all selected treatments. (If you select custom you must select a
treatment height for each selected treatment)
5.
Select “Add New Device” to add your treatment to the scene being
created.
6.
Set the treatment height percentage if necessary.
7.
Select “Done” to finalize your scene.
You can activate your custom scene by navigating to the scene menu,
and pressing “GO” next to the desired scene name. If you wish to set a
programmed timer to activate your scene or individual shades, please
see the next section “Programming Timers”.
PROGRAMMING TIMERS
You can program timers to trigger the specific operation of your shades and scenes at your desired times throughout the day.
1.
On the lower menu bar select the Timer icon. This will take you to the Timer homepage.
2.
Select “Add New Timer” to begin programming your desired timer.
3.
Select either “Add Device Timer” or “Add Scene Timer”
4.
Input your timer name and select a timer picture.
5
. Add the devices or scenes you wish to operate.
6.
Set the time you wish the timer to trigger shade control.
7.
Select the days you wish the timer to operate. (Black dot signifies the timer will repeat on that day)
8.
Select “Done” to finalize your timer.
You can turn your timer on or off to accommodate changes to your regular schedule. Slide the on/off selector on the Timer homepage next to
the desired timer to activate or deactivate the time based control.


