rolleaseacmeda.com
© 2017 Rollease Acmeda Group
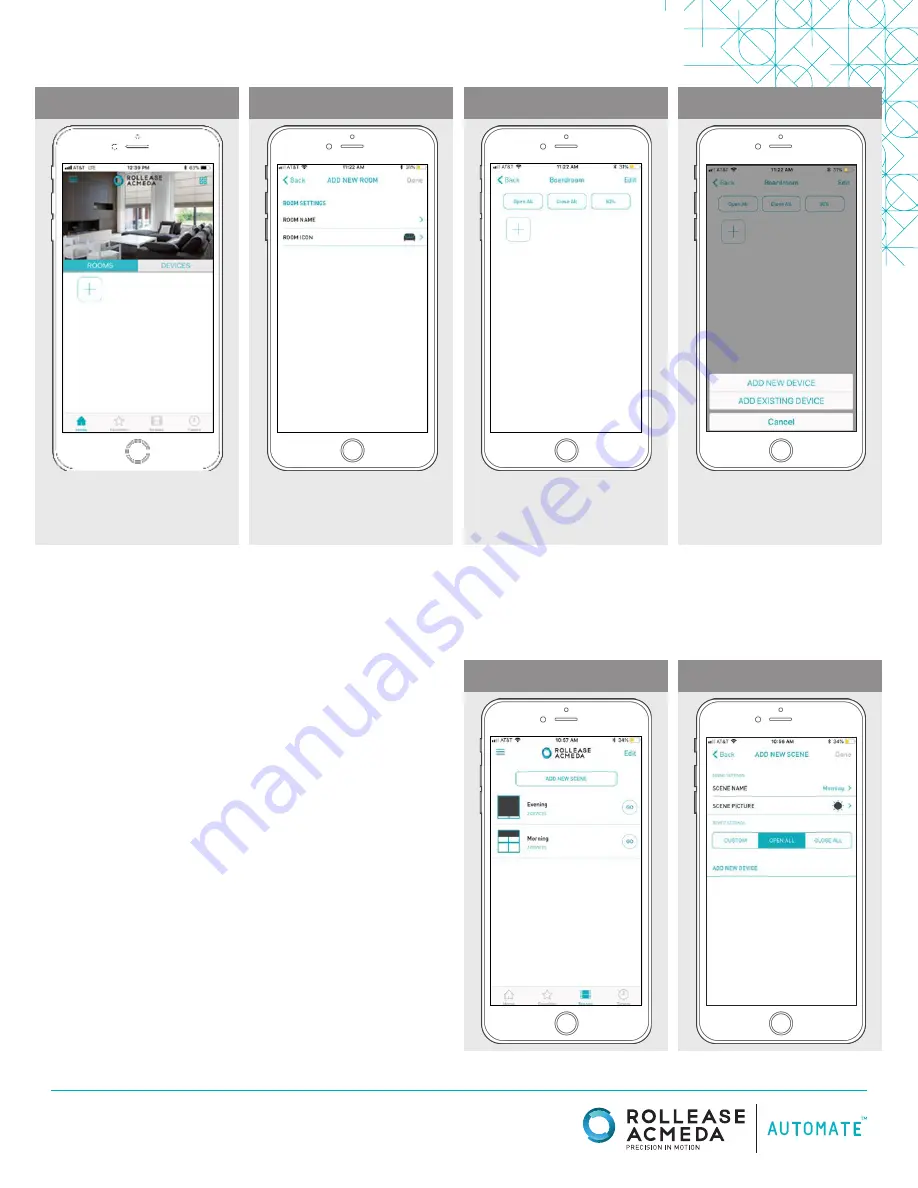
STEP 32
STEP 33
STEP 34
STEP 35
Once all shades are linked
to the application. Click “ROOMS” tab.
Select the “Plus” icon to add a new room
designation, return to the home screen,
Select “Room”.
Select “Add Existing Device” to select
treatments from the dropdown to
add to the room. (Choosing “Add New
Device” will revert back to the pairing a
new device sequence.)
Name the room, pick the room icon
and click “Done”.
Select the newly created room and
select the “Plus” icon to add a linked
shade to the room.
SETTING & SCENE INSTRUCTIONS
SET-UP COMPLETE
Your mobile application setup and product pairing is now complete. Shades added to rooms can be controlled
simultaneously after selecting the desired room. See the following sections for instructions on creating scenes,
setting timers and troubleshooting pairing failures.
Once you have completed the pairing process for the Wi-Fi bridge and
linked all of your shades to the application, you can create scenes to
set a treatment or group of treatments to specific heights.
1.
On the lower menu bar select the Scene icon. This will take you to
the scene homepage.
2.
Select “Add New Scene” to begin programming your desired scene.
3.
Input your scene name and select a scene picture.
4.
You can choose custom heights (by %) or set open/closed for
all selected treatments. (If you select custom you must select a
treatment height for each selected treatment)
5.
Select “Add New Device” to add your treatment to the scene being
created.
6.
Set the treatment height percentage if necessary.
7.
Select “Done” to finalize your scene.
You can activate your custom scene by navigating to the scene menu,
and pressing “GO” next to the desired scene name. If you wish to set a
programmed timer to activate your scene or individual shades, please
see the next section “Programming Timers”.
STEP 36
STEP 37


