5
Operating Guide (Panel Descriptions)
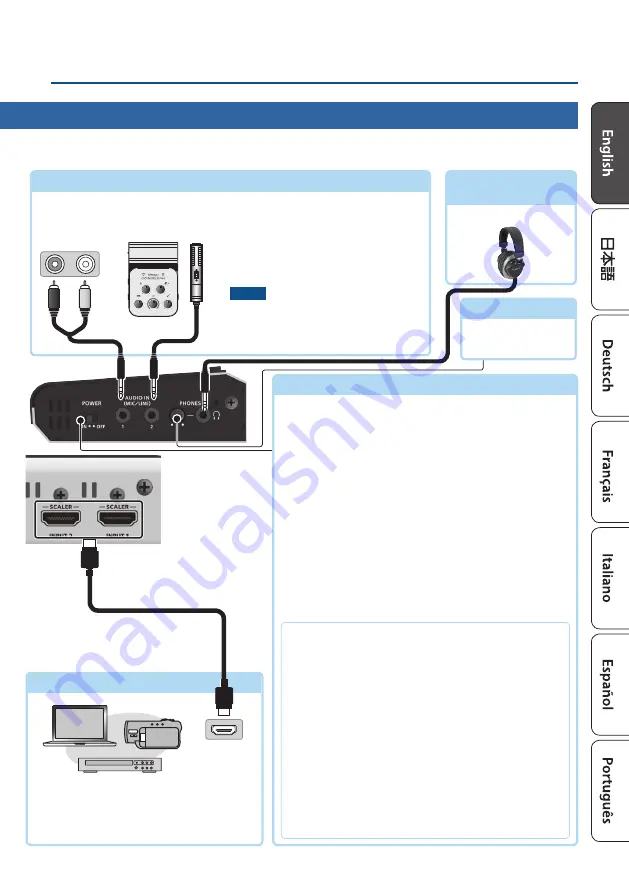
INPUT 1, 2 connectors
[PHONES] knob
Adjusts the volume of
the headphones.
AUDIO IN 1, 2 jack
(stereo mini)
These input audio. Connect a mic, audio mixer, CD players, or other such audio
equipment.
* Plug-in Power type mics are supported.
* Do not block the ventilation openings (the slits located on the front and side panels, etc.). If the ventilation openings are
blocked, the internal temperatures may rise, causing malfunctions due to excessive heat.
9
Turning the Power On/Off
[POWER] switch
* Before turning the unit on/off, always be sure to turn the
volume down. Even with the volume turned down, you might
hear some sound when switching the unit on/off. However, this
is normal and does not indicate a malfunction.
Turning the power on
1.
Make sure that all devices are powered-off.
2.
Turn on the V-02HD MKII’s [POWER] switch.
3.
Turn on the power in the order of source devices
0
output devices.
Turning the power off
1.
Turn off the power in the order of output devices
0
source devices.
2.
Turn off the V-02HD MKII’s [POWER] switch.
About the Auto Off function
The power to the V-02HD MKII turns off automatically
when all of the following states persist for 240 minutes
(Auto Off function).
5
No operation performed on the V-02HD MKII
5
No audio or video input
5
No equipment is connected to the PROGRAM OUT/
PREVIEW OUT connectors
If you do not want the power to be turned off
automatically, disengage the Auto Off function. Press the
[MENU] button
0
“SYSTEM”
0
set “AUTO OFF” to “OFF.”
* Unsaved data is lost when the power turns off. Before
turning the power off, save the data that you want to keep.
* To restore power, turn the power on again.
These input video. Connect these to a video
camera, video device such as a BD player, or
a computer that is equipped with an HDMI
output connector.
Audio output connectors
HDMI output
connector
PHONES (
Q
) jack
(stereo mini)
Connect headphones here.
Rear Panel/Side Panel (Connecting Your Equipment)
Plug-in Power settings
If you’re using a Plug-in Power type mic, turn plug-in
power on.
Press the [SETUP] button to access the “AUDIO
INPUT”
0
“AUDIO IN 1” or “AUDIO IN 2” settings, and
set “PLUG-IN POWER” to “ON.”
NOTE
When connecting a dynamic mic or a mic that does
not support Plug-in Power, be sure to turn Plug-in
Power off. If Plug-in Power is on when such a mic is
connected, malfunctions will occur.
HDMI cable


