background image

FL150-3 User Manual

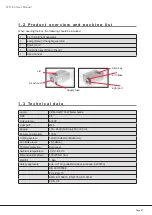
1 . 2   P r o d u c t   o v e r v i e w   a n d   p a c k i n g   l i s t

When opening the box, the following should be included: 

1 . 3   Te c h n i c a l   d a t a


1

FL 150-3 B light generator

1

Lamp (fitted in the light generator)

1

Power cord

1

3mm Allen key (fitted in the lid)

1

User manual

Lamp:

CDM-SA/R 150W Metal halide

CRI:

96 

Colour temp: 

4200K

Light port:

Ø28

Supply:

100 - 240V (Nominal) 50 or 60 Hz

Power consumption:

178W

Cooling system: 

12VDC axial fan (80x80mm)

Fan Noise level:

28,5 dB(A)

Thermal protection:

Auto reset

Ambient temperature:

-30°C to 40°C

Dimensions (WxDxH):

170x257x110mm

Weight:

1,9kg

Safety approvals:

cUL, UL153 (portable cabinet luminaire, E233873)
CB, IEC 60598
FCc, Part 15
EMC, EN 50015, EN 61000, EN 61547
PSE, CE

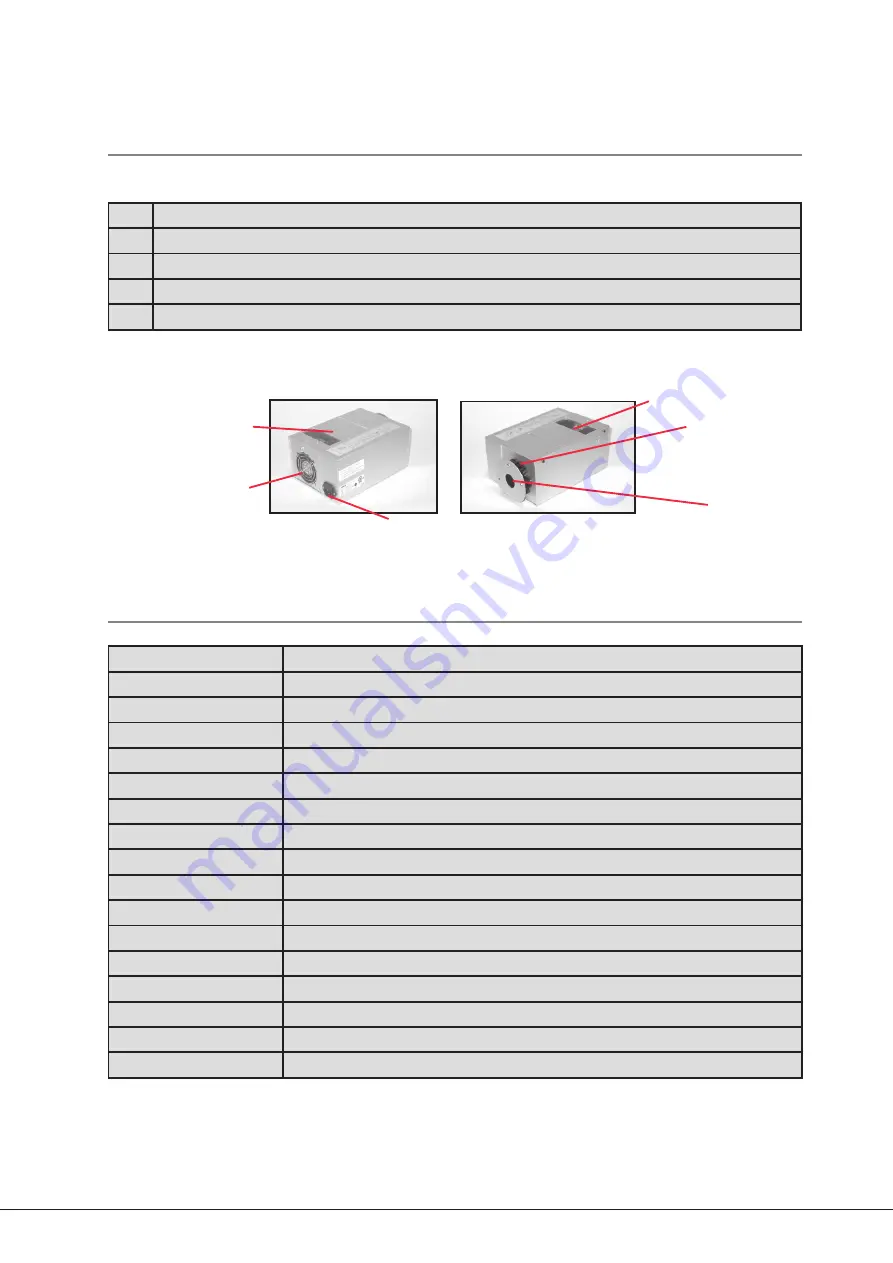
Supply fuse

Air exhaust

Lid

Air intake

Light port

Allen key

Page 03

Содержание 0161 0000

Страница 1: ...FL 150 3 B Metal Halide Light Generator for Fiber Optic Lighting Systems User Manual This user manual describes the following product Item number 0161 0000 FL 150 3 B White light 99082019 Rev 30 06 09 ...

Страница 2: ...ems using either glass or PMMA fibers The metal halide light generator has been developed to meet the requirements of a fiber optic lighting system where the light output intensity and efficiency must be optimized in order to ensure the best performance Furthermore this generator is prepared for use in cabinets or showcases either semi closed or closed compartments This document describes the foll...

Страница 3: ...amp CDM SA R 150W Metal halide CRI 96 Colour temp 4200K Light port Ø28 Supply 100 240V Nominal 50 or 60 Hz Power consumption 178W Cooling system 12VDC axial fan 80x80mm Fan Noise level 28 5 dB A Thermal protection Auto reset Ambient temperature 30 C to 40 C Dimensions WxDxH 170x257x110mm Weight 1 9kg Safety approvals cUL UL153 portable cabinet luminaire E233873 CB IEC 60598 FCc Part 15 EMC EN 5001...

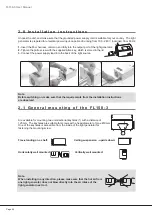
Страница 4: ...the light source Note Before switching on make sure that the requirements from the installation instructions are observed 2 1 G e n e r a l m o u n t i n g o f t h e F L 1 5 0 3 Are available for mounting two unidirectional keyholes 1 with a distance of 125 mm The keyholes are suitable for screws with a head diameter of max Ø9 mm One of the keyholes is accessible from the inside of the light gener...

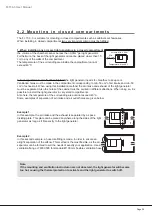
Страница 5: ...must be pointed in different directions When doing so it is possible to install the light generator in very small compartments Also here the temperature of the surrounding area cannot exceed 40 C Some examples of seperation of air intake and air outlet holes are given below Example 1 In this example the air intake and the exhaust is separated by a space dividing plate This plate can be placed anyw...

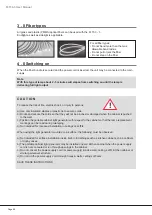
Страница 6: ... portable cabinet light generator may be installed under a kitchen cabinet when the power supply cord is not concealed or run through openings in the cabinet c Do not conceal the power supply cord or power supply inside a wall ceiling soffit kitchen cabinet or similar permanent structure d Do not run the power supply cord through holes in walls ceilings or floors SAVE THESE INSTRUCTIONS 3 0 Fiber ...

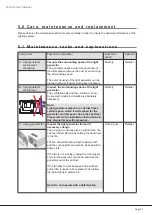
Страница 7: ...the light generator The ventilation slits and the ventilator can not be covered good air circulation is absolutely necessary Note Light generators placed in a cabinet have a certain space which is dertemined for the generator and this space has to be kept free Please refer to the installation instructions in this manual for specific measures Monthly Retailer C Light generator fan Inspect the light...

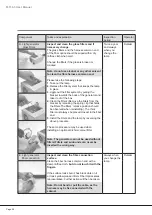
Страница 8: ...ng clip that holds the filters The filters relative position should be observed when reinstalling The thick filter must always be placed closest to the fiber end 5 Install the filters and the lamp by reversing the above procedure The same procedure may be used when installing an optional dichroic colour filter Note The generator can not be used without filters Filters and surrounds can never be in...

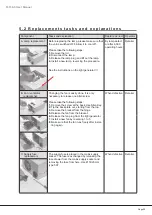
Страница 9: ...tailer B Fan ventilator replacemnet Changing the fan is easily done It is only necessary to release one Allen screw Please take the following steps 1 Remove the screw at the back Use Allen Key 2 Tip the back plate out starting from the top 3 Remove the bracket from the hinge 5 Release the fan from the bracket 6 Release the fan plug from the light generator 7 Install a new fan by reversing 1 to 5 8...

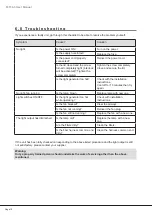
Страница 10: ...ower cord Is the lid closed and the screw turned completely tight interlock will be activated Tighten the screw completely Tighten the screw completely Close and secure the lid Is the light generator too hot Check with the installation instructions Cool off for 10 minutes then try again No light fan running Is the lamp blown Replace lamp with new one Light switches ON OFF Is the light generator to...

Страница 11: ...ture 40x40x1 3mm 5100 0208 Colour filter yellow Yellow dichroic colour filter 40x40x1 3mm 5400 5002 Colour filter green Green dichroic colour filter 40x40x1 3mm 5400 5003 Colour filter blue Blue dichroic colour filter 40x40x1 3mm 5400 5005 Colour filter red Red dichroic colour filter 40x40x1 3mm 5400 5006 Harness adaptor Reduces the lightport size from Ø28 to Ø9 7800 0130 Ventilation hose adaptor ...

Страница 12: ...ax 45 9620 3396 9900 Frederikshavn info roblon com Denmark www roblon com Roblon accepts no responsibility for possible errors in printed and electronic material Roblon reserves the right to alter or discontinue products without notice 2012 Roblon A S ...

Отзывы: