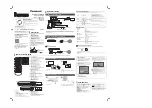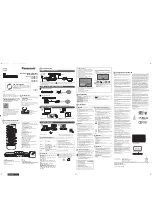
HRA-1750D+BT - REMOTE CONTROL
Installation of Battery
1.
Remove the insulating mylar strip from the battery. It is located at the bottom
back side of the remote control.
2.
2. Loosen the screw on the battery compartment cover with a screwdriver.
Pull out the battery compartment with your fingernails.
3. Replace a new battery (size
2025
) correctly and fully insert the battery compar-
tment back to the original position. Tighten the screw with a screwdriver.
Handling the Remote Control
• Remove the batteries if the remote control is not going to be used for an extended
period of time.
• To avoid possible failure, read the following instructions and handle the remote
control properly.
• Do not drop or cause impact to the remote control.
• Do not spill water or any liquid on the remote control.
• Do not place the remote control on a wet object.
• Do not place the remote control under the direct sunlight or near sources of excessive heat.
• Do not use caustic cleaners ( porcelain, stainless steel, toilet, or oven cleaner etc. ) on the
remote control, as it may suffer damage.
Note:
Remove the battery from remote control handset when it is not to be used for a long period.
Otherwise it can be damaged due to leakage of battery.
Connecting the AC Power Cord
Connect the AC~ socket on the main unit to power plug
to the wall outlet with an AC power cord.
Caution:
Be sure to unplug the power plug from the
outlet when going out or when the unit is not in use for an extended period of time.
Connecting the DAB/FM Antenna
1. Connect the supplied DAB/FM Antenna to the DAB/FM Antenna socket on the rear of the
unit.
2. If reception is poor, connect the outside antenna.
Note:
Before attaching a 75 ohm coaxial lead (the kind with a round wire going to an outside
antenna), disconnect the supplied DAB/FM wire antenna.
Caution:
To avoid noise, keep
Antenna away from the unit, the connecting cables and the mains cable.

