background image


10 • Sample Draw Combustible Gas Detector


Start Up


This section describes procedures to start up the sample draw combustible gas detector 
and place the sample draw detector into normal operation.


Introducing Incoming Power


1. Complete the installation procedures described earlier in this manual.

2. Verify that the power/device wiring is correct and secure.
3. Turn on or plug in the incoming power at the power source end.
4. Verify that the Pilot light is on.
5. Verify that the flowmeter indicates a flow rate of approximately 1.5 SCFH. If 

necessary, use the bypass valve or flow adjust potentiometer to adjust the flow rate.


NOTE:


The following step tests for leaks in the sample line. This test may cause a low 


flow condition at the sample draw detector.

6. Verify that the incoming sample line is not leaking. To test the sample line, plug the 

open end of the sample line with your thumb. If the flowmeter ball drops to the 
bottom of the flowmeter, the incoming sample line is not leaking.

7. Remove your thumb from the sample line, verify the flowmeter returns to a normal 

flow rate.


Setting the Zero Reading


CAUTION:


If you suspect the presence of combustible gas in the  monitoring environment, use 
the calibration kit and the zero air calibration cylinder to introduce “fresh air” to the 


sensor and verify an accurate zero setting. 


1. Verify that the sample draw detector is sampling a fresh air environment 

(environment known to be free of combustible gas).

2. Open the housing door.

3. Set a voltmeter to measure in the milivolt (mV) range.

4. Plug the voltmeter leads into the test points on the amplifier.  Plug the positive lead 

into the test point labeled 


TP+


; plug the negative lead into the test point labeled 


TP-


.

5. Verify a voltmeter reading of 100 mV (


±


 2 mV).

6. If necessary, use a small flat-blade screwdriver to adjust the zero potentiometer until 

the voltmeter reading is 100 mV (


±


 2 mV).

7. Close the housing door.

Содержание 35-3000RKA-LEL

Страница 1: ...detector Table 1 Specifications Target Gas Combustible Gas Input Power 24 VDC Construction housing Fiberglass polyester NEMA 4X Dimensions 8 5 in H x 6 5 in W x 4 25 in D Weight 4 5 lbs Sampling Meth...

Страница 2: ...re attached to the back of the housing one at each corner Use the mounting feet to install the housing to a vertical surface Use the two conduit hubs on the bottom of the housing to make wiring connec...

Страница 3: ...d or clogged Pump The pump is behind the main circuit board near the top of the sample draw detector The pump pulls the gas sample into the sample draw detector The pump operates on 24 VAC which is ge...

Страница 4: ...he EXHAUST fitting accepts 1 4 in rigid tubing See the Installation section on page 7 to connect tubing to the EXHAUST fitting Detection System The detection system consists of the combustible gas sen...

Страница 5: ...f the transmitter The transmitter is factory wired to the sensor and main circuit board Test points The test points are located on the left side of the transmitter and are labeled TP and TP A 100 mV 5...

Страница 6: ...sure switch are factory wired to the circuit board See the Installation on page 7 for all wiring procedures related to the sample draw detector Relay The relay is to the left of the detector terminal...

Страница 7: ...ider the following when you select the mounting site Is there enough room to open the housing door and make wiring connections at the bottom of the housing and tubing connections at the right of the h...

Страница 8: ...to seal the connection between the tubing and the INLET fitting See Appendix A Parts List for an example of an appropriate metal insert 2 Place the opposite end of the tubing at the sampling area CAUT...

Страница 9: ...e Gas Detector 4 20 Feedback Ground WHT GR N BLK GN D 2 4 V _ LEL O2 AM P P AM P 4 2 0 GREEN BLA C K WH ITE RED PUMP ASSY INTERNALLY WIRED 24VDC GND 24V 4 20 RD PUM P PSW TP TP ZERO SPAN GND 24V 4 20...

Страница 10: ...of the sample line with your thumb If the flowmeter ball drops to the bottom of the flowmeter the incoming sample line is not leaking 7 Remove your thumb from the sample line verify the flowmeter retu...

Страница 11: ...e target gas Preparing for the response test NOTE This procedure describes the RKI calibration kit that includes a gas collection bag A calibration kit that uses a demand flow regulator is also availa...

Страница 12: ...ems you may encounter with the sample draw combustible gas detector NOTE This troubleshooting guide describes sample draw detector problems only See the instruction manual for monitoring device if it...

Страница 13: ...pump etc The sample draw detector is malfunctioning The demand flow regulator is not operating properly if one is used for calibration instead of a gas bag Recommended action 1 Verify that the calibra...

Страница 14: ...row indicates the direction of the sample flow 3 Disconnect the filter from the elbows on each end of the filter then remove the filter from the sample draw detector 4 Make sure the arrow is pointing...

Страница 15: ...low to 0 6 SCFH 2 Slowly turn the low flow potentiometer counterclockwise just until the sample draw detector goes into low flow alarm NOTE The low flow potentiometer is accessible through a circular...

Страница 16: ...the correct test points output for the calibrating sample Output mV calibrating sample fullscale X 400 100 For example with a calibrating sample of 50 LEL and a fullscale setting of 100 LEL the corre...

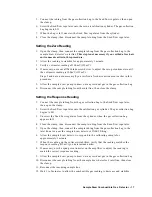
Страница 17: ...e sample tubing from the inlet line then close the clamp Setting the Response Reading 1 Connect the sample tubing from the gas collection bag to the fixed flow regulator then open the clamp 2 Screw th...

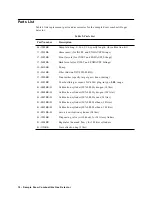
Страница 18: ...Filter Boston DFU9933 05 DQ 57 1050RK Transmitter specify target gas when ordering 61 0145RK Combustible gas sensor NC 6240 plug in type LEL range 81 0002RK 01 Calibration cylinder 50 LEL Hydrogen 34...

Отзывы: