


Riverstone Networks RS 8000/8600 Switch Router Getting Started Guide 3-21
Hardware Installation
Installing the Hardware
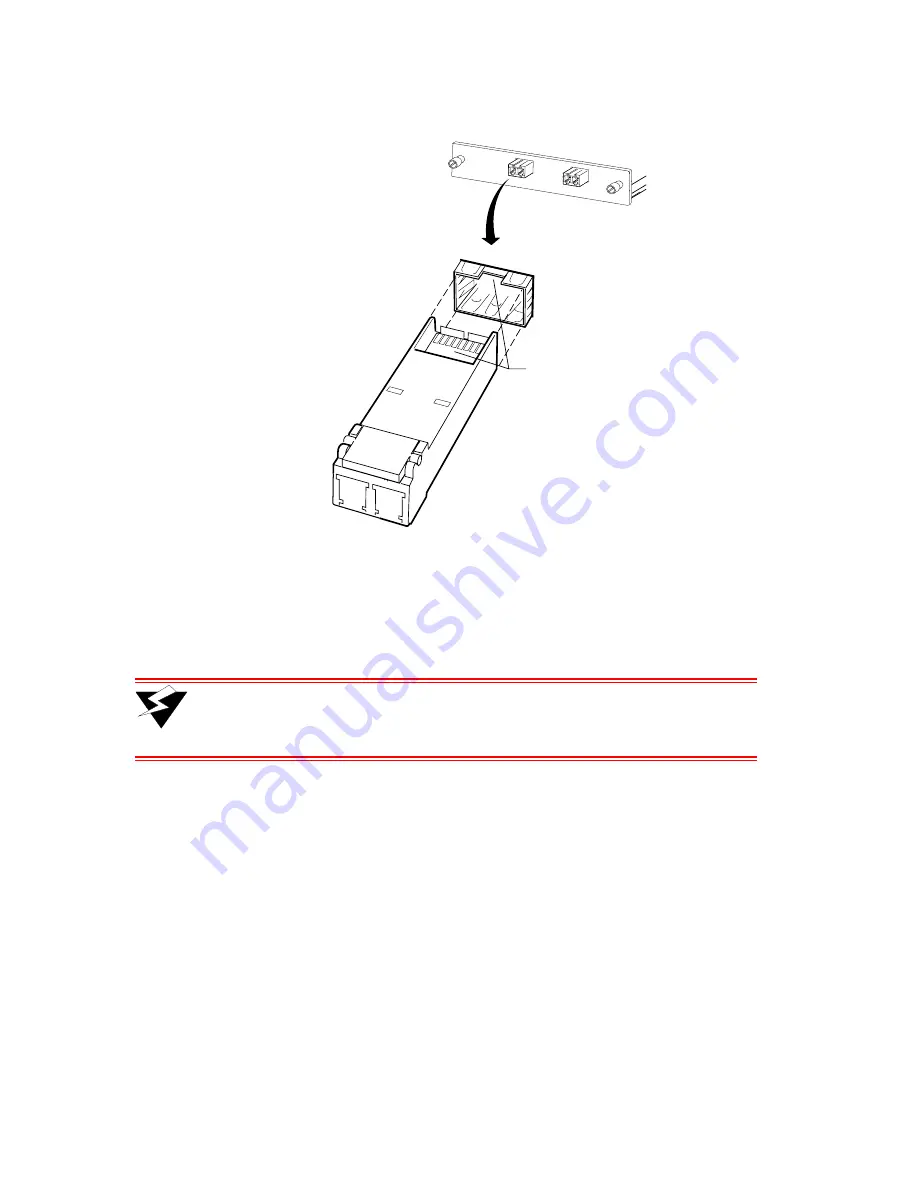
Figure 3-18 Installing SFP transceivers
2.
Insert the transceiver into the target slot until it locks into position. Leave the dust plug in the
transceiver until you are ready to attach a fiber cable. Clean the optic surfaces of the fiber cable prior
to plugging it into the optical bores of the SFP transceiver.
Warning
Keep the dust plug in an SFP transceiver when there is no fiber cable plugged
in. The optics will not work properly when obstructed with dust or
contaminants.
3.3.13
Attaching the Network Cables to Line Cards
With your RS 8000/8600 installed and connected to a management console, you are now ready to attach the
RS 8000/8600’s line cards to your network. The RS 8000/8600 uses industry standard copper and fiber cables and
connectors. For information regarding required connector types, cable types, and pin-out assignments, see the tables
associated with each line card in
Chapter 2,
"Introduction."
Proceed to
Chapter 4,
"Initial Configuration"
for instructions about powering on the RS 8000/8600 and performing
initial configuration.
Insert SFP into ports
with circuit card
edge connector
adjacent to notch in
guide cage on top
Содержание RS 8000
Страница 1: ...36 005 15 Rev 0A RS 8000 8600 Switch Router Getting Started Guide Release 9 3...
Страница 14: ...xiv Riverstone Networks RS 8000 8600 Switch Router Getting Started Guide...
Страница 18: ...xviii Riverstone Networks RS 8000 8600 Switch Router Getting Started Guide...
Страница 24: ...1 2 Riverstone Networks RS 8000 8600 Switch Router Getting Started Guide Related Documentation About This Guide...
Страница 108: ...3 22 Riverstone Networks RS 8000 8600 Switch Router Getting Started Guide Installing the Hardware Hardware Installation...
Страница 152: ...B 2 Riverstone Networks RS 8000 8600 Switch Router Getting Started Guide CONSIDERACIONES DE SEGURIDAD...


