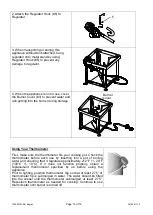
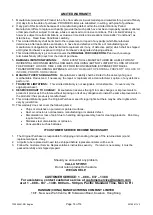
background image

TF2002501-RG English                                                               

Page 7 of 14

                                                                                          20190611 V.2 


Do not release liquid propane (LP) gas into the atmosphere. This is a hazardous practice. 


To remove gas from LP tank, contact an LP dealer or call a local fire department for 
assistance. Check the telephone directory under 

“GAS Companies” for nearest certified LP 

dealers.   


LP Tank Exchange 


Many retailers that sell appliances offer you the option of replacing your empty LP tanks 
through an exchange service, Use only those reputable exchange companies that inspect, 
precision fill, test and certify their cylinders. Exchange your tank only for an OPD safety 
feature-

equipped tanks as described in the “LP Tank” section of this manual. 


Always keep new and exchanged LP tanks in upright position during use, transit or 
storage. 


Leak test new and exchanged LP tanks BEFORE connecting to appliance. 


LP Tank Leak Test 

For your safety 


Leak test must be repeated each time LP tank is exchanged or 
refilled. 


Do not smoke during leak test.   


Do not use an open flame to check for gas leaks. 


Appliance must be leak checked outdoors in well-ventilated area, 
away from open flames or sparks. 


Use a clean paint brush and 50/50 soap and water solution. 

Use mild soap and water. Do not use household cleaning agents.

 Damage to gas train 

components can result. 
Brush soapy solution onto all metal seams and entire valve area. 


Hose Check   


Before each use, check to see if there is evidence of abrasion, wear, cuts or leaks, the 
hose must be replaced prior to the appliance being put into operation. The replacement 
hose assembly must be that specified by the manufacturers.   


WARNING 


If “growing” bubbles appear, do not use or move the LP tank. Contact an LP gas supplier 
or your fire department. 


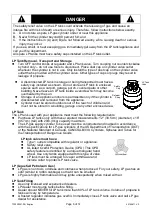
Connecting Regulator to the LP Tank 

1.  Place LP tank on a secure, level, and stable surface. 
2.  Turn control knob to the OFF position.   
3.  Turn LP tank OFF by turning hand wheel clockwise to a 

full 

stop

4.  Remove the protective cap from the LP tank valve. Always use 

cap and strap supplied with valve. 


5.  Hold regulator, insert nipple (B) into LP tank valve. Hand tighten coupling nut, holding 

regulator in a straight line (C) with LP tank valve so as not to cross thread the connection.   


Do not use a POL transport plug 
(A) (plastic part with external 
threads)! It will defeat the safety 
feature of the valve. 


Regulator 

Nipple must be 
centered into 
the LP tank 
valve 

Hold coupling nut and regulator as 
shown for proper connection to LP

 tank 

valve


Coupling nut 

Содержание TF2002501-RG

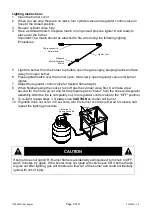
Страница 1: ...use of the appliance Read and follow all warnings and instructions before assembling and using the appliance Follow all warnings and instructions when using the appliance Keep this manual for future...

Страница 2: ...is appliance within 25 ft 7 5 m of any flammable liquid 4 Do not fill cooking vessel beyond maximum fill line 5 Never allow oil or grease to get hotter than 400 F or 200 C If the temperature exceeds 4...

Страница 3: ...nded for commercial use WARNING This Appliance is NOT for Frying Turkeys Safety Symbols The symbols and boxes shown below explain what each heading means Read and follow all of the messages found thro...

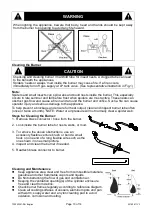
Страница 4: ...overhead construction Always keep the fuel supply hose away from any heated surfaces This appliance is NOT intended for commercial use The use of alcohol prescription or non prescription drugs might i...

Страница 5: ...n using a vessel without a maximum line 1 Place the food product on the holder 2 Place the food product and holder into the empty vessel 3 Fill the vessel with water just until the food product is com...

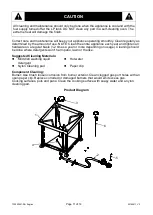
Страница 6: ...ected and removed from the appliance Cylinder must be stored outdoors out of the reach of children and must not be stored in a building garage or any other enclosed area LP Tank The LP tank used with...

Страница 7: ...ean paint brush and 50 50 soap and water solution Use mild soap and water Do not use household cleaning agents Damage to gas train components can result Brush soapy solution onto all metal seams and e...

Страница 8: ...em of a camper or trailer or motor home The pressure regulator and hose assembly supplied with the appliance must be the one used Replacement pressure regulator and hose assemblies must be those speci...

Страница 9: ...d flame height 8 When finished using the cooker turn off gas the cylinder valve first It will take a few second for the fire to go out and for the propane gas to bleed from the hose and regulator asse...

Страница 10: ...prevent a blockage and ensure full heat output clean and inspect burner tube often once or twice a month NOTE Water or air pressure will not normally clear a spider web Steps for Cleaning the Burner...

Страница 11: ...d dish washing liquid detergent Hot water Nylon Cleaning pad Paper clip Component Cleaning Burner Use brush loosen corrosion from burner exterior Clean clogged gas port holes with an open paper clip R...

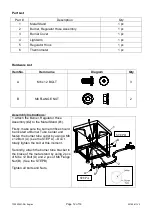
Страница 12: ...2 Assembly Instructions 1 Attach the Burner Regulator Hose Assembly 2 to the Metal Stand 1 Firstly make sure the burner orifice should be located at Burner Tube Center and fasten the burner tube outl...

Страница 13: ...rmometer clip so that at least 2 75 of thermometer tip is submerged in water The water should be filled into the vessel until the thermometer submerged at least 2 75 Reposition thermometer as needed f...

Страница 14: ...ER S OBLIGATION Manufacturer s liability shall be limited to the delivery of a good merchantable Product and if necessary the repair or replacement at manufacturer s option of any defective part or un...

Отзывы: