background image

14

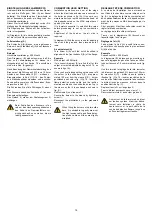
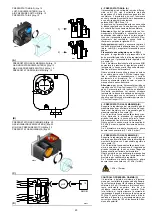
EINSTELLUNG DES FLAMMKOPFS

An dieser Stelle der Installation sind das Flamm-
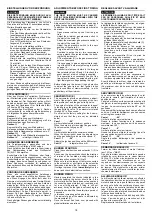
rohr  und  die  Muffe  gem.  Abb.  (A)  am  Kessel 
befestigt.  Die  Einstellung  des  Flammkopfs  ist 
daher  besonders  bequem,  sie  hängt  von  der 
Höchstbrennerleistung. 
Dieser  Wert  muß  daher  unbedingt vor  der  Ein-
stellung des Flammkopfs festgelegt werden.
Die  Regelung  des  Kopfes  auf  der  Luftzufuhr-
seite ist vorgesehen.

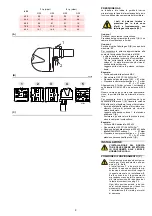
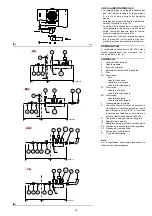
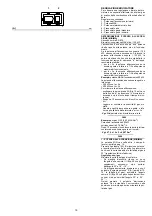
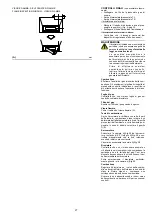
Im  Diagramm  (B)  die  Kerbe  ausfindig  machen, 
auf die Luft und Gas einzustellen sind, dann:

Lufteinstellung (A) 

Die  Schraube  4)(A)  drehen,  bis  die  gefundene 
Kerbe mit der Vorderfläche 5)(A) des Flansches 
zusammenfällt.

Beispiel

Höchstbrennerleistung = 500 Mcal/h.
Dem  Diagramm  (B)  wird  entnommen,  daß  die 
Gas-  und  Lufteinstellungen  für  diesen  Lei-
stungsbereich  auf  der  Kerbe  7,5  auszuführen 
sind, wie in Abb. (A) gezeigt.

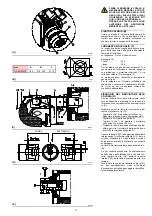
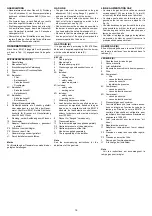
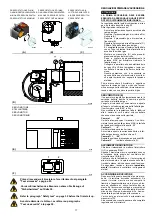
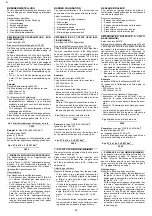
Nach  Beendung der  Flammkopfeinstellung  den 
Brenner auf die Führungen 3)(C) in ca. 100 mm 
Abstand  zur  Brennerkopf  4)(C)  -  einbauen  - 
Brennerposition  in  Abb.  (C)S.18  -  das  Fühler- 
und  Elektrodenkabel  einsetzen  und  anschlie-
ßend den Brenner bis zur Muffe schieben, Bren-
nerposition in Abb. (C).
Die  Schrauben  2)  auf  die  Führungen  3)  einset-
zen.
Den Brenner anhand den Schrauben 1) an dem 
Brennerkopf befestigen.
Das  Gelenk  6)  wieder  am  Skalensegment  5) 
einhängen.

Beim  Schließen  des  Brenners  ist  es 
ratsam,  das  Hochspannungskabel  und 
das  Kabel  des  Flammenfühlers  vor-
sichtig  nach  außen  zu  ziehen,  bis  sie 
leicht gespannt sind.

COMBUSTION HEAD SETTING

Installation  operations  are  now  at  the  stage 
where the blast tube and sleeve are secured to 
the boiler as shown in fig. (A). It is now a very 
simple matter to set up the combustion head, as 
this  depends  solely  on  the  MAX  output  devel-
oped by the burner.
It  is  therefore  essential  to  establish  this  value 
before  proceeding  to  set  up  the  combustion 
head.
Adjustment  of  the  head  on  the  air  side  is 
required

.

In diagram (B) find the notch to use for adjusting 
the  air  and  the  gas,  and  then  proceed  as  fol-
lows:

Air adjustment (A) 

Turn  screw  4)(A)  until  the  notch  identified  is 
aligned with the front surface 5)(A) of the flange.

Example

MAX output = 500 Mcal/h.
If  we  consult  diagram  (B)  we  find  that  for  this 
output, air must be adjusted using notch 7.5, as 
shown in figs. (A).

Once you have finished setting up the head, refit 
the  burner  to  the  slide  bars  3)(C)  at  approxi-
mately  100  mm  from  the  sleeve  4)(C)  -  burner 
positioned  as  shown  in  fig.  (C)p.18  -  insert  the 
flame  detection  probe  cable  and  the  ignition 
electrode cable and then slide the burner up to 
the  sleeve  so  that  it  is  positioned  as  shown  in 
fig. (C).
Refit screws 2) on slide bars 3).
Secure  the  burner  to  the  sleeve  by  tightening 
screw 1).
Reconnect  the  articulation  6)  to  the  graduated 
sector 5).

When fitting the burner on the two slide 
bars, it is advisable to gently draw out 
the high tension cable and flame detec-
tion  probe  cable  until  they  are  slightly 
stretched.

REGLAGE TETE DE COMBUSTION

A  ce  stade  de  l'installation,  buse  et  manchon 
sont fixés à la chaudière comme indiqué sur la 
fig. (A). Le réglage de la tête de combustion est 
donc particulièrement facile, et dépend unique-
ment  de  la  puissance  MAX  développée  par  le 
brûleur.
C'est pourquoi, il faut fixer cette valeur avant de 
régler la tête de combustion.
Le réglage de la tête côté air est prévu

.

Trouver  sur  le  diagramme  (B)  l'encoche  sur 
laquelle régler l'air et le gaz:

Réglage de l'air (A) 

Faire  pivoter  la  vis  4)(A)  jusqu'à  faire  corres-
pondre l'encoche trouvée avec le plan antérieur 
5)(A) de la bride.

Exemple

Puissance MAX = 500 Mcal/h.
Le diagramme (B) indique que pour cette puis-
sance le réglages du gaz et de l’air seront effec-
tués sur l’encoche 7.5, comme indiqué sur la fig. 
(A).

Une fois terminé le réglage de la tête, remonter 
le brûleur sur les guides 3)(C) à environ 100 mm 
du  manchon  4)(C)  -  brûleur  dans  la  position 
illustrée  fig.  (C)p.18  -  insérer  les  câbles  de  la 
sonde et de l'électrode et ensuite faire coulisser 
le  brûleur  jusqu'au  manchon,  brûleur  dans  la 
position illustrée fig. (C).
Replacer les vis 2) sur les guides 3).
Fixer le brûleur au manchon avec la vis 1).
Raccrocher la rotule 6) au secteur gradué 5).

Au moment de la fermeture du brûleur 
sur les deux guides, il faut tirer délica-
tement  vers  l'extérieur  le  câble  de 
haute  tension  et  le  petit  câble  de  la 
sonde de détection flamme, jusqu'à ce 
qu'ils soient légèrement tendus.

Содержание 882 T

Страница 1: ...ien Bruciatori di gas ad aria soffiata D Gas Gebl sebrenner GB Forced draught gas burners F Br leurs gaz air souffl Funzionamento bistadio progressivo o modulante Zweistufig gleitender oder modulieren...

Страница 2: ...Macchine LVD 2014 35 UE Direttiva Bassa Tensione EMC 2014 30 UE Compatibilit Elettromagnetica La qualit viene garantita mediante un sistema di qualit e management certificato secondo ISO 9001 2015 Di...

Страница 3: ...014 35 UE Niederspannungsrichtlinie EMC 2014 30 UE Elektromagnetische Vertr glichkeit Die Qualit t wird durch ein gem ISO 9001 2015 zertifiziertes Qualit ts und Managementsystem garantiert Erkl rung d...

Страница 4: ...achine Directive LVD 2014 35 UE Low Voltage Directive EMC 2014 30 UE Electromagnetic Compatibility The quality is guaranteed by a quality and management system certified in accordance with ISO 9001 20...

Страница 5: ...pareils Gaz MD 2006 42 CE Directive Machines LVD 2014 35 UE Directive Basse Tension EMC 2014 30 UE La qualit est garantie gr ce un syst me de qualit et de gestion certifi conforme ISO 9001 2015 D clar...

Страница 6: ...sono cos indicate 1 A Particolare 1 della figura A nella stessa pagina del testo 1 A p 8 Particolare 1 della figura A riportata a pagina 8 D INHALT TECHNISCHE ANGABEN Seite 2 Elektrische Daten 2 Brenn...

Страница 7: ...ext 1 A p 8 part 1 of figure A page number 8 F INDEX DONNEES TECHNIQUES page 4 Donn es lectriques 4 Description br leur 6 Emballage Poids 6 Encombrement 6 Equipement standard 6 Plage de puissance 8 Ch...

Страница 8: ...assima del bruciatore 3 Pressione sonora misurata nel laboratorio combustione del costruttore con bruciatore funzionante su caldaia di prova alla potenza massima La Potenza sonora misurata col metodo...

Страница 9: ...renners 3 Schalldruck gemessen im Verbrennungslabor des Herstellers bei laufendem Brenner am Pr fkessel bei H chstleistung Die Schallleistung wird mit der von der Norm EN 15036 vorgesehenen Free Field...

Страница 10: ...aximum burner output 3 Sound pressure measured in manufacturer s combustion laboratory with burner operating on test boiler and at maximum rated output The sound power is measured with the Free Field...

Страница 11: ...du br leur 3 Pression sonore mesur e dans le laboratoire de combustion du constructeur avec le br leur fonctionnant sur la chaudi re d essai la puis sance maximale La puissance sonore est mesur e gr...

Страница 12: ...arecchiatura elettrica con avvisatore luminoso di blocco e pulsante di sblocco 20 Un interruttore per funzionamento automatico manuale spento Un pulsante per aumento diminuzione potenza 21 Spine per i...

Страница 13: ...ation probe cable 24 Maximum gas pressure switch 25 Motor contact maker and thermal cutout with reset button 26 Engine protection Two types of burner failure may occur CONTROL BOX LOCK OUT if the cont...

Страница 14: ...ndo la norma EN 676 Riportiamo in B diametro e lunghezza della camera di combustione di prova Esempio Potenza 350 Mcal h diametro 50 cm lunghezza 1 5 m CALDAIE COMMERCIALI C L abbinamento bruciatore c...

Страница 15: ...combustion chamber Example Output 350 Mcal h diameter 50 cm length 1 5 m COMMERCIAL BOILERS C The burner boiler combination does not pose any problems if the boiler is CE approved and its combustion c...

Страница 16: ...abella RS 64 M MZ una potenza di 500 kW Questo valore serve come prima approssima zione la portata effettiva va misurata al conta tore Per conoscere invece la pressione del gas necessaria alla presa 1...

Страница 17: ...at the gas meter To calculate the required gas pressure at test point 1 B set the maximim output required from the burner operation find the nearest output value in the table for the burner in questio...

Страница 18: ...1 12 se non vi espressa richiesta del costruttore della caldaia FISSAGGIO DEL BRUCIATORE ALLA CALDAIA D Prima di fissare il bruciatore alla caldaia verifi care dall apertura del boccaglio se la sonda...

Страница 19: ...D Before securing the burner to the boiler check through the blast tube opening to make sure that the flame sensor probe and the ignition electrode are correctly set in position as shown in D Now det...

Страница 20: ...a far collimare la tacca trovata con il piano anteriore 5 A della flangia Esempio Potenza MAX bruciatore 500 Mcal h Dal diagramma B risulta che per questa potenza la regolazione dell aria va effettuat...

Страница 21: ...f the flange Example MAX output 500 Mcal h If we consult diagram B we find that for this output air must be adjusted using notch 7 5 as shown in figs A Once you have finished setting up the head refit...

Страница 22: ...dicato in tab C LEGENDA B 1 Condotto arrivo del gas 2 Valvola manuale 3 Giunto antivibrante 4 Manometro con rubinetto a pulsante 5 Filtro 6A Comprende filtro valvola di sicurezza regolatore di pressio...

Страница 23: ...essure gauge with pushbutton cock 5 Filter 6A Includes Filter working valve safety valve pressure adjuster 6C Includes safety valve working valve 6D Includes safety valve working valve 7 Minimum gas p...

Страница 24: ...ccendere il bruciatore opportuno regolare la rampa del gas in modo che l accen sione avvenga nelle condizioni di massima sicu rezza e cio con una piccola portata di gas SERVOMOTORE E Il servomotore re...

Страница 25: ...rofile cam and the gas butterfly valve The angle of rotation of the servomotor is equal to the angle on the graduated sector controlling the gas butterfly valve The servomotor rotates through 90 in 24...

Страница 26: ...scollegare la spina presa 23 A p 12 sul cavo della sonda di ionizzazione il bruciatore si accende e va in blocco dopo il tempo di sicu rezza Eseguire 10 accensioni con blocchi consecu tivi Leggere al...

Страница 27: ...e quantity of gas burned This quantity must be equal to or lower than the quantity given by the formula for ts 3s Vg Qa max burner output x n x ts 3600 Example for gas G 20 9 45 kWh Sm3 ignition outpu...

Страница 28: ...ndicazioni date a pag 16 Se bisogna ridurla diminuire la pressione del gas in uscita e se gi al minimo chiudere un po la valvola di regolazione VR Se bisogna aumentarla incrementare la pres sione del...

Страница 29: ...livery needs to be increased increase outlet gas pressure Adjusting air delivery Progressively adjust the end profile of cam 4 A by turning the cam adjustment screws as they appear through the access...

Страница 30: ...in senso antiorario Attenzione per norma il pressostato aria deve impedire che il CO nei fumi superi l 1 10 000 ppm Per accertarsi di ci inserire un analizza tore della combustione nel camino chiudere...

Страница 31: ...ressure switch after having performed all other burner adjustments with the maximum gas pressure switch set to the end of the scale B With the burner operating at MAX output reduce the adjustment pres...

Страница 32: ...o di avviamento FUNZIONAMENTO A REGIME A Bruciatore senza il kit per funzionamento modulante Terminato il ciclo di avviamento il comando del servomotore passa al termostato pressostato TR che controll...

Страница 33: ...emperature control point C The control box continues however to check that the flame is present and that the air pres sure switch is in the correct position If the temperature or pressure is low and t...

Страница 34: ...icheranno i punti dove pi attenta dovr essere l operazione di manu tenzione Fughe di gas Controllare che non vi siano fughe di gas sul condotto contatore bruciatore Filtro del gas Sostituire il filtro...

Страница 35: ...er Gas filter Change the gas filter when it is dirty Flame inspection window Clean the flame inspection window A Combustion head Open the burner and make sure that all compo nents of the combustion he...

Страница 36: ...venire secondo le fasi seguenti Avvio del motore del ventilatore per la pre ventilazione Esecuzione del controllo di tenuta valvole gas se previsto Completamento della pre ventilazione Raggiungimento...

Страница 37: ...with a burner start up attempt The starting cycle should take place with the fol lowing phases Starting of the fan motor for the pre purging Control of the gas valve leak detection if ap plicable Comp...

Страница 38: ...250 000 cicli di funzionamento Valvole gas tipo so lenoide 10 anni o 250 000 cicli di funzionamento Pressostati 10 anni o 250 000 cicli di funzionamento Regolatore di pressione 15 anni Servomotore ca...

Страница 39: ...lenoid 10 years or 250 000 operation cycles Pressure switches 10 years or 250 000 operation cycles Pressure adjuster 15 years Servomotor electronic cam if present 10 years or 250 000 operation cycles...

Страница 40: ...tore Ruotarlo come in figura ed infilare nel foro di una delle due guide la copiglia 9 in modo che il bruciatore rimanga in quella posizione A questo punto possibile estrarre il distributore del gas 7...

Страница 41: ...y back Turn the burner as shown in the figure and fit the split pin 9 into one of the slide bar holes so that the burner remains in position Now extract the gas distributor 7 after having removed the...

Страница 42: ...si avvia e poi si arresta in blocco Pressostato aria non commuta per pressione aria insufficiente 15 Pressostato aria mal regolato Regolarlo o sostituirlo 16 Tubetto presa pressione del pressostato os...

Страница 43: ...interruttori Controllare collega menti 39 Telecomando limite o di sicurezza aperto Regolarlo o sostituirlo 40 Fusibile di linea interrotto Sostituirlo 41 Apparecchiatura elettrica difettosa Sostituirl...

Страница 44: ...ltung Luftdruckw chter schaltet nicht um weil Luftdruck nicht ausreichend 15 Luftdruckw chter falsch eingestellt Einstellen oder auswechseln 16 Leitung der Druckentnahmestelle des Druckw chters versto...

Страница 45: ...Sicherheitsfernsteuerung offen Einstellen oder auswechseln 40 Leitungssicherung unterbrochen Auswechseln 41 Defektes Steuerger t Auswechseln 42 Kein Gas Die handbet tigten Ventile zwischen Z hler und...

Страница 46: ...he burner switches on but then stops in lockout Air pressure switch inoperative due to insufficient air pressure 15 Air pressure switch incorrectly adjusted Adjust or replace 16 Pressure switch pressu...

Страница 47: ...pen Adjust or replace 40 Line fuse blocked Replace 41 Defective control box Replace 42 No gas supply Open the manual valves between contactor and train 43 Mains gas pressure insufficient Contact your...

Страница 48: ...ression air insuffisante 15 Pressostat air mal r gl R gler ou remplacer 16 Tube de prise de pression du pressostat obstru Nettoyer 17 T te mal r gl e R gler 18 Haute pression dans le foyer Raccorder l...

Страница 49: ...rique Fermer interrupteurs Contr ler raccorde ments 39 T l commande de limite ou de s curit ouverte R gler ou remplacer 40 Fusible de ligne interrompu Remplacer 41 Coffret de s curit d fectueux Rempla...

Страница 50: ...termico I bruciatori RS 64 M MZ sono stati omologati per funzionamento intermittente Ci significa che devono fermarsi per Norma almeno 1 volta ogni 24 ore per permettere all apparecchiatura elettrica...

Страница 51: ...ersorgung 230 V betr gt den Motoranschlu Stern oder Dreieckschaltung und die Einstellung des berstromausl sers ver ndern Die Brenner RS 64 M MZ sind f r intermittierenden Betrieb typgepr ft Das bedeut...

Страница 52: ...f 400V If 230V power supply is used change the motor connection from star to delta and change the setting of the thermal cutout as well The burners RS 64 M MZ have been approved for intermittent opera...

Страница 53: ...limentation est 230V changer la connexion du moteur d toile triangle et le r glage du relais thermique Les mod les RS 64 M MZ ont t homologu s pour fonctionner de fa on intermittente Cela veut dire qu...

Страница 54: ...nti elettrici a cura dell installatore Elektroanschlusse vom Installateur auszuf hren Electrical connections set by installer Raccordements lectriques par l installateur 3 Schema funzionale Betriebssc...

Страница 55: ...0 1 2 2 2 2 3 33 3 4 3 3 4 5 3 3 3 6 5 5 5 5 3 3 4 2 2 7 5 8 9 8 9 5 8 9 5 5 5 2 3 2 2 7 5 8 A 08 8 B C C D D D E D F D D D D D D D D D D E D D D D E D F D D D D D D D D D D E D G 3 48...

Страница 56: ...49...

Страница 57: ...0 0 0 1 2 2 3 4 4 4 2 4 4 5 67 4 8 8 8 9 9 9 9 9 9 9 9 9 9 9 9 9 9 9 8 50...

Страница 58: ...0 1 2 0 0 0 3 4 5 06 0 0 7 0 7 0 7 8 7 2 7 7 7 7 7 07 0 7 67 6 6 0 7 7 8 7 51...

Страница 59: ...XTM Terra mensola X4 Spina 4 poli X5 Spina 5 poli X6 Spina 6 poli X7 Spina 7 poli ZEICHENERKL RUNG SCHEMEN A Steuerger t B Entst rungsfilter BB Komponenten an Bord der Brenner BC Komponenten an Bord...

Страница 60: ...elf earth X4 4 pin plug X5 5 pin plug X6 6 pin plug X7 7 pin plug L GENDE SCH MAS ELECTRIQUE A Coffret de s curit B Protection contre parasites radio BB Composants sur br leurs BC Composants sur chaud...

Страница 61: ...4 KIT TESTA LUNGA codice 3010427 KIT CONTATTI PULITI codice 3010419 KIT POTENZIOMETRO PER INDICAZIONE POSIZIONE DI CARICO codice 3010109 KIT INTERFACE ADAPTER RMG TO PC codice 3002719 RAMPE GAS DA ABB...

Страница 62: ...lnr 3010427 KIT POTENTIALFREIE KONTAKTEN Bestellnr 3010419 KIT POTENTIOMETER ZUR ANZEIGE DER F LLPOSITION Bestellnr 3010109 KIT INTERFACE ADAPTER RMG TO PC Bestellnr 3002719 MIT DEM BRENNER ZU KOMBINI...

Страница 63: ...14 KIT LONG HEAD code 3010427 CLEAN CONTACTS KIT code 3010419 POTENTIOMETER KIT FOR THE INDICATION OF LOAD POSITION code 3010109 KIT INTERFACE ADAPTER RMG TO PC code 3002719 GAS TRAINS TO COUPLE WITH...

Страница 64: ...Con riserva di modifiche nderungen vorbehalten Subject to modifications Sous r serve de modifications RIELLO S p A I 37045 Legnago VR Tel 39 0442 630111 http www riello it http www riello com...

Отзывы: