13
ASSEMBLY
In addition to the nut wrench and hex wrench supplied with
your saw, no tools are needed for assembly.
Stand Set-Up
CAUTION:
To avoid serious injury when lifting the saw, bend your
knees and lift with your legs, not with your back.
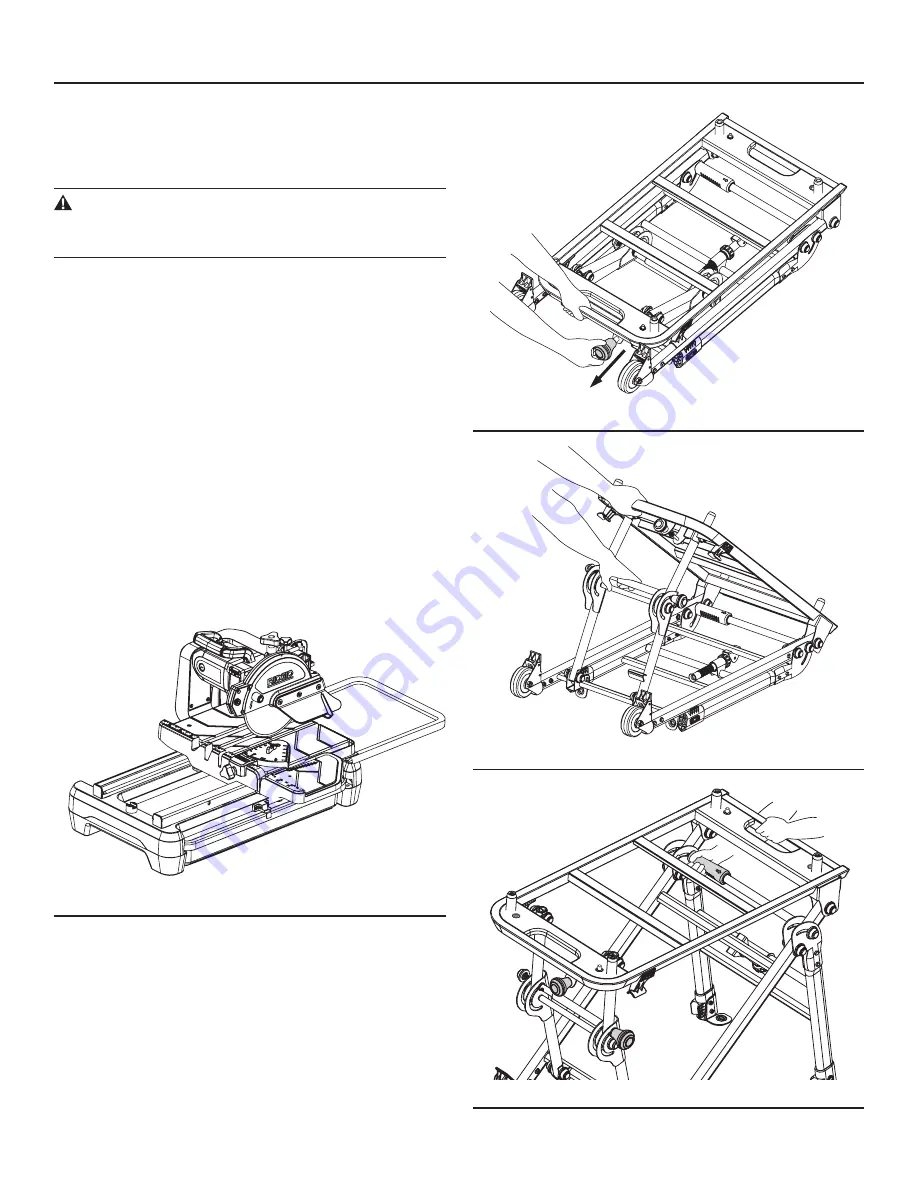
The saw can be placed on a flat surface for cutting opera-
tions without using the stand. (Fig. 4)
When using the stand, observe the following instructions:
To Open the Stand:
1. Place the folded stand on a flat surface, as shown in
Fig. 5.
. Pull out the lock knob, then lift the handle (Fig. 5).
3. Continuing to lift the handle, pull the crossbar out until
you hear the legs lock in place (Fig. 6).
4. On the opposite end of the stand, locate the handle and
the orange lock sleeve on the crossbar, and note the
arrow on the lock sleeve. Lift the handle and move the
lock sleeve in the direction of the arrow on the sleeve.
Allow the legs to fall (Fig .7), and then release the sleeve.
Hold the lift handle, and pull the lower crossbar until you
hear the legs lock into place.
Fig. 4
Fig. 5
Fig. 6
Fig. 7
Содержание WTS2000L
Страница 39: ...39 Exploded Drawings and parts lists WTS2000L Tile Saw...
Страница 41: ...41 Notes...
Страница 42: ...42 Notes...
Страница 43: ...43 Notes...


