background image

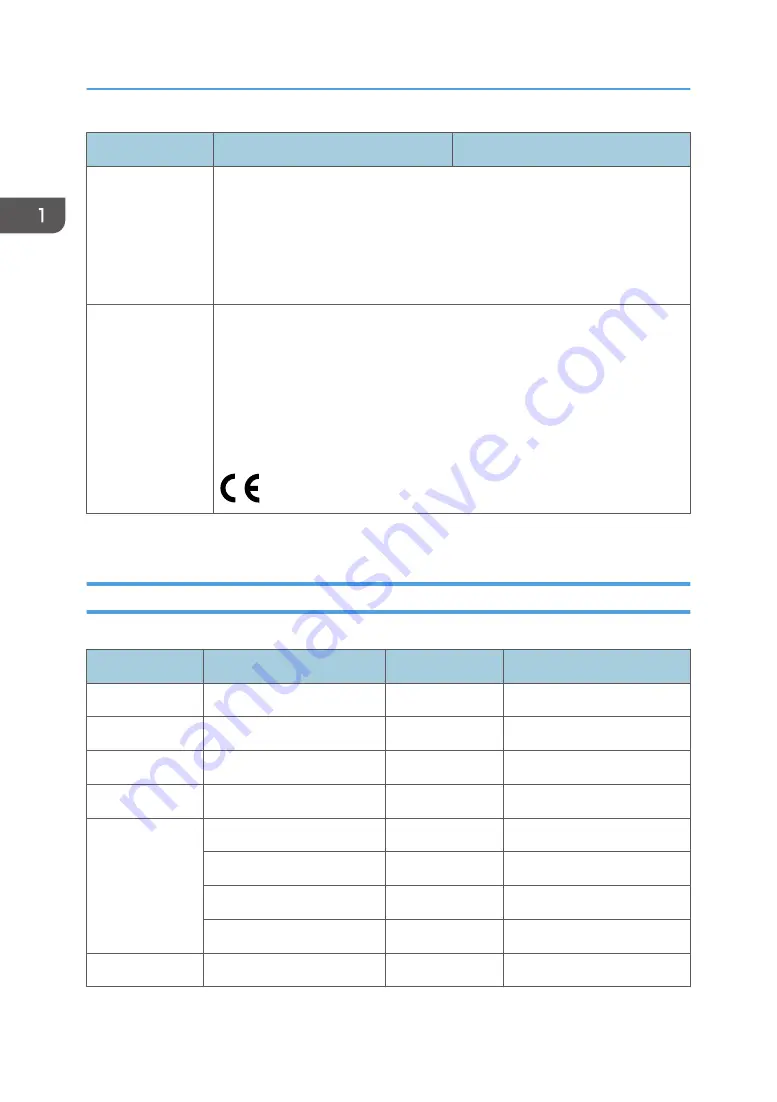
PJ X5360N

PJ WX5350N

Environmental
Considerations

Operational Temperatures : 41° to 104°F (5° to 40°C),
(ECO mode selected automatically at 95°F to 104°F/35°C to 40°C)
20% to 80% humidity (non-condensing)
Storage Temperatures : 14° to 122°F (-10° to 50°C),
20% to 80% humidity (non-condensing)

Regulations

UL/C-UL Approved (UL 60950-1, CSA 60950-1)
Meets DOC Canada Class B requirements
Meets FCC Class B requirements
Meets AS/NZS CISPR.22 Class B
Meets EMC Directive (EN55022, EN55024, EN61000-3-2, EN61000-3-3)
Meets Low Voltage Directive (EN60950-1, TÜV Approved)

The specifications are subject to change without notice.

List of Supported Signals

Analog RGB

Signal

Resolution ( dots )

Aspect Ratio

Refresh Rate ( Hz )

VGA

640 × 480

4 : 3

60/72/75/85/iMac

SVGA

800 × 600

4 : 3

56/60/72/75/85/iMac

XGA

1024 × 768 

*1

4 : 3

60/70/75/85/iMac

XGA+

1152 × 864

4 : 3

60/70/75/85

WXGA

1280 × 768 

*2

15 : 9

60

1280 × 800 

*2

16 : 10

60

1360 × 768 

*3

16 : 9

60

1366 × 768 

*3

16 : 9

60

Quad-VGA

1280 × 960

4 : 3

60/75

1. Appendix: Specifications

6

Содержание PJ WX5350

Страница 1: ...Model Rigel PJ1 nx nw Machine Codes Y015 Y016 Field Service Manual 6 January 2012...

Страница 2: ......

Страница 3: ...g servicing such as the cabinet chassis and parts are labelled with individual safety instructions Carefully comply with these instructions and all precautions in the instruction manual 2 BE CAREFUL O...

Страница 4: ...returned to their original positions Also examine if the serviced sections and peripheral areas have suffered from any deterioration as a result of servicing In addition check insulation between exter...

Страница 5: ...e or Refer to Screw Connector Trademarks Microsoft and Windows are registered trademarks of Microsoft Corporation in the United States and or other countries Other product names used herein are for id...

Страница 6: ...equirements 19 Fire and Shock Precautions 19 3 Replacement and Adjustment Cautions for Maintenance Service 25 Method of starting the set without TOP COVER and LAMP COVER 25 Special Tools 28 Parts Repl...

Страница 7: ...zation plate Contrast adjustment 73 Electrical Adjustment 76 Procedures for the replacement of the PCB Main Ass y 77 Outline of adjustment procedules 77 PC control software for service 78 Model Specif...

Страница 8: ...or 119 Status Indicator 119 Lamp Indicator 120 Over Temperature Protection 121 Service Mode 122 List of functions 122 Mode changeover 122 Expert mode 122 Service mode 123 How to withdraw from the mode...

Страница 9: ...vice Information Reset 136 Contents of Error Log Page1 Display 137 Status Columns 137 PJ Usage Columns 138 TEMP Columns 138 Other Columns 138 Contents of Error Log Page2 Display 139 TEMP Columns 139 L...

Страница 10: ...8...

Страница 11: ...1 Product Information Specifications See Appendices for the following information General Specifications 9...

Страница 12: ...Cover 2 Ventilation outlet 3 Lens Cover 4 Lens 5 Adjustable Tilt Foot Lever 6 Adjustable Tilt Foot 7 Controls 8 Focus Lever 9 Zoom Lever 10 Lens Shift Dial Vertical 11 Ventilation inlet Filter Cover...

Страница 13: ...12 Remote Sensor Rear 1 Port Cover for USB Wireless LAN Unit 2 Monaural Speaker 3 Terminal Panel 4 AC Input 5 Remote Sensor 6 Built in Security Slot 7 Security chain opening 8 Rear Foot Overview 11...

Страница 14: ...trapezoid in the vertical direction 2 Enter Button Proceeds to the next hierarchical menu in the currently displayed on screen menu Applies the selected item while the confirmation message is display...

Страница 15: ...ntly displayed on screen menu When the cursor is placed over the main menu the menu closes When a confirmation message appears the operation is canceled 8 Eco Button Displays the screen for selecting...

Страница 16: ...DIN 4 Pin 8 Computer 1 Audio In Mini Jack Stereo Mini 9 Computer 1 In Component Input Connector Mini D Sub 15 Pin 10 Audio Out Mini Jack Stereo Mini 11 PC Control Port D Sub 9 Pin 12 Monitor Out Comp...

Страница 17: ...ower button once displays the power off confirmation message Pressing the Power button a second time turns the projector off standby 3 Power On Button Confirm that the projector is in standby the Powe...

Страница 18: ...menu for setting or adjusting a variety of items 12 Enter Button Proceeds to the next hierarchical menu in the currently displayed on screen menu Applies the selected item while the confirmation mess...

Страница 19: ...the computer mouse remote mouse when the machine is connected to a computer via a USB cable 25 Page Button 1 Used to switch the viewer between thumbnail views This button is also used when the machine...

Страница 20: ...1 Product Information 18...

Страница 21: ...nd a wall Do not try to touch the ventilation outlet on the left front when seen from the front as it can become heated while the projector is turned on and immediately after the projector is turned o...

Страница 22: ...other soft materials such as rugs Do not heat the power cord Do not handle the power plug with wet hands Turn off the projector unplug the power cord and have the projector serviced by a qualified ser...

Страница 23: ...igned correctly Do not use new and old batteries together or use different types of batteries together Dispose of used batteries according to your local regulations Note for US Residents The lamp in t...

Страница 24: ...altitudes approximately 5500 feet 1600 meters or higher can shorten the life of optical components such as the lamp Safety Labels of This Machine 1 Do not look into the lens while the projector is on...

Страница 25: ...Installation Requirements 23...

Страница 26: ...2 Installation 24...

Страница 27: ...rted if the LAMP COVER and TOP COVER are left removed This is because the Lamp Cover switch can be turned OFF only if the LAMP COVER is removed In addition the PCB Shutter lens cover is installed on t...

Страница 28: ...VER SWITCH ON by PUSH D Insert the carton 3 Insert the carton or cardboard paper folded in Character V in the right side of the Lamp Cover switch Insert it along the Lamp Cover switch 4 Connect the PC...

Страница 29: ...y should be mounted first Then the LAMP COVER can be mounted If the installation work is carried out in the state that the LAMP COVER is mounted on the TOP COVER the Lamp Cover switch may be damaged b...

Страница 30: ...B 3 Y0135214 Extension connector 16P For Power supply POPW 500mm POWER SUPPLY DC 1 Y0155209 Extension connector PWB 16P For Power supply POWER SUPPLY DC 1 Y0155210 Extension connector 5P For Power sup...

Страница 31: ...Y0135204 Extension connector 2P For THERMISTOR POTH E POTH I 900mm 2 Y0135201 Extension connector PWB 2P For THERMISTOR POTH E POTH I 2 Y0135202 SPACER RL2 T0 1 PB52 Spacer for CLG CLB RL2 adjustment...

Страница 32: ...he PWB Let the embossed part framed part in blue shown below fall down in the direction of the red arrow The embossed pat for fixing the FFC cable is fragile Handle it with care when installing or rem...

Страница 33: ...Parts Replacement Lamp Unit 1 Loosen the screw and remove the Lamp cover 1 2 Loosen the screw and remove the Lamp unit 2 Parts Replacement 31...

Страница 34: ...Filters 1 Remove the Filter cover 2 Remove the Filters 3 Replacement and Adjustment 32...

Страница 35: ...the holder Port Cover for USB Wireless LAN Unit 1 Loosen the screw and remove the Port cover for USB wireless LAN unit 1 Top Cover The PCB Shutter and PCB Main Ass y mounted on the inside of the top...

Страница 36: ...top cover make sure to keep the lens cover open It might be difficult to remove the cover due to projections inside the chassis Be careful not to damage the cover or other parts when removing the cov...

Страница 37: ...There is a cable connecting the TopCover to the main unit Exercise care when removing the TopCover PCB Shutter 1 Top cover p 33 2 Remove the PCB Shutter 1 1 Parts Replacement 35...

Страница 38: ...Rear Panel and Speaker 1 Top cover p 33 3 Replacement and Adjustment 36...

Страница 39: ...2 Remove the Main board unit 6 15 3 Remove the screw 1 4 Remove the bracket A 3 Parts Replacement 37...

Страница 40: ...nt When replacing the PCB Main Ass y p 76 Please do the Copying of all data before removing the PCB Main Ass y 1 PCB Main Ass y p 36 2 Remove the PCB Network 6 PCB Network Keep the PCB Network away fr...

Страница 41: ...en assembling the main board align the position of the PCB Main Ass y and PCB Network on board connectors and press the portion marked A to fasten them securely Lamp Fan 1 Rear Panel and Speaker p 36...

Страница 42: ...2 Remove the Lamp fan unit 2 3 Remove the Lamp fan 2 When assembling the lamp fan pay careful attention to where the bracket is inserted 3 Replacement and Adjustment 40...

Страница 43: ...PT Base After replacing the OPT Base Require the Software adjustment and Adjustment of the optical axis 1 PCB Main Ass y p 38 2 Remove the Lens holder top 4 3 Remove the OPT Base 2 Parts Replacement 4...

Страница 44: ...zoom and focus levers use the same parts These parts can be used interchangeably 2 Place the lens cover over the OPTBase and screw it into place A Zoom ring B Foucus ring Before placing the lens cove...

Страница 45: ...3 Align the protrusion of the zoom lever with the notch on the zoom ring 4 With the lever inclined on the engine side push in the lens side until you hear it snap Parts Replacement 43...

Страница 46: ...5 In the same way install the focus lever IRIS Unit 1 PCB Main Ass y p 38 3 Replacement and Adjustment 44...

Страница 47: ...2 Remove the barrier 2 3 Remove the IRIS unit 2 When removing or installing the IRIS Unit be careful not to damage the Integrator PS Converter 1 Remove the IRIS unit p 44 Parts Replacement 45...

Страница 48: ...2 Remove the Integrator unit 1 3 Remove the PS converter 1 LCD Fan 1 1 Remove the Lamp fan p 39 2 Remove the OPT Base p 41 3 Remove the IRIS unit p 44 3 Replacement and Adjustment 46...

Страница 49: ...4 Remove the Engine unit 4 5 Remove the Lens holder bottom 2 6 Remove the duct 3 Parts Replacement 47...

Страница 50: ...7 Remove the LCD fan unit 4 8 Remove the LCD fan 2 LCD Fan 2 1 Remove the LCD fan unit p 46 2 Remove the LCD fan 2 2 3 Replacement and Adjustment 48...

Страница 51: ...PCB Remocon 1 Remove the LCD fan unit p 48 2 Remove the PCB remocon A When assembling the board properly insert the PCB Remocon into the notch Parts Replacement 49...

Страница 52: ...Intake Temp Sensor 1 Top cover p 33 2 Remove the intake temp sensor A 1 Exhaust Temp Sensor 1 Top cover p 33 2 Remove the Exhaust temp sensor 1 3 Replacement and Adjustment 50...

Страница 53: ...Exhaust Fan 1 Remove the Exhaust temp sensor p 50 2 Remove the Exhaust fan cover 2 Parts Replacement 51...

Страница 54: ...Exhaust fan 4 Remove the rubber buffer The rubber buffer is reused when replacing parts Handle it carefully Thermostat 1 Remove the Lamp fan p 39 2 Remove the Exhaust fan cover p 51 3 Replacement and...

Страница 55: ...3 Remove the bracket A 2 4 Remove the screw 1 5 Remove the barrier Parts Replacement 53...

Страница 56: ...emove the bracket 2 7 Remove the pin A and Thermostat When assembling the projector position the print side of the Thermostat to face you Firmly insert the pin all the way 3 Replacement and Adjustment...

Страница 57: ...PSU Fan 1 Remove the Exhaust fan cover p 51 Parts Replacement 55...

Страница 58: ...emove the bracket 2 3 Remove the PSU fan A Power Supply Ballast 1 Remove the PSU Fan p 55 2 Remove the Power supply ballast 3 2 Power Supply DC 1 Remove the Lamp fan p 39 3 Replacement and Adjustment...

Страница 59: ...2 Remove the Power Supply Ballast p 56 3 Remove the bracket A 2 4 Remove the screw 1 Parts Replacement 57...

Страница 60: ...5 Remove the barrier 6 Remove the bracket 2 7 Remove the bracket A 3 8 Remove the Power supply DC 4 1 3 Replacement and Adjustment 58...

Страница 61: ...Bottom Cover 1 Remove the LCD fan unit p 46 2 Remove the Thermostat p 52 3 Remove the Power supply DC p 56 Parts Replacement 59...

Страница 62: ...able below Adjustment needed Need checking Adjustment parts Disassembly replacement of parts Polarizing parts OPT BASE R G B RL2 adjustments CLG adjustments CLB adjustments POLARIZER R SASSY POLARIZER...

Страница 63: ...the area enclosed by the blue circle in the figure Polarizer G PJ X5360N 1 Remove the PCB Main Ass y p 38 2 Remove the Polarizer G A 1 B Make sure to note the direction in which the Polarizer G is set...

Страница 64: ...CB Main Ass y p 38 2 Remove the Filter G A 1 3 Remove the Polarizer G A 1 Polarizer G No need to adjust filter Insertion and removal of the polarizing plate is the same as PJ X5360N 3 Replacement and...

Страница 65: ...Make sure to note the direction in which the Polarizer R is set in the holder You will notice a mark in the area enclosed by the blue circle in the figure Optical Parts Adjustment Adjustments needed a...

Страница 66: ...w C Polarization plate R D Polarization plate fixing screw R E Polarization plate B F Polarization plate fixing screw B G CLB H CLB fixing screw I CLG J CLG Fixing screw K Polarization plate G L Polar...

Страница 67: ...H CLB fixing screw I CLG J CLG Fixing screw K Polarization plate G Filter G L Filter G fixing screw M Polarization plate fixing screw G Adjustment of the optical axis Shadow adjustment If the projecti...

Страница 68: ...To R G B LCD 40P E To BS 5P F To FAN POF5 3P G To TH E 2P H To FAN POF4 4P I To PCB Shutter 3P J To PS 16P K THERMOSTAT L To FAN POF3 4P M Turn the lamp switch ON Maintain the ON state by means of an...

Страница 69: ...extension connectors and Thermostat on the PCB Main Ass y that has been dislodged 3 Connect the respective connectors of the set with the extension connector PWB EXPERT Test Pattern Replacement of Opt...

Страница 70: ...tern all white signal Set the machine to EXPERT or SERVICE mode then select SETUP to display TEST PATTERNDISPLAY 5 Make shadow adjustments 6 After the completion of adjustments recover the original st...

Страница 71: ...adjustments are carried out from the LCD panel this margin cannot be seen directly Therefore try to move the shadow until its top bottom right or left part appears By doing so examine how much shadow...

Страница 72: ...rtical The holder RL2 is held at the height of only one spacer RL2 T1 0 Horizontal Bosses of Cover OPT are located in the right and left holder RL2 holes each in the center position CLB Vertical The h...

Страница 73: ...can be reduced Horizontal direction 1 Hold the handle part of the holder CLG by hand and move the holder to the right and left in order to adjust the shadow margin so that it is horizontally equalized...

Страница 74: ...Vertical direction 1 Sufficiently loosen the CLB fixing screw 1 position 2 Change the thickness of the spacers RL2 and make adjustments so that the shadow margin becomes uniform vertically Try to decr...

Страница 75: ...r B Move the holder CLB horizontally and eliminate the horizontal shadow Equally balanced in horizontal directions Make adjustments until the portions in yellow color are eliminated horizontally and u...

Страница 76: ...P E To BS 5P F To FAN POF5 3P G To TH E 2P H To FAN POF4 4P I To PCB Shutter 3P J To PS 16P K THERMOSTAT L To FAN POF3 4P M Turn the lamp switch ON Maintain the ON state by means of an adhesive tape N...

Страница 77: ...sion connector PWB 3 Start the set Display an internal pattern all black signal Select Install and Setup on the menu screen and set the background at Black Background 4 Adjust the polarization plate 5...

Страница 78: ...del number Data Read Write All Data Flicker Data VT Data Uniformity Data Color Correction Data Wall Collor Data Usage Time Data Flicker adjustment Floor Ceiling Description of adjustment items Version...

Страница 79: ...t procedules Before the replacement of PCB Main Ass y 1 Copying of all data After the replacement of PCB Main Ass y 1 Data writing for each model is carried out Software PJUpgrader2vupf PJUpgrader2 2...

Страница 80: ...Usage Time data Personal computer setting intended to obtain the adjusting pattern screen outputs Personal computer s resolution frequency and the No of colors Make settings for VESA XGA 1024 768 60Hz...

Страница 81: ...1 Assure a condition that PJ and PC are connected through a serial cable and start the service adjustment software 2 Click Setup button to open the Setup window Electrical Adjustment 79...

Страница 82: ...When the adjustment described below from the procedure Replacement of the PCB Main Ass y Replacement of the OPT BASE and Miscellaneous is done click Adjust End button When adjustments of another set...

Страница 83: ...in standby to open the Data window According to 1 and 2 below follow the steps of All Data Read Write All Data mentioned here denote the respective factory adjusting data Flicker VT Uniformity Color C...

Страница 84: ...em in a file Check mark the All data and click Read button Name the file and save The procedure is done when a message box It completed is displayed In a certain faulty state data cannot be saved In s...

Страница 85: ...k Write button to select the saved file When a message Please Power Off Standby state is displayed make sure that the PJ Power is in standby then click OK button The procedure is done when a message b...

Страница 86: ...justment of Flicker Click Flicker button of the service software to open the Flicker Adjust window Make Flicker adjustments according to 1 3 below 1 Adjustment start Keeping the PJ power supply turned...

Страница 87: ...e Test Pattern box Adjust R scroll bar so that the flicker in the middle of the window becomes smallest Display Green raster signal by clicking Test G button in the Test Pattern box Adjust G scroll ba...

Страница 88: ...e middle of the window becomes smallest When flicker adjustment is done click SET button in the Data box to write the adjusted value When displaying Test pattern in case flicker is not clearly display...

Страница 89: ...s done SET is clicked the Floor Ceiling characters turn to red To restore the data to the state before the adjustment click RESET button The data will restore to the initial setting and the characters...

Страница 90: ...Click Usage Time button of the service software with the PJ Power in standby to open Usage Time Setting window Make Usage Time setup according to 1 below 3 Replacement and Adjustment 88...

Страница 91: ...age Time is changed the changed time will be displayed in the editor below To restore the time click RESET button It restores to the initial data When changing Usage Time Usage Time indicated in the m...

Страница 92: ...n closing the serial port Confirm if there is any application that occupies the serial port In case it occurs 2 or 3 times consecutively reboot the PC File format error Address error The data format o...

Страница 93: ...o be written _mdata bin 2 Initial setting of writing software COM port Set the COM port of used PC Baud rate Match the setting of the PJ Operation Procedure Prior to operation install the writing soft...

Страница 94: ...3 Release the MENU and EXIT keys when the Power LED blinks in green 3 Replacement and Adjustment 92...

Страница 95: ...et and PC are properly connected each other then press Flash button Message Do you start flash write is displayed 7 When Yes Y button is pressed writing is started Progress bar showing writing situati...

Страница 96: ...ing EDID data Outline software descriptions This is PC control software to rewrite EDID data of PCB Main Ass y supporting PJ X5360N WX5350N Equipment to be used and environment Equipment to be used ED...

Страница 97: ...folder and execute Rewrite procedure Make sure to follow the procedure below to rewrite the data After exchanging PCB Main Ass y first adjust PCB Main Ass y PCB Main Ass y adjustment Use PC control s...

Страница 98: ...d on Connect the PJ and the PC with a serial cable referring to 2 Equipment to be used and environment Then activate EDIDwriter Mode Select Flash Port Select the corresponding Com Port for the target...

Страница 99: ...yyyy Model xxx version Comparison Table of Model Names and EDID File Names of HDMI Model Name EDID File Name PJ X5360N X5360N_EDID_HDMI_V bin PJ WX5350N WX5350N_EDID_HDMI_V bin The asterisks of the f...

Страница 100: ...perly connected and then click Flash button Rewriting HDMI terminal EDID is started When writing is completed the message Write Finished will be displayed Click OK button to finish the procedure Rewri...

Страница 101: ...wer OFF for the PJ main unit AC source turned on Connect the PJ and the PC with a RGB cable referring to 2 Equipment to be used and environment Then activate EDIDwriter Mode Select Flash Port Set DDCA...

Страница 102: ...odel Name EDID File Name PJ X5360N X5360N_EDID_DSUB_V bin PJ WX5350N WX5350N_EDID_DSUB_V bin The asterisks of the fine name denote a version 3 Transferring to Data Writing Mode Turn the PJ Power ON an...

Страница 103: ...e PC image is displayed on the PJ at this time When writing is completed the message Write Finished will be displayed Click OK button to finish the procedure When the PJ is equipped with multiple D SU...

Страница 104: ...response from the PJ Check whether the PC and the PJ are connected through a serial cable There was a Nack response from the PJ Check the condition of PJ power supply and the baud rate Writing in the...

Страница 105: ...Check whether the PC and the PJ are connected through an RGB cable A wrong model is specified Check the model Procedure for writing of a serial number and a model number Software installation Electri...

Страница 106: ...that is saved in the directory C Program Files Projector Tools SN WRITER 3 In the specified format the model number and the serial number are entered in the column of A When the Write button is press...

Страница 107: ...re read out When the Read button is pressed the data read out of the projector are displayed in Column B in the specified format In regard to baud rate that is indicated in the above mentioned screen...

Страница 108: ...Procedures for the replacement of the OPT Base After the replacement of PCB Main Ass y 1 Flicker adjustments PC control software for service 3 Replacement and Adjustment 106...

Страница 109: ...jector via a wired or wireless LAN You can use PING to check whether the PC is successfully connected to the LAN 2 Select MENU INFO WIRED LAN or WIRESS LAN to check the IP address 3 Place the projecto...

Страница 110: ...itten successfully appears in the history section press the REBOOT button to restart the projector 9 To update multiple files repeat steps 5 to 7 for each file you want to update 10 Do not turn off th...

Страница 111: ...uter 1 In Computer 2 In HDMI analog analog digital Yes Yes Yes A A commercially available USB cable compatible with USB 2 0 specifications B HDMI cable not supplied Use High Speed HDMI Cable C Stereo...

Страница 112: ...yed back via a commercially available scan converter This is because the projector will process a video signal as a computer signal at the default setting In that case do the following When an image i...

Страница 113: ...been disconnected and then reconnected an image may not be correctly displayed Should this happen restart your PC HDMI input signal Disconnecting and connecting the HDMI cable may result in no pictur...

Страница 114: ...ni plug audio cable not supplied You can connect a separate external monitor to your projector to simultaneously view on a monitor the computer analog image you re projecting Daisy chain connection is...

Страница 115: ...supplied C Audio cable not supplied D Audio equipment E Audio cable not supplied Select the source name for its appropriate input connector after turning on the projector Input connector Input button...

Страница 116: ...to your VCR owner s manual for more information about your equipment s video output requirements An image may not be displayed correctly when a Video or S Video source is played back in fast forward o...

Страница 117: ...ark in the Component radio button Select the source name for its appropriate input connector after turning on the projector Input connector Input button on the projector cabinet Button on the remote c...

Страница 118: ...IN HDMI HDMI For users of audio video equipment with an HDMI connector Select Enhanced rather than Normal if HDMI output is switchable between Enhanced and Normal This will provide improved image cont...

Страница 119: ...put sound cannot be heard in the menu select HDMI SETTINGS AUDIO SELECT HDMI Connecting to a Wired LAN The projector comes standard with a LAN port RJ 45 which provides a LAN connection using a LAN ca...

Страница 120: ...Positive Negative polarity 1k Audio signal 0 5Vrms 22k or more RGB signal frequencies Horizontal sync frequency 15 100kHz Vertical sync frequency 50 120Hz Maximum resolution UXGA 1600 1200 HDMI digita...

Страница 121: ...t flashes The projector is getting ready to turn on Wait for a moment Blue long flashes Off Timer is enabled Steady light Blue The projector is turned on Orange NORMAL is selected for STANDBY MODE Red...

Страница 122: ...range cycles of 1 Network conflict Both the built in wired LAN and the wireless LAN cannot be connected to the same network at the same time To use both built in wired LAN and wireless LAN at the same...

Страница 123: ...e over temperature protector will automatically turn off the lamp with the Status indicator blinking 2 cycle On and Off Should this happen do the following Unplug the power cord after the cooling fans...

Страница 124: ...TEST PATTERN2 COLOR UNIFORMITY WHITE UNIFORMITY All white color unevenness adjustment function SYNCHRONIZE REF WHITE BALANCE KEYSTONE CONFIGURATION Horizontal adjustment MESSAGE CLEAR PANEL HOURS SET...

Страница 125: ...ach key in the order of HELP ENTER HELP ENTER HELP ENTER MENU for 3 seconds each Then a menu of ENTER PASSCODE is displayed Press the select keys in the order of ENTER Press the MENU key to display th...

Страница 126: ...on Clear Panel Hours is added to Reset Modification of processing for existing functions In the service mode the items to be initialized are increased for the All Data Reset Additional functions extra...

Страница 127: ...Earlier replacement is recommended according to the Instruction Manual The initial value after All Data Reset is ON Security functions Keyword setting only is required for security The memory card ca...

Страница 128: ...iled setup DESKTOP CONTROL UTILITY Detailed setup Network setup Wireless LAN Detailed setup simplified connections Network setup Wireless LAN Detailed setup easy access points Network setup Wireless L...

Страница 129: ...led setup simplified connections Baud rate Baud rate is selected for simplified connections Transmission output Transmission output is specified for simplified connections Network setup Wireless LAN D...

Страница 130: ...fied In the case of Initialize operation the initial value is recovered Network service SNMP Effective Effective Non Effective of SNMP is specified Network service PC control setup A port number is sp...

Страница 131: ...de Operation check It is possible to conduct a certain level of fault diagnosis in normal state of operation check Before removing the top cover check the indicator Factors related to starting Trouble...

Страница 132: ...e menu setup has been wrongly made 1 The Power is not ON even though the Power switch is pressed in the standby state POWER LED lit in orange and STATUS LED in green 2 Normal video display is not pres...

Страница 133: ...f the Expert Mode menu is effective as an examination program even at the time of input entry at the Video S Video terminal Power block If the power does not start Power LED is not lit Troubleshooting...

Страница 134: ...If the power does not start Power LED is not blue For Video The picture is not displayed correctly Com1 Com2 5 Troubleshooting 132...

Страница 135: ...For Audio Does not output sound from the speaker Troubleshooting Guide 133...

Страница 136: ...rror log screen The error log screen is displayed by long pressing the MENU button five seconds or more in user expert or service mode Service Information Page 1 User mode Expert mode Service mode Dis...

Страница 137: ...Service Information Page 2 User mode Expert mode Service mode Display of lamp voltage added Error Log 135...

Страница 138: ...Service Information Reset Not related to the menu mode 5 Troubleshooting 136...

Страница 139: ...D blinking twice Temperature error Bimetal error E2 2 Status LED blinking twice Temperature error Thermal error E3 1 Status LED blinking 3 times Power source error Nil E4 1 Status LED blinking 4 times...

Страница 140: ...of Suction Air Lamp Exhaust Air Ballast from left to right Other Columns Display of Service Menu only Display can differ according to the error phenomenon arising For Fan error Symbol consisting of 2...

Страница 141: ...in regard to Lamp Usage Filter Usage Displayed in the order of No of reset actions for Lamp Usage and No of reset actions for Filter Usage Cleared with All Data Reset from the Service menu Power ON OF...

Страница 142: ...ated exceeding the Service Power The present status of lamp ballast voltage is displayed Contents of Error Log Reset Display ALL DATA All Data Reset is executed according to the User Menu mode 5 Troub...

Страница 143: ...Model Rigel PJ1 Machine Codes Y015 Y016 Appendices 6 January 2012...

Страница 144: ...TABLE OF CONTENTS 1 Appendix Specifications General Specifications 3 List of General Specifications 3 List of Supported Signals 6 1...

Страница 145: ...2...

Страница 146: ...mm Lens Shift Vertical 0 0 5V 0 0 6V Lamp 265 W AC 195 W in ECO1 Light Output 2 3 4200 lumens 3500 lumens ECO1 75 ECO1 75 Contrast Ratio 3 full white full black 2000 1 Image Size Diagonal 25 300 inche...

Страница 147: ...Type B Color Reproduction 10 bit signal processing 1 07 billion colors VIEWER NETWORK Colors 16 7 million colors Compatible Signals Analog VGA SVGA XGA XGA WXGA WXGA SXGA SXGA UXGA 480i 480p 576i 576p...

Страница 148: ...copying of video data sent over a Digital Visual Interface DVI If you are unable to view material via the HDMI input this does not necessarily mean the projector is not functioning properly With the i...

Страница 149: ...B requirements Meets AS NZS CISPR 22 Class B Meets EMC Directive EN55022 EN55024 EN61000 3 2 EN61000 3 3 Meets Low Voltage Directive EN60950 1 T V Approved The specifications are subject to change wi...

Страница 150: ...60 Full HD 1920 1080 16 9 60 MAC 13 640 480 4 3 67 MAC 16 832 624 4 3 75 MAC 19 1024 768 4 3 75 MAC 21 1152 870 4 3 75 MAC 23 1280 1024 5 4 65 HDMI Signal Resolution dots Aspect Ratio Refresh Rate Hz...

Страница 151: ...3 16 9 50 Component Signal Resolution dots Aspect Ratio Refresh Rate Hz HDTV 1080p 1920 1080 16 9 50 60 HDTV 1080i 1920 1080 16 9 50 60 HDTV 720p 1280 720 16 9 50 60 SDTV 480p 720 480 4 3 16 9 60 SDTV...

Страница 152: ...ult is NORMAL for ASPECT To display these signals select 16 9 for ASPECT Sync on Green and Composite sync signals are not supported Signals other than those specified in the table above may not be dis...

Страница 153: ...MEMO 10...

Страница 154: ...MEMO 11...

Страница 155: ...MEMO 12 EN...

Отзывы: