background image

1. What You Can Do with This Machine

You can search for a description by what you want to do.

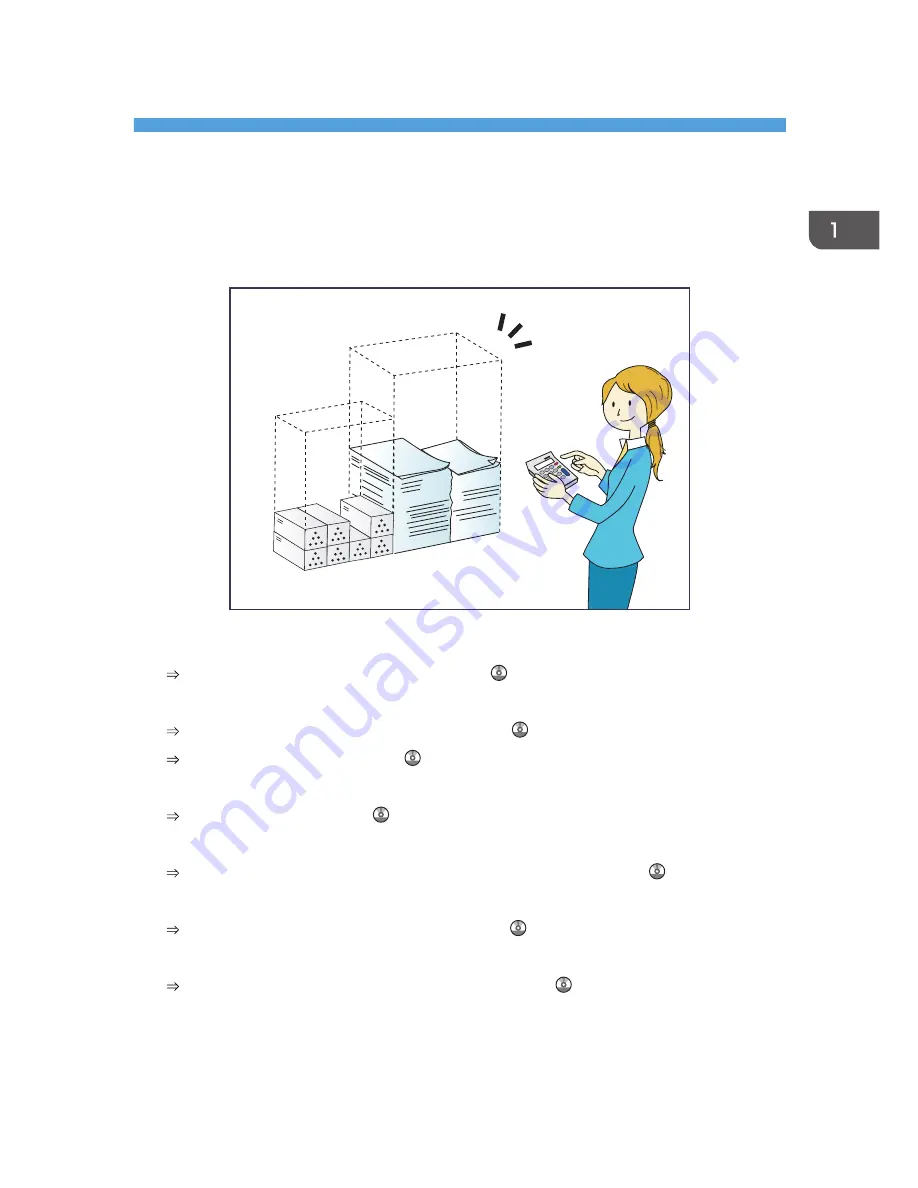
Saving Paper

BRL059S

Printing multi-page documents on both sides of sheets (Duplex Copy)

 See "Duplex Copying", Copy/ Document Server .

Printing multi-page documents and received faxes on a single sheet (Combine (Copier/Fax))

 See "Combined Copying", Copy/ Document Server .
 See "Combine Two Originals", Fax .

Printing received faxes on both sides of sheets (2 Sided Print)

 See "Two-Sided Printing", Fax .

Converting received faxes to electronic formats (Paperless Fax)

 See "Confirming/Printing/Deleting Received and Stored Documents", Fax .

Sending files from the computer without printing them (LAN-Fax)

 See "Sending Fax Documents from Computers", Fax .

Checking how much paper is saved ([Information] screen)

 See "How to Use the [Information] Screen", Getting Started .

9

Содержание MP 2001SP

Страница 1: ...First before using the machine For information not in this manual refer to the HTML PDF les on the supplied CD ROM Appendix Troubleshooting Adding Paper and Toner Web Image Monitor Document Server Sca...

Страница 2: ......

Страница 3: ...Installed 21 Using the Facsimile and the Scanner in a Network Environment 22 Preventing Information Leakage Security Functions 23 Monitoring and Setting the Machine Using a Computer 24 Preventing Unau...

Страница 4: ...Basic Procedure 57 Reducing or Enlarging Originals 59 Preset Reduce Enlarge 59 Zoom 60 Auto Reduce Enlarge 61 Duplex Copying 63 Specifying the Original and Copy Orientation 64 Combined Copying 66 One...

Страница 5: ...ing the Printer Driver Properties 94 Standard Printing 95 When Using the PCL 6 Printer Driver 95 Locked Print 96 Sending a Locked Print File 96 Printing a Locked Print File Using the Control Panel 96...

Страница 6: ...pass Tray Using the Printer Function 130 Loading Orientation fixed Paper or Two sided Paper 135 Recommended Paper Sizes and Types 138 Thick Paper 144 Envelopes 145 Adding Toner 149 Sending Faxes or Sc...

Страница 7: ...When Messages Are Displayed on Your Computer Screen 211 Messages Displayed When Using the Scanner Function 211 11 Appendix Trademarks 217 INDEX 219 5...

Страница 8: ...his symbol is located at the end of sections It indicates where you can find further relevant information Indicates the names of keys on the machine s display or control panels Indicates instructions...

Страница 9: ...cific Read the information under the symbol that corresponds to the region of your machine mainly Europe and Asia If the label contains the following your machine is a region A model CODE XXXX 27 29 2...

Страница 10: ...Names of Major Features In this manual major features of the machine are referred to as follows Auto Document Feeder ADF 8...

Страница 11: ...See Combined Copying Copy Document Server See Combine Two Originals Fax Printing received faxes on both sides of sheets 2 Sided Print See Two Sided Printing Fax Converting received faxes to electronic...

Страница 12: ...sic Procedure When Using Scan to Folder Scan Storing scan files on media See Basic Procedure for Saving Scan Files on a Memory Storage Device Scan Converting transmitted faxes to electronic formats an...

Страница 13: ...estination in the address book manually Scan Using Web Image Monitor to register destinations from a computer See Registering Internet Fax Destination Information Using Web Image Monitor Fax Downloadi...

Страница 14: ...t Functions Registering frequently used printing settings to the printer driver See Using One Click Presets Print Changing the initial settings of the printer driver to frequently used printing settin...

Страница 15: ...ily by pressing the shortcut icons You can display only the icons of functions and shortcuts that you use You can change the order of the function and shortcut icons For details about the features on...

Страница 16: ...to the machine rotates the original image by 90 degrees to match it with the copy paper See Reducing or Enlarging Originals Copy Document Server Copier functions such as Duplex and Combine allow you t...

Страница 17: ...ich have been previously sent from computers using the printer driver The following types of print jobs can be selected Sample Print Locked Print Hold Print and Stored Print See Storing Documents in t...

Страница 18: ...verter you can download documents stored in copier Document Server or printer mode to your computer For details about how to use the Document Server see Document Server Copy Document Server For detail...

Страница 19: ...e Monitor to check print delete retrieve or download documents using your computer Storing received documents See Confirming Printing Deleting Received and Stored Documents Fax Transmission You can se...

Страница 20: ...d then specify the destination You can also check the sent image data For details about the machine s settings see Network Settings Requirements Connecting the Machine System Settings For details abou...

Страница 21: ...net Fax or from computers Internet Fax Reception and Mail to Print See Receiving E mail by Internet Fax Mail to Print Fax Internet Fax compatible machines and computers that have e mail addresses can...

Страница 22: ...For details about the machine s settings see Network Settings Requirements Connecting the Machine System Settings 1 What You Can Do with This Machine 20...

Страница 23: ...chine and remote machine The procedure for sending faxes is as same as that of for the machine with the fax unit When a job has finished confirm results displayed on sending history or printed on repo...

Страница 24: ...ssion Function Fax See Basic Procedure When Using Scan to Folder Scan You can use this machine as a delivery scanner for the ScanRouter delivery software 1 Network delivery scanner You can save scan f...

Страница 25: ...of the machine as well as prevent machine settings from being changed without authorization By setting passwords you can prevent unauthorized access via the network You can erase or encrypt the data o...

Страница 26: ...which tray is running out of paper register information in the Address Book specify the network settings configure and change the system settings manage jobs print the job history and configure the a...

Страница 27: ...uipped with the Copy Data Security unit the machine beeps to notify users that unauthorized copying is being attempted If the document is copied on a machine without the Copy Data Security Unit the hi...

Страница 28: ...1 What You Can Do with This Machine 26...

Страница 29: ...he machine s vents Doing so risks fire caused by overheated internal components Front and left view CSL002 9 8 7 1 2 3 5 6 4 1 Exposure glass cover or ADF The illustration shows the ADF Lower the expo...

Страница 30: ...Control Panel 6 Internal Tray 1 Copied printed paper and fax messages are delivered here 7 Front cover Open to access the inside of the machine 8 Paper trays Load paper here The Type 1 model has one...

Страница 31: ...loading A4 81 2 11 or larger size paper in the bypass tray 6 Lower right cover Open this cover when a paper jam occurs 7 Lower paper tray right cover Open this cover when a paper jam occurs 8 Right co...

Страница 32: ...nals face down here 3 Ventilation holes Prevent overheating 4 Main power switch To operate the machine the main power switch must be on If it is off turn the switch on 5 Control panel See p 34 Guide t...

Страница 33: ...paper guides flush against the paper 4 Bypass tray Use to copy or print on thick paper OHP transparencies envelopes and label paper adhesive labels 5 Extender Pull this extender out when loading A4 8...

Страница 34: ...ginals 2 ADF Load a stack of originals here They will feed in automatically 3 Lower paper tray Holds up to 500 sheets of paper 4 Lower paper trays Consists of two paper trays Holds up to 1 000 sheets...

Страница 35: ...functions It also allows you to use the machine as a telephone 2 Lower paper tray Holds up to 500 sheets of paper 3 Lower paper trays Consists of two paper trays Holds up to 1 000 sheets of paper Each...

Страница 36: ...s are registered to the function keys as a factory default You can register often used functions programs and Web pages For details see Configuring function keys Getting Started 3 Display panel Displa...

Страница 37: ...where to order expendable supplies and where to call when a malfunction occurs You can also print these details See Checking Inquiry Using the User Tools Maintenance and Specifications 10 Simple Scree...

Страница 38: ...tus operational status of each function and current jobs You can also display the job history and the machine s maintenance information 18 Data In indicator facsimile and printer mode Flashes when the...

Страница 39: ...the language used on the display English is set as default 1 Press the User Tools Counter key CMR633 2 Press 3 Press language key until the language you want to display appears 4 Press the User Tools...

Страница 40: ...make copies For details about how to use the copy function see Copy Document Server 2 Document Server Press to store or print documents on the machine s hard disk For details about how to use the Docu...

Страница 41: ...Home screen Shortcut names of up to 32 characters can be displayed in a standard screen If the name of the shortcut is longer than 32 characters the 32nd character is replaced with Only 30 characters...

Страница 42: ...dministrator For details see Security Guide 3 Point to Device Management and then click Device Home Management 4 Click Edit Icons 5 Point to Icon can be added of the position that you want to add and...

Страница 43: ...3 Press Edit Home 4 Press Add Icon 5 Press Select Icon to Add 6 Press Program How to Use the Home Screen 41...

Страница 44: ...7 Press Copier Program 8 Select the program you want to add 9 Press Select Destination 10 Specify the position where Blank is displayed 2 Getting Started 42...

Страница 45: ...11 Press Exit 12 Press the User Tools Counter key Press on the upper right corner of the Select Destination screen to check the position on the simple screen How to Use the Home Screen 43...

Страница 46: ...Func Other functions number of prints Facsimile Transmission type memory transmission immediate transmission Select Destination from Address Book except for folder destinations Manual Entry TX Status...

Страница 47: ...es become the default settings which are displayed without pressing the Program key when modes are cleared or reset and after the machine is turned on See Changing the Default Functions of the Initial...

Страница 48: ...ed Sizes in Orig and Auto Reduce Enlarge in the initial display You can print various size copies onto one size of paper so they are easier to manage Thumbnail copy Specify Cmb 1 Side under Combine in...

Страница 49: ...Settings Scanned documents maintain much of the detail of the originals but the size of the data may be quite large Batch document scan Select Batch in Send Settings You can apply multiple scans to a...

Страница 50: ...above are just examples You can assign any name to a program according to your objectives Depending on your business details or the type of documents to be scanned registering a program cannot be reco...

Страница 51: ...ately after turning it on Doing so may result in damage to the hard disk or memory leading to malfunctions 1 Make sure the power cord is firmly plugged into the wall outlet 2 Push the main power switc...

Страница 52: ...amage to the hard disk or memory leading to malfunctions Do not turn off the power while the machine is in operation Doing so may result in damage to the hard disk or memory leading to malfunctions Do...

Страница 53: ...administrator for the Login User Name Login Password and User Code For details about user authentication see Security Guide User Code to enter on User Code Authentication is the numerical value regis...

Страница 54: ...ng Out Using the Control Panel This section explains the procedure for logging out the machine when Basic Authentication Windows Authentication LDAP Authentication or Integration Server Authentication...

Страница 55: ...e ADF or the exposure glass cover by more than 30 degrees Otherwise the size of the original might not be detected correctly 2 Place the original face down on the exposure glass The original should be...

Страница 56: ...r left corner Start with the first page to be scanned CSN001 1 1 1 Positioning mark 3 Lower the ADF Placing Originals in the Auto Document Feeder Be sure not to block the sensor or load the original u...

Страница 57: ...Place the aligned originals squarely face up in the ADF Do not stack originals beyond the limit mark The first page should be on the top CSN004 1 2 2 1 Limit mark 2 Original guide Placing Originals 5...

Страница 58: ...2 Getting Started 56...

Страница 59: ...orth America About placing the original on the exposure glass see p 53 Placing Originals on the Exposure Glass mainly North America About placing the original in the ADF see p 54 Placing Originals in...

Страница 60: ...ess the key after all originals are scanned Some functions such as Batch mode may require that you press the key when placing originals in the ADF Follow the messages that appear on screen 7 When the...

Страница 61: ...iginal is scanned When the original is placed on the exposure glass the upper left corner will be the base point When it is placed in the ADF the bottom left corner will be the base point Placing the...

Страница 62: ...nd then press the Start key Zoom You can specify the reproduction ratio in increments of 1 CKN007 To specify a reproduction ratio enter the ratio using the number keys or specify the ratio with or Thi...

Страница 63: ...etects the original size and then selects an appropriate reproduction ratio based on the paper size you select CKN008 You cannot use the bypass tray with this function If you select a reproduction rat...

Страница 64: ...ls about Rotate Copy see Rotate Copy Copy Document Server The original sizes and orientations you can use with this function are as follows mainly Europe and Asia Original location Original size and o...

Страница 65: ...ded pages on one 2 sided page 2 Sided 2 Sided Copies one 2 sided page on one 2 sided page The resulting copy image will differ according to the orientation in which you place your originals or Origina...

Страница 66: ...put To change the original or copy orientation press Orientation To specify the original orientation is whether readable or unreadable press Orig s Orientation 4 Press OK twice 5 Place the originals a...

Страница 67: ...Top CKN011 Top to Bottom CKN012 1 Press Orientation 2 Select Top to Top or Top to Bottom for Original if the original is two sided 3 Select Top to Top or Top to Bottom for Copy 4 Press OK Duplex Copy...

Страница 68: ...he image by 90 degrees to make copies properly Orientation of the original and image position of Combine The image position of Combine differs according to original orientation and the number of origi...

Страница 69: ...bypass tray with this function There are four types of One Sided Combine 1 Sided 2 Originals Cmb 1 Side Copies two 1 sided originals to one side of a sheet 1 Sided 4 Originals Cmb 1 Side Copies four...

Страница 70: ...hange the orientation by pressing Orientation To specify the original orientation is whether readable or unreadable press Orig s Orientation 4 Press Cmb 1 Side 5 Select the number of originals to comb...

Страница 71: ...ht 1 sided originals to one sheet with four pages per side 2 Sided 4 Pages Cmb 2 Sides Copies two 2 sided originals to one sheet with two pages per side 2 Sided 8 Pages Cmb 2 Sides Copies four 2 sided...

Страница 72: ...tation 6 Select Top to Top or Top to Bottom for Original and or Copy and then press OK 7 Select the number of originals to combine 8 Press OK twice 9 Select the paper tray 10 Place the originals and t...

Страница 73: ...stalled When prints are delivered to Internal Tray 2 Horizontal length 148 0 460 0 mm 5 83 18 11 inches vertical length 100 0 305 0 mm 3 94 12 00 inches 1 Load the paper face down in the bypass tray B...

Страница 74: ...s see p 145 Envelopes Before using this function press Tray Paper Settings in User Tools and then select Envelope as Paper Type in Paper Type Bypass Tray For details see System Settings Connecting the...

Страница 75: ...4 Specify the envelope size and then press OK twice 5 Place the originals and then press the Start key Copying onto Envelopes 73...

Страница 76: ...r details see Functions Requiring Optional Configurations Getting Started To use the Rotate Sort function two paper trays loaded with paper of the same size and type but in different orientation are r...

Страница 77: ...6 Place the originals and then press the Start key Changing the Number of Sets You can change the number of copy sets during copying This function can be used only when the Sort function is selected...

Страница 78: ...ring Data Depending on which options are installed on your machine this function might not be available For details see Functions Requiring Optional Configurations Getting Started 1 Press Other Func 2...

Страница 79: ...imultaneously It is recommended that you call the receivers and confirm with them when sending important documents If there is a power failure the main power switch is turned off or the machine is unp...

Страница 80: ...oadcasting specify the next destination 8 If you send documents to Internet Fax or e mail destinations or enable the Email TX Results function specify a sender 9 Press the Start key Sending Originals...

Страница 81: ...K 7 Press to display Title 1 Title 2 and Title 3 8 Press Title 1 Title 2 or Title 3 to select the key for the classification you want to use The keys you can select are as follows Frequent Added to th...

Страница 82: ...specified delivery destination messages to its registered Personal Box for example cannot be delivered Be sure to check the settings in the fax function before deleting any destinations 1 Press the U...

Страница 83: ...8 Press Clear and then press OK 9 Press Exit 10 Press OK 11 Press the User Tools Counter key Basic Procedure for Transmissions Memory Transmission 81...

Страница 84: ...ssion mode is automatically switched to Memory Transmission It is recommended that you call the receivers and confirm with them when sending important documents 1 Press the Home key on the top left of...

Страница 85: ...3 Specify a destination 4 Make the scan settings you require 5 Press the Start key 6 Place the next original on the exposure glass within 10 seconds when you send multiple originals and then repeat st...

Страница 86: ...ore pressing the Start key 1 Press the Reset key CMK001 Canceling a Transmission While the Original Is Being Scanned Use this procedure to cancel scanning or transmitting of the original while it is b...

Страница 87: ...ion File 2 Press Standby File List 3 Select the file you want to cancel If the desired file is not shown press or to find it 4 Press Cancel TX 5 Press OK To cancel another file repeat steps 3 through...

Страница 88: ...Transmission File 3 Press Display File List 4 Select the file you want to cancel If the desired file is not shown press or to find it 5 Press Cancel TX 6 Press OK To cancel another file repeat steps 4...

Страница 89: ...y are lost If documents are lost for this reason a Power Failure Report is automatically printed when the main power switch is turned on Use this report to check the list of lost documents See Turning...

Страница 90: ...y assigned names such as FAX0001 or FAX0002 Password You can set this function so as not to send to unspecified people A four to eight digit number can be specified as a password You can also change t...

Страница 91: ...iver 8 Press the Start key Sending Stored Documents The machine sends documents stored with the facsimile function in the Document Server The documents stored in the Document Server can be sent again...

Страница 92: ...range the order of the documents to be sent To view details about stored documents press Details Press to switch the screen to thumbnail display 4 If you select a document with a password enter the pa...

Страница 93: ...tions specified by file number Print per User Prints the results of communications by individual senders 1 Press Comm Status Print 2 Press Print Journal 3 Select the printing method 4 If you selected...

Страница 94: ...4 Fax 92...

Страница 95: ...er s CD ROM drive If the AutoPlay dialog box appears click Run AUTORUN EXE 3 Select an interface language and then click OK 4 Click Quick Install 5 The software license agreement appears in the Licens...

Страница 96: ...equired to change the printer settings Log on as an Administrators group member You cannot change the machine default settings for individual users Settings made in the printer properties dialog box a...

Страница 97: ...Click Preferences 4 In the Job Type list select Normal Print 5 In the Document Size list select the size of the original to be printed 6 In the Orientation list select Portrait or Landscape as the or...

Страница 98: ...5 Click Details 6 Enter a User ID in the User ID box and then enter a password in the Password box 7 Click OK 8 Change any other print settings if necessary 9 Click OK 10 Start printing from the appli...

Страница 99: ...d Print files at once by pressing All Jobs after selecting a file 5 Press Print 6 Enter the password using the number keys and then press OK 7 To change the print settings of the document press Det Se...

Страница 100: ...name of a Hold Print file 7 To specify the print time of the document select the Set Print Time check box and then specify the time You can specify the time in 24 hour format 8 Click OK 9 Change any...

Страница 101: ...nt You can select all the Hold Print files at once by pressing All Jobs after selecting a file 5 Press Print 6 To change the print settings of the document press Det Settings 7 Enter the number of cop...

Страница 102: ...e in the machine and prints it later using the control panel Store and Print Prints the file at once and also stores the file in the machine Stored Print Shared Stores the file in the machine and allo...

Страница 103: ...int You can select all the Stored Print files at once by pressing All Jobs after selecting a file 5 Press Print If you set the password in the printer driver enter the password If multiple print files...

Страница 104: ...5 Print 102...

Страница 105: ...ng Folders Connecting the Machine System Settings and register the address of the destination computer to the address book 1 Press the Home key on the top left of the control panel and press the Scann...

Страница 106: ...mputer you will send scanned documents to 1 On the Start menu point to All Programs then Accessories and then click on Command Prompt 2 Enter the command ipconfig all and then press the Enter key 3 Co...

Страница 107: ...ore object types select a location and then click Find Now 10 From the list of results select the groups and users you want to grant access to and then click OK 11 In the Select Users or Groups window...

Страница 108: ...ss New Program 4 Press Names 5 Press Name The name entry display appears 6 Enter the name and then press OK 7 Press to display Title 1 Title 2 and Title 3 8 Press Title 1 Title 2 or Title 3 to select...

Страница 109: ...n Password 17 Enter the password of the destination computer and then press OK 18 Enter the password again to confirm and then press OK 19 Press OK 20 Press Exit 21 Press Folder 22 Check that SMB is s...

Страница 110: ...the IP address of the destination computer is 192 168 0 191 and the folder name is Share the path will be 192 168 0 191 Share 3 Press OK four times If the format of the entered path is not correct a m...

Страница 111: ...e 4 Press Folder 5 Select the name whose folder you want to delete Press the name key or enter the registered number using the number keys You can search by the registered name user code fax number fo...

Страница 112: ...K 7 Depending on the destination setting enter the user name for logging in to the computer Press Enter to the right of the user name field to display the soft keyboard 8 Depending on the destination...

Страница 113: ...Original and specify scan settings according to the original you want to scan Example Scanning the document in color duplex mode and saving as a PDF file Press Original and then press 2 Sided Press S...

Страница 114: ...Address Book Mangmnt 3 Press New Program 4 Press Names 5 Press Name The name entry display appears 6 Enter the name and then press OK 7 Press to display Title 1 Title 2 and Title 3 8 Press Title 1 Tit...

Страница 115: ...screen and in the address display on the scanner function screen If Internet Fax Destination Only is specified registered e mail addresses only appear in the internet fax display on the fax function s...

Страница 116: ...the registered name user code fax number folder name e mail address or IP Fax destination 6 Press Email 7 Press Email Address 8 Press Delete All and then press OK 9 Press Exit 10 Press OK 11 Press the...

Страница 117: ...responsible for any damage that may result from the loss of files For long term storage of files we recommend the use of DeskTopBinder For details contact your local dealer or see the documentation fo...

Страница 118: ...confirmation and then press OK 8 Press OK twice 9 If necessary press Send Settings or Original to configure settings for resolution and scan size 10 Press the Start key Checking a Stored File Selecte...

Страница 119: ...single page file type when scanning multiple originals one file is created for each single page and the number of files sent is the same as the number of pages scanned Multi page PDF High Compress PDF...

Страница 120: ...Specifying Send Settings 1 Press Send Settings 2 Specify resolution scan size and other settings as required 3 Press OK 6 Scan 118...

Страница 121: ...transmission or scanning by the scanner make sure that all other operations are ended File Name A file name such as COPY0001 and COPY0002 is automatically attached to the scanned document You can cha...

Страница 122: ...er a user name 5 Press File Name 6 Enter a file name and then press OK 7 Press Password 8 Enter a password with the number keys and then press OK You can use four to eight digits for the password 9 Fo...

Страница 123: ...nt For details about each function see Copy Document Server 1 Select a document to be printed 2 When printing two or more documents at a time repeat step 1 Up to 30 documents can be printed 3 When spe...

Страница 124: ...7 Document Server 122...

Страница 125: ...owser 2 Enter http machine s IP address or host name in your Web browser s URL bar Top Page of Web Image Monitor appears If the machine s host name has been registered on the DNS or WINS server you ca...

Страница 126: ...n Click the Web browser s Refresh button to refresh the entire browser screen Help Use Help to view or download Help file contents 4 Basic Information area Displays the basic information of the machin...

Страница 127: ...dicating incorrect user code entry appears If this is the case reprogram a user code 4 Click the property icon of the desired fax document 5 View the content of the fax document 6 To download the rece...

Страница 128: ...8 Web Image Monitor 126...

Страница 129: ...place the position of the tray s side fences may slip out of place Check the paper edges are aligned at the right side When loading a low number of sheets be sure not to squeeze the side fences in to...

Страница 130: ...y against the paper you loaded CSN010 5 Carefully slide the paper tray fully in Various sizes of paper can be loaded in the paper trays by adjusting the positions of side fences and end fence For deta...

Страница 131: ...he bypass tray CSN005 2 Insert the paper face down until you hear the beep 3 Align the paper guides to the paper size If the guides are not flush against the paper images might be skewed or paper misf...

Страница 132: ...m the bypass tray see Copying from the Bypass Tray Copy Document Server When printing from a computer see p 130 Printing from the Bypass Tray Using the Printer Function When the Panel Key Sound is tur...

Страница 133: ...control panel 1 Press the User Tools Counter key CMR633 2 Press Tray Paper Settings 3 Press 4 Press Printer Bypass Paper Size 5 Select the paper size 6 Press OK 7 Press the User Tools Counter key Load...

Страница 134: ...ecified press Change 6 Press Vertical 7 Enter the vertical size using the number keys and then press 8 Press Horizontal 9 Enter the horizontal size using the number keys and then press 10 Press OK twi...

Страница 135: ...Size and then specify the paper size 5 Press OK 6 Press Paper Type Bypass Tray 7 Press Paper Type 8 Select the paper type To load thick paper press and then press Thick Paper To load OHP transparencie...

Страница 136: ...For details about paper thickness see System Settings Connecting the Machine System Settings 9 Adding Paper and Toner 134...

Страница 137: ...ier Docu Server Features menu and then place the original and paper as shown below Printer mode Specify Auto Detect or On Always for Letterhead Setting in System under the Printer Features menu and th...

Страница 138: ...m the bypass tray specify the paper size Copy side Paper trays Bypass tray 1 One sided Two sided Unavailable 1 If you place originals in the ADF and copy on orientation fixed paper from the bypass tra...

Страница 139: ...a print job is changed partway through printing from one sided to two sided printing one sided output after the first copy may be printed facing a different direction To ensure all paper is output fa...

Страница 140: ...Paper capacity 60 105 g m2 16 28 lb Bond Plain Paper Middle Thick Paper sizes that can be detected automatically A3 A4 A5 B4 JIS B5 JIS 81 2 11 250 sheets 60 105 g m2 16 28 lb Bond Plain Paper Middle...

Страница 141: ...8K 16K 11 15 11 14 10 15 10 14 250 sheets 60 105 g m2 16 28 lb Bond Plain Paper Middle Thick Custom size 1 Vertical 7 17 11 69 inches Horizontal 5 99 17 00 inches 250 sheets 1 When loading paper with...

Страница 142: ...ngth of more than 279 mm 11 0 inches in the paper trays use paper that has a horizontal width of 420 mm 16 6 inches or less Lower paper tray and lower paper trays mainly North America Paper type and w...

Страница 143: ...A5 B4 JIS B5 JIS B6 JIS Plain Paper 100 sheets Thick Paper 1 60 162 g m2 16 lb Bond 90 lb Index Plain Paper Thick Paper Select the paper size 2 A6 11 17 81 2 14 81 2 13 81 2 11 81 4 14 81 4 13 8 13 8...

Страница 144: ...be fed into the machine or may cause paper jams 5 Load envelopes so that the height of the stack of envelopes does not exceed the limit mark of the bypass tray without pressing on the stack of envelop...

Страница 145: ...the paper may become wrinkled may not be fed into the machine or may cause paper jams 5 Load envelopes so that the height of the stack of envelopes does not exceed the limit mark of the bypass tray wi...

Страница 146: ...f the Auto Tray Switching function see Copier Document Server Features Copy Document Server When loading label paper We recommend that you use specified label paper After pressing Bypass press Paper T...

Страница 147: ...if thick paper is loaded as described above normal operations and print quality might still not be possible depending on the paper type Prints might have prominent vertical creases Prints might be not...

Страница 148: ...nvelopes Orientation of envelopes Exposure glass Bypass tray Side opening envelopes Flaps open Bottom side of envelopes toward the left of the machine Side to be scanned face down Flaps open Bottom si...

Страница 149: ...on Envelopes Print Recommended envelopes For information about recommended envelopes contact your local dealer For details about the sizes of envelopes you can load see p 138 Recommended Paper Sizes...

Страница 150: ...the environment copying or printing on envelopes may wrinkle them even if they are recommended Certain types of envelopes might come out creased dirtied or misprinted If you are printing a solid colo...

Страница 151: ...possible to use the cleaner designed for dust explosion proof purpose If toner is spilled over the floor sweep up spilled toner slowly and clean remainder with wet cloth Do not crush or squeeze toner...

Страница 152: ...tore toner on a flat surface Do not shake the toner cartridge with its mouth down after removing it Residual toner may scatter Do not repeatedly install and remove toner cartridges This will result in...

Страница 153: ...form transmission operation The error message disappears Any reports are not printed Disposing of Used Toner This section describes what to do with used toner Toner cannot be re used Pack used toner c...

Страница 154: ...9 Adding Paper and Toner 152...

Страница 155: ...misfeed occurs For details about removing jammed paper see Removing Jammed Paper Troubleshooting Load Paper indicator Appears when paper runs out For details about loading paper see Loading Paper Pape...

Страница 156: ...nnot be used because an error has occurred on the machine 3 Messages Displays a message that indicates the status of the machine and each function 4 Check If an error occurs in the machine or a functi...

Страница 157: ...Control Panel You can use other functions normally The machine is unable to connect to the network A network error has occurred Press Check in the function which error is occurred And then check the...

Страница 158: ...long beeps Soft alert An auto reset was performed through the Simple Screen of the Copy Document Server function the Facsimile function or the Scanner function Five long beeps repeated four times Soft...

Страница 159: ...menu has items missing Functions other than the copier function are not yet ready Functions appear in the User Tools menu when they become ready for use Time required varies by function Wait a little...

Страница 160: ...s displayed If the machine is not ready in five minutes turn off the main power switch and make sure the main power indicator turns off Wait at least ten seconds and then turn the main power switch on...

Страница 161: ...ing pages that have been scanned Delete unnecessary files by pressing Delete File The user code entry screen is displayed Users are restricted by User Code Authentication For details about how to log...

Страница 162: ...r if the HDD is not installed Press the Start key An error message remains displayed even after the indicated cover is closed One or more covers of the machine other than the indicated one are still o...

Страница 163: ...a paper size that is not selected automatically you need to specify the paper size with the control panel For details about specifying paper size with the control panel see Changing to a Size That Is...

Страница 164: ...ter the maximum waiting time has elapsed contact your service representative The machine makes a loud clicking sound shortly after the main power switch is turned off The main power switch makes a lou...

Страница 165: ...e data size for shortcut images see Customizing the Home Screen Convenient Functions The format of the image data is not valid appears The file format of the shortcut image to be added is not supporte...

Страница 166: ...l placed on the exposure glass is a non standard size Place the original on the exposure glass again Face the original down If the machine cannot detect the size of the original specify the size manua...

Страница 167: ...een exceeded For details about how to check the number of copies available per user see Security Guide File being stored exceeded max number of pages per file Copying will be stopped The scanned origi...

Страница 168: ...ine for a while and allow it to adapt to the environment For details about the optimum environmental conditions for the machine see Optimum Environmental Conditions After Moving the Machine Maintenanc...

Страница 169: ...e displayed The machine will make copies of the scanned originals first and then automatically proceed to scan and to copy the remaining originals In this case the resulting sorted pages will not be s...

Страница 170: ...ile Features For details about H 323 Settings see Initial Settings Fax For details about network problems contact your administrator Check whether there are any network problems 13 11 Cannot access ga...

Страница 171: ...red Check that IPv4 in Effective Protocol is set to Active in System Settings For details about Effective Protocol see Interface Settings Connecting the Machine System Settings Check that the correct...

Страница 172: ...IP address for the SMTP Server For details about these settings see Interface Settings or File Transfer Connecting the Machine System Settings Check that the folder for transfer is correctly specifie...

Страница 173: ...er ID and password for the computer with the folder for forwarding are correctly specified Check that the folder for forwarding is correctly specified Confirm that the computer with the folder for for...

Страница 174: ...log in to the POP3 IMAP4 server Check that the correct User Name and Password are listed in Fax Email Account of System Settings For details about Fax Email Account see File Transfer Connecting the Ma...

Страница 175: ...Machine System Settings Check that the LAN cable is correctly connected to the machine For details about network problems contact your administrator Check whether there are any network problems 15 12...

Страница 176: ...failed Try the operation again If the message is still shown the network may be busy Check the settings for LDAP server in System Settings For details about settings for LDAP server see Programming th...

Страница 177: ...riod has expired and then resume reception of the Internet Fax For details about reception of the Internet Fax contact your administrator Functional problems with facsimile Data will be initialized Th...

Страница 178: ...ile s contained file s without access privileges Only file s with access privileges will be deleted You tried to delete a document for which you do not have permission to delete To check your access p...

Страница 179: ...machine supports the remote fax function Check that the remote machine is working normally Check that the correct IP address or host name is set for the remote machine in System Settings For details...

Страница 180: ...on with remote machine see Sending Receiving Documents Using a Remote Machine Remote Fax Fax Remote fax is not available because User Code Authentication is active The remote fax function does not sup...

Страница 181: ...as expired A new user certificate must be installed For details about the user certificate destination certificate see Security Guide Transmission cannot be performed because the certificate used for...

Страница 182: ...lid XXX and YYY indicate the user action The device certificate S MIME has expired A new device certificate S MIME must be installed For details about how to install a device certificate S MIME see Se...

Страница 183: ...ired For details about the device certificate S MIME see Security Guide XXX cannot be YYY because there is a problem with the device certificate used for the S MIME signature Check the device certific...

Страница 184: ...ficate PDF with digital signature see Security Guide The email destination s which is registered to the program cannot be recalled because there is a problem with the Digital Signature s device certif...

Страница 185: ...adecimal format Press Job Reset to cancel Hex Dump mode Suspended job exists Printing was temporarily stopped by SmartDeviceMonitor for Client You can resume printing via My Job List in SmartDeviceMon...

Страница 186: ...while Messages displayed on the control panel when using the printer function Before turning the main power switch off see p 49 Turning On Off the Power Message Causes Solutions Cannot connect with th...

Страница 187: ...main power switch and then back on again If the message appears again contact your service representative Hardware Problem Parallel I F An error has occurred in the IEEE 1284 interface board Turn off...

Страница 188: ...size see Changing the Paper Size Paper Specifications and Adding Paper Tray setg do not match spcfd siz typ Select new tray or use siz typ below The printer driver settings are incorrect or the tray...

Страница 189: ...et for the main sheets and slip sheets Designate Check the setting The tray selected for other pages is the same as the one for slip sheets Reset the job Be sure the tray you select for slip sheets is...

Страница 190: ...cannot be printed When the total size of the multiple files that are selected exceeds 1 GB select files separately When the size of selected file exceeds 1 GB print by using a function other than the...

Страница 191: ...orized Copy Prevention error occurred Job cancelled The Enter User Text field on the Unauthorized Copy Prevention for Pattern Details screen is blank Only when using PCL 6 PostScript 3 On the printer...

Страница 192: ...rvice representative Command Error An RPCS command error occurred Check if the communication between the computer and the machine is working correctly Check if the correct printer driver is being used...

Страница 193: ...d see Tray Paper Settings Connecting the Machine System Settings Error has occurred A syntax error etc occurred Check that the PDF file is valid Exceeded max capacity of Document Server Cannot store T...

Страница 194: ...incomplete The number of pages exceeds the maximum number of sheets that you can use Collate with Reduce the number of pages to print Exceeded max number of pages Auto While using the error job store...

Страница 195: ...s stored in the machine Reduce the data size of the Temporary Print file and or the Stored Print file I O buffer overflow An input buffer overflow occurred In Printer Features under System set Memory...

Страница 196: ...ntact your service representative No response from the server Authentication has failed A timeout occurred while connecting to the server for LDAP Authentication or Windows Authentication Check the st...

Страница 197: ...ax No of pages per file The maximum page capacity of the Document Server was exceeded Delete some of the files stored in the Document Server or reduce the number of pages that you want to send The sel...

Страница 198: ...onfiguration Page see List Test Print Print Messages Displayed When Using the Scanner Function This section describes likely causes of and possible solutions for the error messages that appear on the...

Страница 199: ...tered path name might be incorrect or firewall and security settings might be blocking network connectivity An antivirus program or a firewall is preventing the machine connecting to your computer Ant...

Страница 200: ...might be unformatted or its format might be incompatible with this machine Check the file name set at the time of scanning For details about the characters that can be used in file names see Availabl...

Страница 201: ...ding its data The followings are likely causes of time outs Too many originals per set Misfed originals Transmission of other jobs Reduce the number of originals and then scan again Remove any misfed...

Страница 202: ...data capacity Specify the scan size and resolution again Note that it may not be possible to scan very large originals at a high resolution For details about the settings for scan function see Relati...

Страница 203: ...nts Copy Document Server Exceeded max number of pages per file Do you want to store the scanned pages as 1 file The file being stored has exceeded the maximum number of pages for one file Specify whet...

Страница 204: ...n delivered Exceeded time limit for LDAP server search Check the server status A network error has occurred and connection has failed Try the operation again If the message is still shown the network...

Страница 205: ...ete The scan could not be completed because there was insufficient hard disk memory at the time of saving to the memory device Select whether or not to save the scanned document to the memory device M...

Страница 206: ...Features Print Delete Scanner Journal in Scanner Features is set to Do not Print Disable Send and Scanner Journal is full Print or delete Scanner Journal For details about printing or deleting Scanner...

Страница 207: ...ncryption settings for all destinations Some invalid destination s contained Do you want to select only valid destination s The specified group contains e mail destinations and Scan to Folder destinat...

Страница 208: ...as shown above The e mail has too many destinations Split the destinations into two or more groups The number of destinations that can be specified at the same time is as shown above The e mail has to...

Страница 209: ...t computers from establishing connection with this machine If you are using anti virus software add the program to the exclusion list in the application settings For details about how to add programs...

Страница 210: ...the resolution or Specify Size value and then try to scan the original again The size of the scanned data is too small Check the scanning resolution then press the Start key again The data being scann...

Страница 211: ...Digital Signature s device certificate is invalid The file cannot be sent There is no device certificate PDF with digital signature or the certificate is invalid A new device certificate PDF with digi...

Страница 212: ...ted because its encryption certificate is not currently valid The user certificate destination certificate has expired A new user certificate must be installed For details about the user certificate d...

Страница 213: ...r Name Login Password and DriverEncryp Key see Security Guide Authentication succeeded However the access privileges for scanner function has been denied The logged in user name does not have permissi...

Страница 214: ...is turned on Cannot find XXX scanner used for the previous scan YYY will be used instead XXX and YYY indicate scanner names The machine is not connected to the network correctly Check that the previou...

Страница 215: ...puter Check whether the Ethernet board of the client computer is recognized correctly by Windows Check whether the client computer can use the TCP IP protocol Error has occurred in the scanner The app...

Страница 216: ...scan the original again Invalid Winsock version Please use version 1 1 or higher You are using an invalid version of Winsock Install the operating system of the computer or copy Winsock from the opera...

Страница 217: ...e used on this machine Contact your service representative Scanner is not available Check the scanner connection status The machine s main power switch is off Turn on the main power switch Scanner is...

Страница 218: ...Connection Tool For the WIA driver check the Network Connection tab in the properties Use Web Image Monitor to set LLMNR of IPv6 to Active In Windows XP IPv6 addresses cannot be obtained from the hos...

Страница 219: ...D logo are trademarks of SD 3C LLC The proper names of the Windows operating systems are as follows The product names of Windows XP are as follows Microsoft Windows XP Professional Microsoft Windows X...

Страница 220: ...11 Appendix 218...

Страница 221: ...panel 34 Document Server 10 16 76 88 89 119 121 Duplex 14 63 Duplex Copy 9 63 E E mail address 112 113 114 E mail destination 112 113 114 Energy Saver key 35 Enlarging originals 59 Enter key 35 Envelo...

Страница 222: ...Fax 9 17 Parallel connection 93 PCL 93 Placing originals 53 54 Preset Reduce Enlarge 59 Preventing information leakage 23 Printer 95 Printer Bypass Paper Size 130 131 132 Printer driver properties 94...

Страница 223: ...the power 49 Turning on the power 49 Two sided Combine 68 Two sided paper 135 U Unauthorized copy prevention 25 Used toner 151 User code authentication 51 User Tools key 35 User Tools Counter key 35 V...

Страница 224: ...MEMO 222...

Страница 225: ...MEMO 223...

Страница 226: ...MEMO 224 EN GB EN US EN AU D159...

Страница 227: ...2012...

Страница 228: ...D159 7503 AU EN US EN GB EN...

Отзывы: