Clearing jams
Jam error messages appear on the printer control panel display and include the area of the printer where the jam
occurred. When there is more than one jam, the number of jammed pages is displayed.
200 and 201 paper jams
1
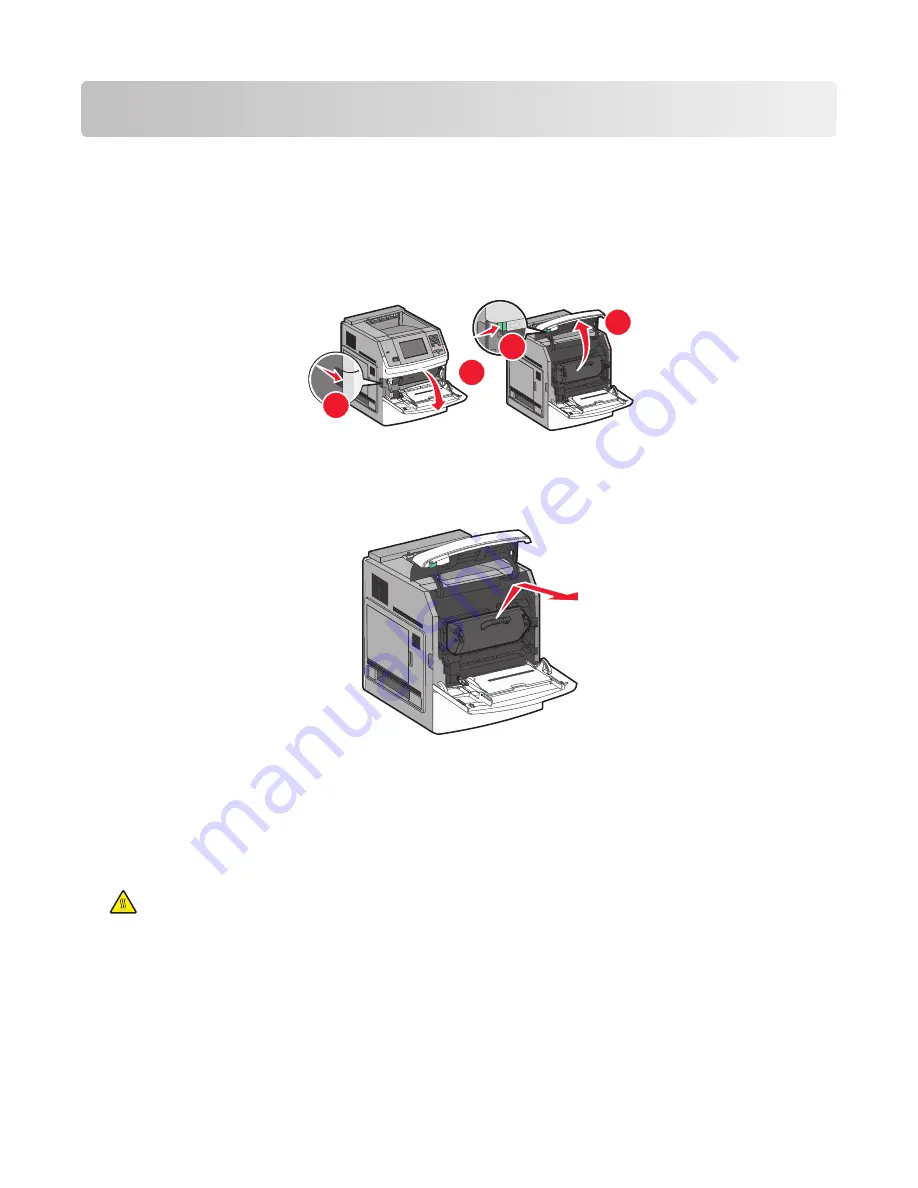
Lower the multipurpose feeder door, and then push the release latch to open the front cover.
2
1
3
4
2
Lift and pull the print cartridge out of the printer.
Warning—Potential Damage:
Do not touch the photoconductor drum on the underside of the cartridge. Use
the cartridge handle whenever you are holding the cartridge.
3
Place the print cartridge aside on a flat, smooth surface.
Warning—Potential Damage:
Do not leave the cartridge exposed to light for extended periods.
Warning—Potential Damage:
The jammed paper may be covered with unfused toner which can stain garments
and skin.
4
Remove the jammed paper.
CAUTION—HOT SURFACE:
The inside of the printer might be hot. To reduce the risk of injury from a hot
component, allow the surface to cool before touching.
Note:
If the paper is not easy to remove, then open the rear door and remove the paper from there.
5
Align and reinstall the print cartridge.
6
Close the front cover.
7
Close the multipurpose feeder door.
8
Touch
Continue
.
Clearing jams
59
Содержание InfoPrint 1892
Страница 1: ...InfoPrint 1892 MT 4864 User s Guide G510 9799 00...
Страница 2: ......
Страница 3: ...InfoPrint 1892 MT 4864 User s Guide G510 9799 00...
Страница 6: ...4...
Страница 95: ......
Страница 96: ...Printed in USA G510 9799 00...


