PitBoss
+ Tech Support:
1-833-786-7779
CONNECTING THE PITBOSS
+
CONTROLLER
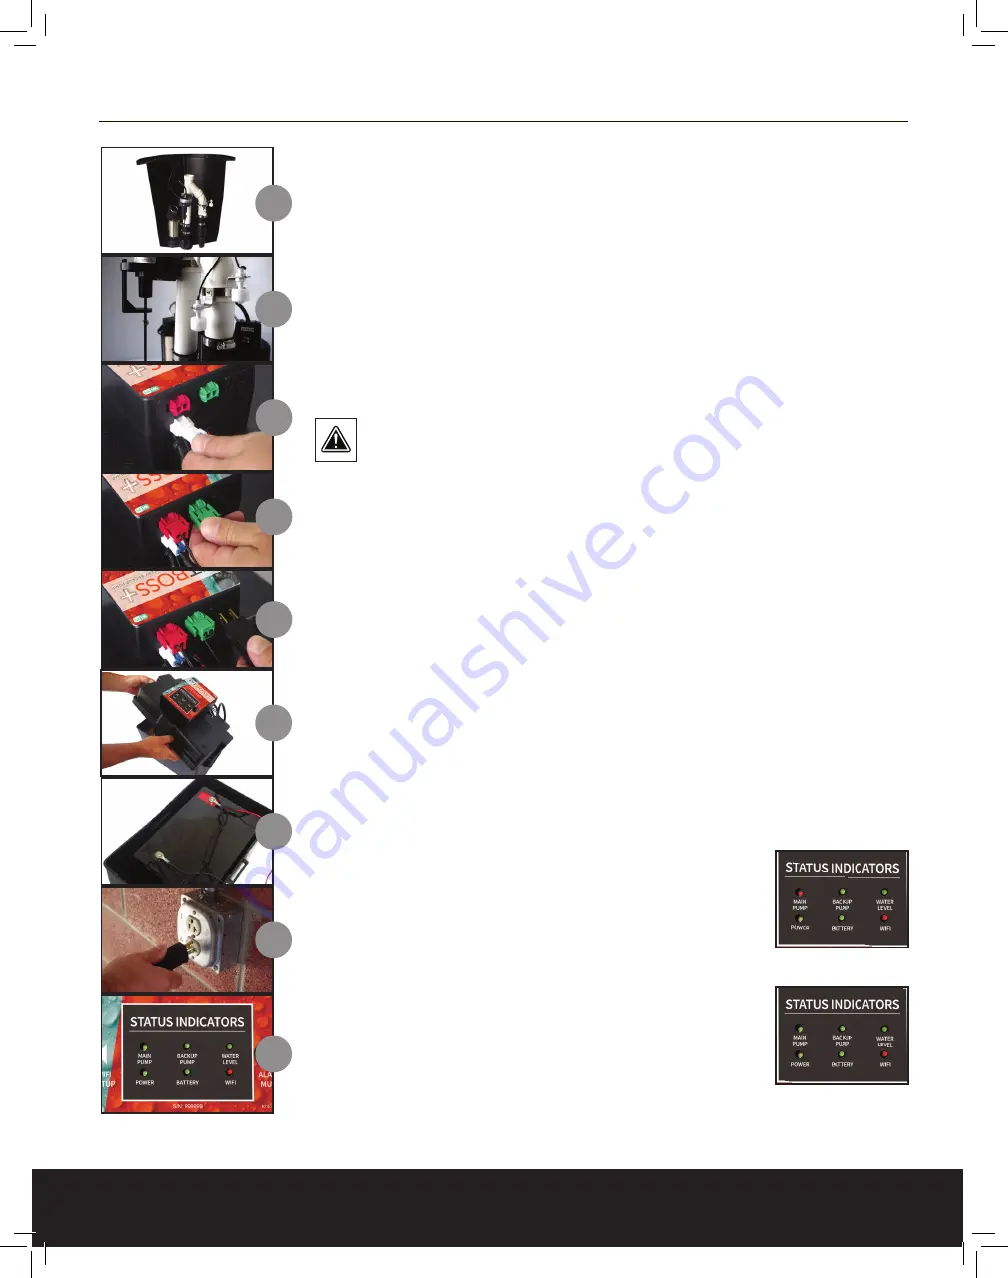
1. Install the Backup Pump using good plumbing practices. Both the Primary and
Backup pumps should set on the bottom of the basin.
2. Install the switches for the primary pump and backup pump. The ON level of the
lowest backup switch should be approximately 1” - 2” higher than the ON level of
the primary sump pump.
3. Connect the Backup Sump Pump to the PitBoss+ Controller’s white jack.
4. Connect the backup switches to the PitBoss+ Controller’s color coded jacks.
5.
VERY IMPORTANT!
Connect the Main Sump Pump to the PitBoss+ controller
using the AC outlet located on the back of the controller. DO NOT CONNECT
THE MAIN PUMP TO AN AC WALL OUTLET.
6. Open the battery case and place 12 Volt battery inside.
7. Connect the PitBoss+ controller to the battery. Black to – (negative), Red to +
(positive). Replace and lock the lid onto the battery case. The PitBoss+ system
will initialize and boot up. All status LEDs will initially be GREEN. Within 20
seconds, the Power and WiFi status LEDs will turn RED.
8. Plug the PitBoss+ controller into an AC wall outlet. The Power status LED will
turn green. Consult your local codes for GFCI requirements.
9. The PitBoss+ system is now ready for alert testing.
TEST THE SYSTEM IN THIS ORDER! IT’S RECOMMENDED TO RUN INITIAL
CYCLES WITH WATER AND CHECK ALL PLUMBING FOR LEAKS DURING
TESTING.
Lift the lowest Battery Backup switch and hold. Release
when the battery backup pump cycles. The BACKUP PUMP
status LED will remain GREEN. The MAIN PUMP status LED
will turn RED and the alarm will sound. Press ALARM MUTE
to silence, if desired.
REFILL BASIN WITH WATER.
Cycle the Primary Sump Pump. The alarm will stop and the
MAIN PUMP status LED will turn GREEN.
WiFi will turn GREEN after the completing the WiFi setup with the
PitBoss+ app using the instructions on the next page.
1
2
3
4
5
6
7
8
9


