background image

20

20

G

B

INsTALLATION DUKE

COMMAND TYPE 

USE OF THE SHUTTER


Skilled persons 

Skilled persons 

Unrestricted use


(out of public area*) 

(public area) 


with manned operation 

non possibile

with visible impulses 

C or E 

C or E 

C and D, or E

(e.g. sensor) 

with not visible impulses


C or E 

C and D, or E 

C and D, or E

(e.g. remote controldevice)

automatic 

C and D, or E 

C and D, or E 

C and D, or E

* a typical example are those shutters which do not have access to any public way

A:  Command button with manned operation (that is, operating as long as activated), 

like code ACG2013

B: Key selector with manned operation, like code ACG1010

C: Adjustable power of the motor

D:  Safety strips and/or other safety devices to keep thrust force within the limits of 

EN12453 regulation - Appendix A.

E:  Photocells, like code ACG8026 (To apply every 60÷70cm for all the height of the 

column of the gate up to a maximum of 2,5m - EN 12445 point 7.3.2.1)

Parts to install meeting the EN 12453 standard

P

rE-INsTALLATION CHECKs

The leaf must be fixed firmily on the hinges to the pillars, must not be 
flexible during the movement and must move without frictions.
before the installation of DUKE, verify all dimensions etc.
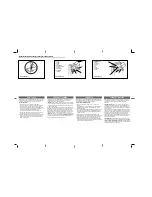
There’s  no  need  for  any  modification,  if  the  gate  is  like  that  shown 
in Fig. 1.

Gate features must be uniformed with the standards and laws in 
force.

 The gate can be automated only if it is in a good condition and 

its conditions comply with the EN 12604 norm.
-  The  gate  leaf  does  not  have  to  have  a  pedestrian  opening.  in  the 

opposite  case  it  is  necessary  to  take  the  appropriate  steps,  in 
accordance  with  EN  12453  norm  (for  instance;  by  preventing  the 
operation  of  the  motor  when  the  pedestrian  opening  is  opened,  by 
installing a safety microswitch connected with the control panel).

-  No  mechanical  stop  shall  be  on  top  of  the  gate,  since  mechanical 

stops are not safe enough.

P

rEPArE THE CEMENTATION Of THE BOX

-  Excavate a trench next to the pillar (Fig. 3).
-   On the bottom of foundation box a 50 mm Ø pipe should be fitted to 

drain  water.  On  one  side  of  the  box  another  pipe  32  mm  Ø  should 
be fitted. Pipe should be flexible, sturdy and insulated type, to let out 
electrical wiring (use holes on internal side of gate opening).


ENsUrE  THAT  THE  CABLE  JOINTs  ArE  MADE

  inside  a  sealed 

junction  box 

OUTsIDE  THE  DUKE  BOX

  (The  junction  box  can  be 

built-in to the wall or surface mounted, positioned at a safe height and 
must comply with the relevant standards).

-  Use  a  level  to  position  the  box  so  that  the  upper  edge  of  the  cover 

corresponds with the finished floor level.

-  The centreline of the pintles must be perfectly in line with the centreline 

of the operating arm mounting shaft.

 DUKE 110°: Cement in, taking care to ensure that cement does 
not fall into the box and checking that the short sides of the box 
are perfectly parallel to the gate when in the “CLOsED” position.

 DUKE 180°: Cement in, taking care to ensure that cement does 
not fall into the box and checking that the short sides of the box 
are  perfectly  perpendicular  to  the  gate  when  in  the  “CLOsED” 
position. 

-  insert the bolts for cover fixing in places cut into the foundation box.

I

NsTALLING THE DUKE 110°


Make sure that the pivot of foundation box is well greased. lay down 
the ball (CVA1479) end insert drive rod CME5224 after fitting release 
system (picture 7).


Fit  gate  bracket  plate  CME6987  through  its  pivot  in  the  drive  rod 
(picture 8).


Place gate leaf between upper hinge and plate of gate bracket 

(hinge 

and pivot of gate bracket plate should be perfectly aligned).

-  Weld carefully bracket plate on the leaf.


Fit adjusting open position bolt 

A

 (picture 11) M10X30 and relevant 

nut. 

-  Fit Duke operator inside the foundation box (picture 4).


Screw on pulling lever adjusting bolt M10x60 and relevant nut (picture 
11).


Fit  joint  lever  CCA1360  (picture 
4).

-   

ATTENTION:


joint 

lever 

CCA1360  must  be  fitted  as 
shown  in  picture  4.  Should  it 
be  difficoult  to  fit,  operate 
electrically the reducer.

3

250

460

380

4

sX

DX

CCA1360

CCA1360

Содержание AA10975

Страница 1: ...Peso m x verja 800 kg 1760 lbs per anta 2 m pour vantail 2 m for 2 m leaf f r Fl gel 2 m para puerta 2 m DUKE 180 230V 50 60Hz Nm 330 AA10985 800 kg 1760 lbs per anta 2 m pour vantail 2 m for 2 m leaf...

Страница 2: ...ER SOIGNEUSEMENT CES INSTRUCTIONS 1 Si la centrale lectrique ne dispose d aucun interrupteur il faut en installer un de type magn tothermique en amont de cette derni re omnipolaire avec ouverture mini...

Страница 3: ...THE SAFETY OF THE PEOPLE IT IS IMPORTANT TO FOLLOW ALL THE INSTRUCTIONS INSTALLATIONSVORSCHRIFTEN BEACHTET WERDEN 1 Wenn nicht bereits an der elektrischen Schaltzentrale vorgesehen muss vor der Schal...

Страница 4: ...l sistema respetando las normas y las leyes vigentes SEGUIR TODAS LAS INSTRUCCIONES DE INSTALACI N 1 Este manual de instrucciones est exclusivamente dirigido a personal especializado que conozca los c...

Страница 5: ...o a 2 m E consigliabile prevedere una serratura elettrica per ante superiori a 2 m I Misure in mm CARATTERISTICHE TECNICHE Lunghezza max anta Peso max cancello Tempo medio di apertura Coppia max Alime...

Страница 6: ...Cementate la cassa di fondazione verificando che i suoi lati pi corti siano perfettamente perpendicolari al cancello quando CHIUSO Inserire i dadi a gabbietta per il fissaggio del coperchio nelle app...

Страница 7: ...7 7 I 6 8 5 7 CME5224 DUKE 110 CME5230 DUKE 180 ACG2120 ACG2125 ACG2130 CME6987 DUKE 110 DUKE 180 Tubo per scarico acqua Tubo per cavi elettrici Tubo per cavi elettrici Tubo per scarico acqua 62 mm 9...

Страница 8: ...UKE non necessario fissare fermi a terra o altro perch dotato all interno di viti di fermo registrabili per delimitare la corsa dell anta Per accedere alle viti necessario togliere il coperchio del DU...

Страница 9: ...i collegamenti ed i dati tecnici degli accessori attenersi ai relativi libretti MANUTENZIONE Da effettuare da parte di personale specializzato dopo aver tolto l alimentazione elettrica al motore Ogni...

Страница 10: ...L antenna va installata perpendicolarmente e deve essere in vista del telecomando LAMPEGGIATORE SPARK con scheda intermittente incorporata cod ACG7059 SUPPORTO LATERALE cod ACG7042 ANTENNA SPARK 91 co...

Страница 11: ...i FOTOCELLULE SENZA FILI SOSTITUTIVE DELLA COSTA VERTIGO Wi Fi 8 cod ACG8042 VERTIGO Wi Fi 10 cod ACG8043 BLOCK Wi Fi SELETTORE A CHIAVE SENZA FILI cod ACG6098 MASTER Wi Fi SCHEDA DI GESTIONE SISTEMA...

Страница 12: ...r allant jusqu 2 m On conseille pr voir une serrure lectrique pour portes sup rieures 2 m Mesures en mm CARACTERISTIQUES TECHNIQUES Longueur maxi du battant Poids maxi du portail Temps moyen d ouvertu...

Страница 13: ...barri re lorsqu elle est sur FERME DUKE 180 Cimenter en veillant ce que le mortier n entre pas l int rieur du caisson et en s assurant que les c t s les plus courts sont parfaitement perpendiculaires...

Страница 14: ...CME5224 DUKE 110 CME5230 DUKE 180 ACG2120 ACG2125 ACG2130 8 CME6987 DUKE 110 Tube pour ecoulement de l eau Tube pour c bles lectriques 62 mm 9 DUKE 180 Tube pour c bles lectriques Tube pour ecoulemen...

Страница 15: ...S FINS DE COURSE MECANIQUES DUKE 110 Lorsqu on utilise le DUKE il n est pas n cessaire de fixer des arr ts au sol ou ailleurs car il est quip l int rieur de vis d arr t r glables pour stopper la cours...

Страница 16: ...gir sur la dispositif de deblocage qui se trouve sur le levier d entra nement Fig 8 ATTENTION Pour ne pas rendre trop difficile le d brayage manuel veiller ce que les vantaux ne viennent pas buter sur...

Страница 17: ...oit tre install e de fa on perpendiculaire et tre en vue de la t l commande FEU CLIGNOTANT SPARK avec carte intermittente incorpor e code ACG7059 SUPPORT LATERAL code ACG7042 ANTENNE SPARK 91 code ACG...

Страница 18: ...ser 12 30V ac dc code ACG6099 NOVA Wi Fi PHOTOCELLULES SANS FILS code ACG8037 PAIRE DE POTEAUX NOVA code ACG8039 VERTIGO Wi Fi PHOTOCELLULES SANS FIL POUR REMPLACER LA BARRE PALPEUSE VERTIGO Wi Fi 8 c...

Страница 19: ...ng down the gate The DUKE will comfortably operate gates and doors up to 800 kg in weight and 2 metres in length For leaves longer than 2 m it is suggested fitting an electro lock TECHNICAL DATA Max l...

Страница 20: ...TATION OF THE BOX Excavate a trench next to the pillar Fig 3 On the bottom of foundation box a 50 mm pipe should be fitted to drain water On one side of the box another pipe 32 mm should be fitted Pip...

Страница 21: ...G B 6 8 5 7 CME5224 DUKE 110 CME5230 DUKE 180 ACG2120 ACG2125 ACG2130 CME6987 DUKE 110 DUKE 180 Tube for water drain Tube for electric cables Tube for electric cables Tube for water drain 62 mm 62 mm...

Страница 22: ...etermined by means of set screws located internally of the box Access to the screws is gained by lifting the cover To adjust the travel limit for the opening movement of the gate simply turn the screw...

Страница 23: ...n be opened manually by releasing the lock on the operating lever to allow the gate to move freely Fig 8 IMPORTANT Please make sure that the leaves stop against the mechanical stoppers inside the oper...

Страница 24: ...from working Install the antenna vertically and in such a way the remote control can reach it SPARK BLINKER WITH IN BUILT INTERMITTENT CARD code ACG7059 LATERAL SUPPORT code ACG7042 SPARK ANTENNA 91 c...

Страница 25: ...with terminal block 12 30V ac dc code ACG6099 NOVA Wi Fi PHOTOCELLS WITHOUT WIRES code ACG8037 PAIR OF COLUMS NOVA code ACG8039 VERTIGO Wi Fi WIRELESS PHOTOCELLS SUBSTITUTING THE SAFETY STRIP VERTIGO...

Страница 26: ...gell nge von 2m bet tigt werden Man empfiehlt einen elektrischen Schloss f r Fl gel l nger als 2 Meter Abmessungen in mm TECHNISCHE EIGENSCHAFTEN Max Torfl gelweite Max Torgewicht ffnungszeit ca Maxi...

Страница 27: ...ichend sicher sind BEREITEN SIE DIE ZEMENTIERUNG DES GEH USE VOR Die Grube im Boden an der Kante des Pfeilers Abb 3 Am Boden vom Kasten ein Rohr 50 mm aus PVC f r den Abfluss vorbereiten und auf einer...

Страница 28: ...8 5 7 CME5224 DUKE 110 CME5230 DUKE 180 ACG2120 ACG2125 ACG2130 CME6987 DUKE 110 DUKE 180 R hre f r Wasserabfluss R hre f r elektrische Kabel R hre f r elektrische Kabel R hre f r Wasserabfluss 62 mm...

Страница 29: ...Montage rechts EINSTELLUNG MECHANISCHE ENDANSCHL GE DUKE 110 Mit einem DUKE Antrieb er brigen sich Anschl ge im Boden o da er ber interne regulierbare Endlagenschrauben zur Begrenzung der Torbewegung...

Страница 30: ...lliert werden Es wird die Verwendung der elektronischen Steuerger te T2 f r 1 oder 2 einphasige Motoren empfohlen F r die Anschl sse und technische Daten der Zubeh rteilen verweisen wir auf die entspr...

Страница 31: ...die Funktion der Antenne au er Kraft setzt Die Antenne muss senkrecht von dem Fernbet tigungsger t aus sichtbar montiert werden BLINKER SPARK mit eingebauter wechselsignalkarte Kode ACG7059 SEITENLAG...

Страница 32: ...94 mit Endblockierung 12 30V ac dc Kode ACG6099 NOVA Wi Fi FOTOZELLEN OHNE KABEL Kode ACG8037 EIN PAAR FOTOZELLEN ST NDER NOVA Kode ACG8039 VERTIGO Wi Fi KABELLOSE FOTOZELLE ERSETZT DIE SCHALTLEISTEN...

Страница 33: ...sta 800 kg y tienen 2 metros de largo Se aconseja un cierre el ctrico para hojas de m s de 2 metros Mesures en mm CARACTER STICAS T CNICAS Longitud m xima de la anta Peso m x cancela Tiempo de abertur...

Страница 34: ...a de la verja porque no son suficientemente seguros PREPARACI N DEL ENCEMENTADO DE LA CAJA Hacer una fosa en la tierra al lado de la columna Fig 3 Preparar en el fondo del contenedor un tubo 50 mm en...

Страница 35: ...8 5 7 CME5224 DUKE 110 CME5230 DUKE 180 ACG2120 ACG2125 ACG2130 CME6987 DUKE 110 DUKE 180 Tubo para descarga agua Tubo para cables el ctricos Tubo para cables el ctricos Tubo para descarga agua 62 mm...

Страница 36: ...esario fijar topes u otras cosas en la tierra porque est equipado adentro de tornillos ajustables de parada para delimitar el recorrido de la hoja Para tener acceso a los tornillos es necesario quitar...

Страница 37: ...onofasis MANTENIMIENTO Estas operaciones deben ser efectuadas exclusivamente por personal especializado y con el motor desconectado de la alimentaci n el ctrica Cada a o poner grasa sobre las piezas q...

Страница 38: ...la antena Instale la antena verticalmente y de tal manera el mando a distancia puede alcanzarla INTERMITENTE SPARK con tarjeta intermitente incorporada c d ACG7059 SOPORTE LATERAL c d ACG7042 ANTENA S...

Страница 39: ...4 con regleta 12 30V ac dc c d ACG6099 NOVA Wi Fi FOTOC LULAS SIN CABLES c d ACG8037 PAR DE COLUMNAS NOVA c d ACG8039 VERTIGO Wi Fi FOTOC LULAS SIN CABLES PARA REEMPLAZAR A LA COSTA VERTIGO Wi Fi 8 c...

Страница 40: ...40 40 NOTES...

Страница 41: ...on de l art 6 paragraphe 2 de la Directive machines 2006 42 CEE et de ses modifications successives Sa mise en service est interdite avant que l installation ait t d clar e conforme aux dispositions p...

Страница 42: ...23 Vite s fine CME5224 Leva traino cassa DUKE 110 CME6987 Piatto cancello cassa DUKE CMO1319 Rotore con albero CRS62042R Cusc 6204 2RS CTC1013 Chiavetta 8 7 25 CTC1090 Paraolio 20x30x5 Rolf CTC1371 Sp...

Страница 43: ...E 180 CME5229 Albero di traino DUKE 180 CME5230 Gruppo palmola c ingr DUKE 180 CME6987 Piatto cancello cassa DUKE CMO1319 Rotore con albero CRS62042R Cusc 6204 2RS CTC1013 Chiavetta 8 7 25 CTC1090 Par...

Страница 44: ...d velopp et fabriqu en Italie This product has been completely developed and built in Italy Dieses Produkt wurde komplett in Italien entwickelt und hergestellt Art culo totalmente proyectado y produc...

Отзывы: