- 12 -
5. Operating Instructions
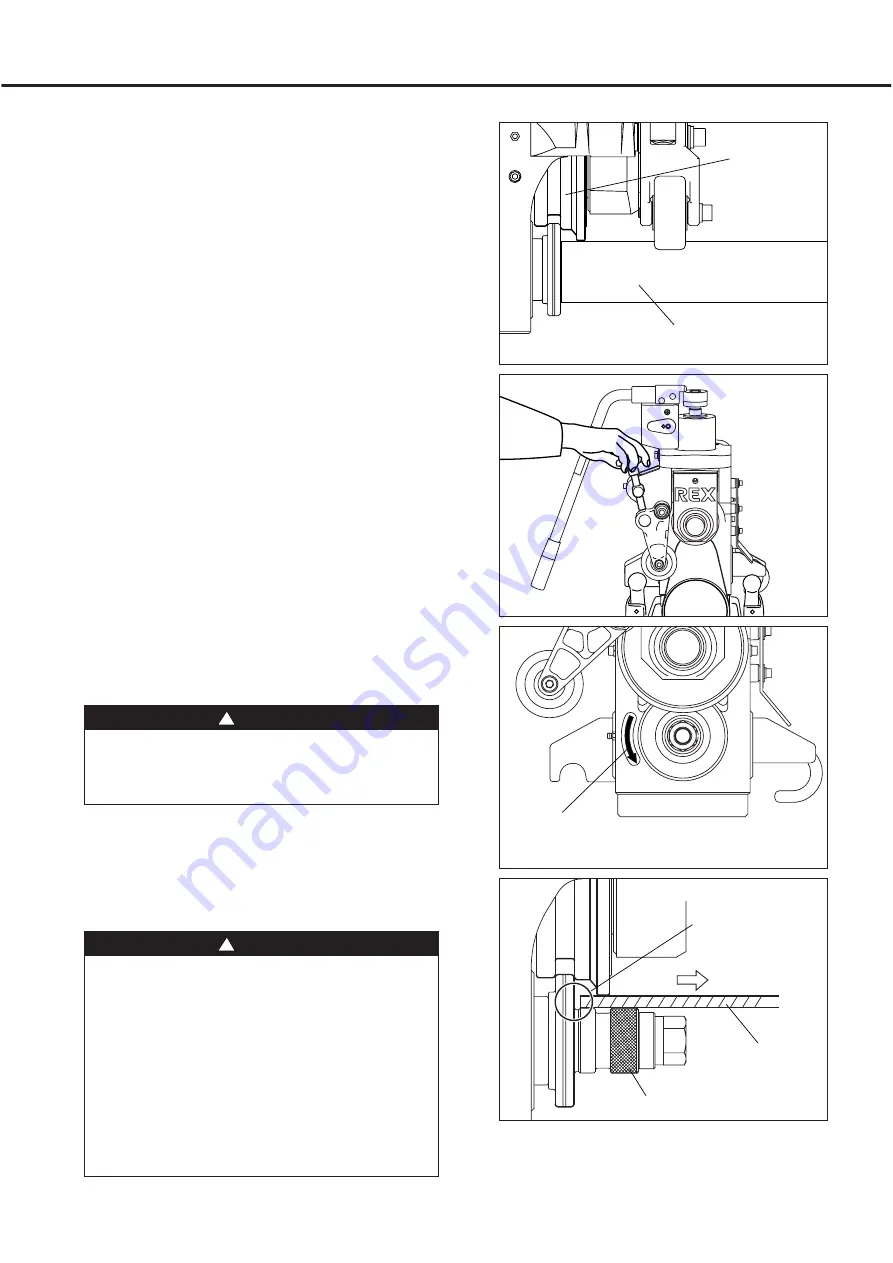
1) Turn the hydraulic pump valve to the ON
position, and pull the pump handle up quickly
and firmly to engage the pipe lightly with the
upper roller and then raise the pump again.
2) Turn the push knob on the guide roller to
lightly engage the guide roller with the pipe.
In this position, tighten the knob a further half-
turn to push the guide roller against the pipe.
(Fig. 22)
The amount you tighten depends on the pipe.
Tighten lightly for thin pipes; more for thick or
hard pipes.
Ascertain the most suitable amount you should
tighten according to the pipe's size and
material. If you tighten too much, the end of
the pipe will flare; if not tightened enough, the
pipe may fall out when working on it.
3) If the threading machine has a switch for
changing directions, use in the forward
(normal) direction position for cutting threads.
(Fig. 23)
3. Grooving
4) Turn the threading machine on to start the
pipe rotating.
Allow the pipe to rotate several times to
ensure that the pipe does not slip away from
the lower roller flange.
㧍
CAUTION
㨯
If you use the machine in the opposite
direction to threading (reverse), the pipe
may fall out, which can be very
㧍
WARNING
㨯
Should the pipe slip off the lower roller,
turn the threading machine OFF
immediately to stop it rotating. If the pipe
slips out while still rotating, the pipe will
become detached from the lower roller
and could fall out, which is very dangerous.
(Fig. 24)
Loosen the hydraulic valve and reset the
pipe. If the pipe slips out, shift the pipe a
little more.
Fig. 22
Fig. 24
Fig. 23
Fig. 21
Correct
direction
Upper Roller
Pipe
Lower roller
Pipe
If the pipe slips out,
immediately turn
the switch OFF.
Pipe slipping out


