


III_Operating VisualTable
- 25 -
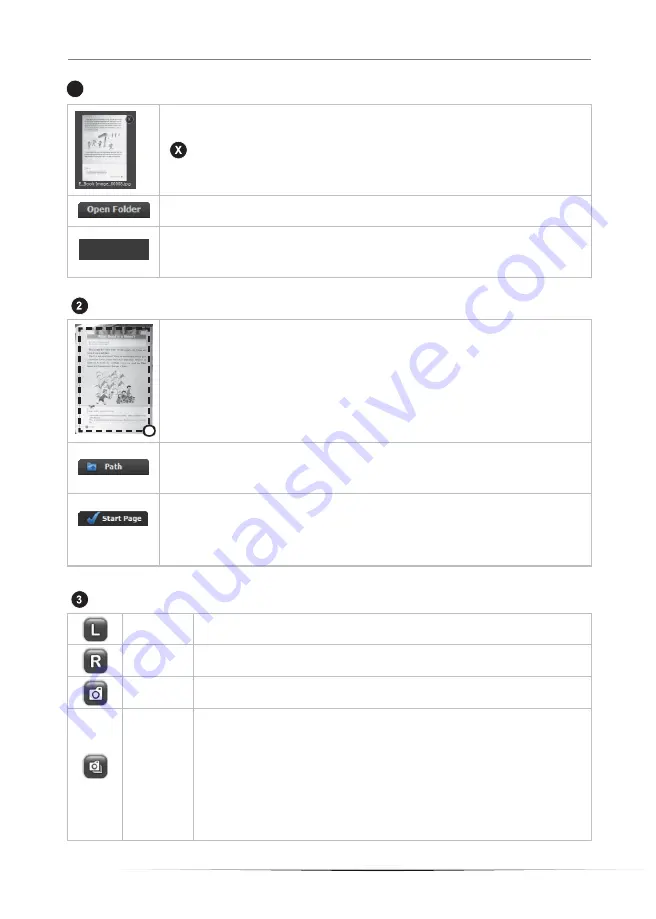
Saved image lineup window
To display the list of scanned images
To delete the saved image
File name: the folder name + sequential number
To get the folder of saved images and check them
To delete all the files in the folder. In the event of sharing VisualTable, make
sure to back up all the necessary scanned images for successive scanning in
the next time before other users delete all the images by
“Delete All” button.
Real-time image/ Scan area specifying window
To show the page of a book to be scanned and specify scan areas for saving.
- Drag the mouse to move about the Area Select window (the dotted box).
- Click on a circle at a corner of the Area Select window to drag and adjust its size.
- Scanning is executed only on the marked area, which can be saved for later use.
-
Saving the image by double click of the inside of the scan area in creating
eBook (Folder setting: Custom setting/ Program options/ Documents Folder)
To select the folder to save scanned images for creating an eBook file.
Scanned image files are automatically numbered.
File name: the folder name + sequential number
To input a beginning number; this will increase by one at each scanning.
File name: the folder name + sequential number counting from the beginning
number (It is helpful to creating pdf file by having the successive numbers for
the previous scanned files.)
Function button window
Left
To go to page on the left side and show it
Right
To go to page on the right side and show it
Capture
To scan and save the currently viewing page
Automatic
capture
To save left and right pages in image file format. The currently viewing
page is saved first and then the opposite page follows. The path is
assigned to
“E_Book Image” save folder.
The opposite page will be saved after the first pages is completed,
waiting for an interval set in
“Delay Time” (Custom Setting/ Camera
options). In the event that scanned images are dim and blurry or their
brightness is not uniform, you need to extend the scan delay time 5
seconds at default.
1
Delete All


