background image


iv 

Rev. 01 – 07-01-2008 

Remarks and Alterations 


Applied Modifications 


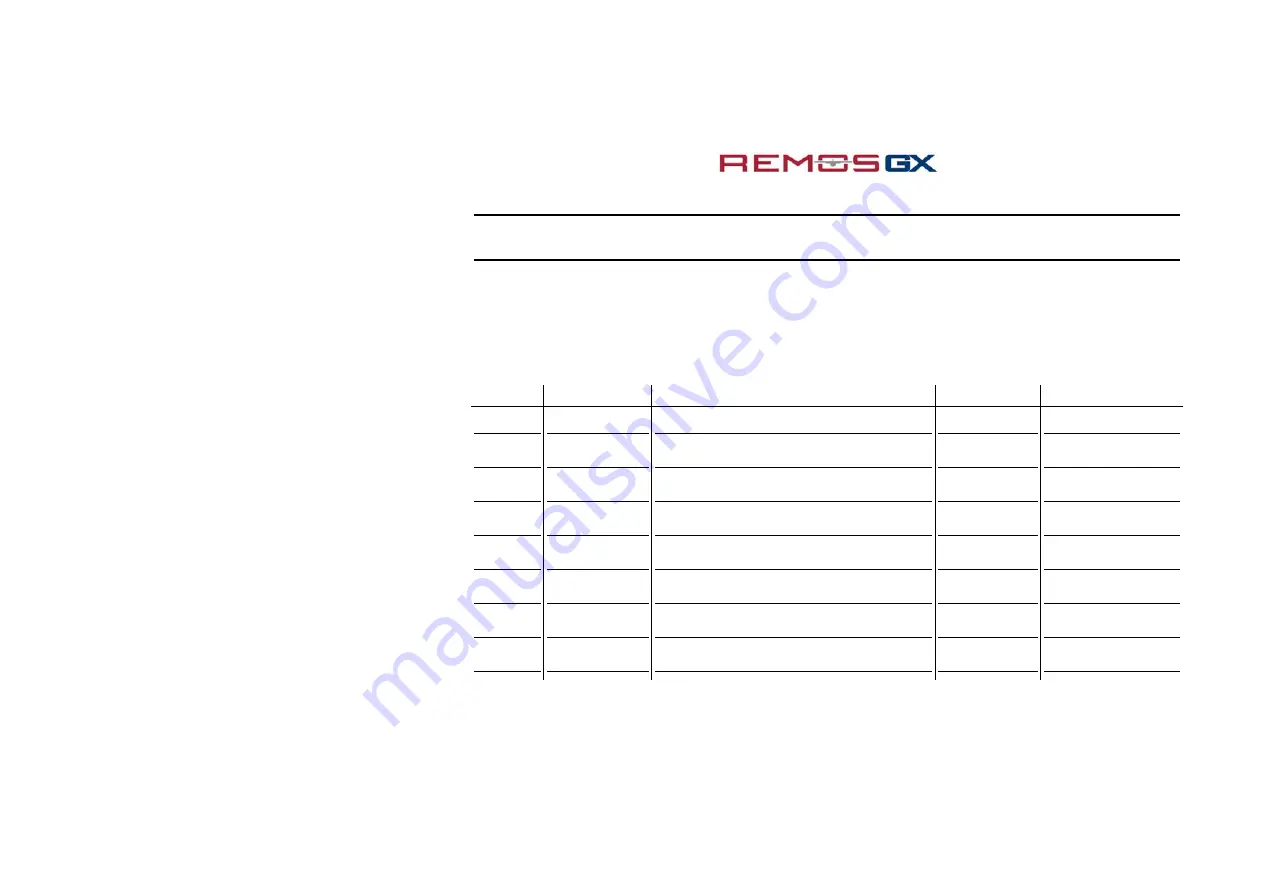
Please make a notation below, if any changes have been made to this manual or to the plane. This 
manual is an important documentation for pilots in command to ensure a safe operation of the aircraft. 
Therefore it is recommended to keep this Operating Handbook updated with the newest information 
available. You can get the latest upgrades of this manual from your dealer or directly from the 
manufacturer´s homepage. 

 
Pos. Page 

Concern 

Date 

Signature 


Содержание G 2008 Series

Страница 1: ...i...

Страница 2: ...ess standards and does not conform to standard category airworthiness requirements Serial No Engine Type Year of constr Serial No Engine Call Sign Propeller Type Serial No Propeller Manufacturer REMOS...

Страница 3: ...008 Table of Contents Vi Revision 01 07 01 2008 Views Vii Revision 01 07 01 2008 General Information 1 1 thru 1 3 Revision 01 07 01 2008 Airplane and Systems Descriptions 2 1 thru 2 21 Revision 01 07...

Страница 4: ...e This manual is an important documentation for pilots in command to ensure a safe operation of the aircraft Therefore it is recommended to keep this Operating Handbook updated with the newest informa...

Страница 5: ...v Rev 01 07 01 2008 Remarks and Alterations Applied Modifications continued Pos Page Concern Date Signature...

Страница 6: ...n 1 1 thru 1 3 2 Airplane and Systems Descriptions 2 1 thru 2 21 3 Operating Limitations 3 1 thru 3 4 4 Weight and Balance Information 4 1 thru 4 7 5 Performance 5 1 thru 5 6 6 Emergency Procedures 6...

Страница 7: ...vii Rev 01 07 01 2008 Views The REMOS GX is designed as full composite carbon fiber aircraft...

Страница 8: ...eral Information 1 1 Rev 01 07 01 2008 1 General Information Table of Contents Paragr Description Page 1 1 Introduction 1 2 1 2 Certification 1 2 1 3 Quick Reference 1 2 1 4 Technical Specifications 1...

Страница 9: ...from the manufacturer s homepage 1 2 Certification The REMOS GX was manufactured in accordance with the Light Sport Aircraft airworthiness standards and does not conform to standard category airworthi...

Страница 10: ...l which are bonded together carbon fiber Kevlar and glass fiber Engine Rotax 912 UL S Propeller 2 blade ground adjustable composite 1 4 Technical Specifications Specifications posted below are related...

Страница 11: ...2 3 Fuel and Fuel Capacity 2 2 2 16 Secondary Instrumentation 2 17 2 4 Engine Oil Coolant 2 3 2 17 Glass Cockpit Left Hand Panel 2 18 2 5 Operating Weights and Loading 2 3 2 18 Dynon EFIS D 100 HS 34...

Страница 12: ...50 C 2 2 Propeller Gearbox Propeller Manufacturer Sensenich Propeller type number of blades 2A0 R5R70 EN 2 blade carbon Gearbox Manufacturer Rotax Gearbox ratio Engine Propeller 2 43 1 Clutch yes 2 3...

Страница 13: ...2 5 liters Ratio 1 1 Concentrate Water 2 5 Operating Weights and Loading Maximum take off weight MTOW 1320 lb 600 kg Maximum useful load 650 lb 295 kg Minimum empty weight 670 lb 305 kg Minimum flyin...

Страница 14: ...n 2 6 Cockpit Overview Cockpit example The following pages will give you more information about how to operate your REMOS GX Note Some of the illustrated devices or options may not be available due to...

Страница 15: ...Airplane and Systems Description 2 5 Rev 01 07 01 2008 2 Airplane and Systems Description...

Страница 16: ...consists of the following ASI VSI Altimeter Slip Indicator Magnetic Compass Rotax FLYdat rpm operation hours indicator exhaust gas oil pressure oil temp CHT temp gauges If you have chosen the Cross C...

Страница 17: ...the signalled operating data exceeds the stored operating limit the FLYdat will create a warning The FLYdat features the following actual readings Engine speed CHT temperature oil pressure and tempera...

Страница 18: ...achieve the maximum engine performance and endurance Take special care to warm up the engine before take off to at least 120 F 50 C Engine Gauges Oil Pressure Oil Temperature CHT Temperature rpm Mini...

Страница 19: ...definitely The following functions are contained Electric trim control lever blue Flap control lever white Anti Collision Light ACL Electric fuel pump Navigation lights wing tail Instrument lighting...

Страница 20: ...easily The Master Bus is separated into Master and Avionics circuits each populated by 6 automatic circuit breakers An additional charge fuse is loctated in front of the firewall beneath the battery...

Страница 21: ...feature an effective LED panel lighting system which can be dimmed independently from the instrument lights It is a dazzle free system designed for Night VFR use At the left border of the cockpit fram...

Страница 22: ...il temperature control is installed Push to increase temperature Pull to decrease temperature At the lower position the dual trottle control is located The dual throttle lever does not feature a frict...

Страница 23: ...center console Choke green Carburetor heat yellow Fresh air control blue Cabin heat red Fuel valve Brake lever including fluid reservoir Parking brake valve All controls are labeled On the center cons...

Страница 24: ...ration The radio rack is held in place by 6 shock mounts to give a maximum protection against vibration Due to the modular design the complete radio rack can be removed from the cockpit frame as a who...

Страница 25: ...ionics package contains a Garmin SL 40 radio along with a Garmin Mode C S transponder GTX 327 GTX 330 With the PS E 1000 intercom there is an additional audio input provided enabling connection of ext...

Страница 26: ...g with the audio panel Garmin GMA 340 An audio input allows connection of external audio devices The Garmin GPS 496 is mounted along with an AirGizmo frame to allow to remove the device for to go very...

Страница 27: ...the left The pictures below are showing the factory installed gauges The function of the illustrated gauges is not decribed in this manual because they match with the common standards The following g...

Страница 28: ...d for the reliable and well approved Dynon Avionics system This system consists of an EFIS D 100 as a primary flight display along with an analog airspeed indicator altimeter and slip indicator as bac...

Страница 29: ...n comparison to version A the engine monitoring and various secondary gauges are combined in the Dynon EMS D 120 monitor so some of the additional gauges are to be omitted With the HS 34 HSI module is...

Страница 30: ...t provides a much brighter display allowing very good visibility during broad daylight The EFIS D 100 includes the following functions Airspeed Indicator Altimeter Vertical Speed Indicator Slip Indica...

Страница 31: ...f engine parameters and additional functions on one wide display screen Installed in the REMOS GX the functions listed below are displayed by the EMS D 120 The following functions are covered by the E...

Страница 32: ...imitations Table of Contents Paragr Description Page 3 1 Airspeed Limits 3 2 3 2 Cross Wind Limitations 3 3 3 3 Service Ceiling 3 3 3 4 Load Factors 3 3 3 5 Prohibited Flight Maneuvers 3 3 3 6 Center...

Страница 33: ...ssible maneuvers VNO Maximum speed in turbulence 123 mph 107 kts Airspeed which shall never be exceeded in gusty weather conditions VFE Speed range flaps extended 44 81 mph 38 70 kts Airspeed which sh...

Страница 34: ...component 17 mph 15 knots for take off and landing 3 3 Service Ceiling Maximum permissible service ceiling 15 000 ft 3 4 Load Factors Safe multiple load range 4 0 g 2 0 g 3 5 Prohibited Flight Maneuve...

Страница 35: ...thru 16 3 inch measured from the leading edge of the wing close to the fuselage To determine the CG the weight of the aircraft has to determined equipped with all devices ready to fly except fuel and...

Страница 36: ...Information Table of Content Paragr Description Page 4 1 Installed Equipment List 4 2 4 2 Weight and Balance Form 4 2 4 3 Center of Gravity CG Range and Determination 4 3 4 4 CG Calculation 4 4 4 5 Ca...

Страница 37: ...gauge Oil temperature gauge CHT gauge Exhaust gas temperature only with Rotax Flydat D 120 Electric fuel gauge Position and tail lights ACL Anti Collision Light Master avionics and engine kill ignitio...

Страница 38: ...surface Before weighing a level wing main chord has to be established use pads between main wheels and scale beneath A check mark R P on the leading edge of the left wing adjacent to the wing root is...

Страница 39: ...f the center of gravity CG Moment lb Inch Weight lb x Arm Inch Moment Total lb Inch Center of Gravity Inch Weight Total lb Weight lb Arm Inch Moment lb Inch Empty Weight ____ ____ ____ Occupants ____...

Страница 40: ...70 12 5 8 375 Occupants 175 8 3 1 452 5 Fuel 120 37 8 4 536 Luggage 30 37 4 1 122 Weight Total 995 Moment Total 15 485 5 Moment Total lb Inch Center of Gravity Inch Weight Total lb 15 56 Inch Calculat...

Страница 41: ...Weight and Balance Information 4 6 Rev 01 07 01 2008 4 Weight and Balance Information 4 6 CG Diagram...

Страница 42: ...s Below the aircraft specific data shall be notified Pilots must use this information to ensure a correct weight and balance calculation prior to every flight This is essential for a safe conduction o...

Страница 43: ...iption Page 5 1 Take Off and Landing Distances 5 2 5 2 Rate of Climb 5 2 5 3 Take Off Distance Effected by External Circumstances 5 3 5 4 Take Off Distance Effected by Pressure Altitude 5 4 5 5 Pressu...

Страница 44: ...ding roll distance Flaps 40 270 ft Landing distance Flaps 40 760 ft 5 2 Rate of Climb Description Airspeed for best angle of climb Vx IAS 75 mph Airspeed for best rate of climb VY IAS 88 mph Maximum c...

Страница 45: ...ave an effect on take off and landing performance According to ICAO circular 601AN 55 2 it is recommended to use following ad ons on roll and air distances Description On roll distance for dry grass 2...

Страница 46: ...Performance 5 4 Rev 01 07 01 2008 5 Performance 5 4 Take Off Distance Effected by Pressure Altitude...

Страница 47: ...Performance 5 5 Rev 01 07 01 2008 5 Performance 5 5 Pressure Altitude Diagramm...

Страница 48: ...chHG Fuel Consumption gph True Airspeed at 3000 ft mph Maximum Endurance hr min Maximum Range SM 5 400 6 1 137 3 31 480 5 100 5 3 130 4 02 520 4 800 4 6 120 4 37 550 4 600 3 6 115 6 00 630 4 400 3 0 1...

Страница 49: ...6 4 Operating the Rescue System 6 3 6 5 Illustrated Rescue System Installation 6 4 6 6 Engine Failure Loss of Power before Take Off 6 5 6 7 Engine Failure after Take Off 6 5 6 8 Engine Failure in Fli...

Страница 50: ...portant information regarding the use of the recommended rescue system 6 1 Door Emergency Eject 1 Unlock the doors by rotating back the door lock handle 2 Unlock the hinges by pushing the securing pin...

Страница 51: ...d to connect the bridles with the rescue system which has to be inspected before each flight to assure that it is fixed securely Attention Do not make changes or modifications to any part of the rescu...

Страница 52: ...ev 01 07 01 2008 6 Emergency Procedures 6 5 Illustrated Rescue System Installation 1 Emergency handle 2 Connection kevlar bridles to main spar 3 Recovery system rocket 4 Parachute softpack 5 Rubber pr...

Страница 53: ...e Off If the engine fails during climbing after take off apply the following procedures A Below 500 ft above ground 1 Push the control stick forward carefully to get into a safe airspeed range 2 Cut o...

Страница 54: ...in gliding configuration has to be conducted 6 9 Emergency Landing Procedure 1 Determine the wind direction 2 Search for a possible landing area pay attention to the wind direction 3 Touch down into...

Страница 55: ...nal approach has to be carried out into the wind 2 Cut off the ignition and close fuel valve 3 Eject doors 4 Touch down on the water surface with minimum possible airspeed 5 Unbuckle and exit the airc...

Страница 56: ...flight Check 7 2 7 2 Starting the Engine 7 3 7 3 Taxiing 7 5 7 4 Normal Take Off 7 5 7 5 Best Angle of Climb Speed VX 7 6 7 6 Best Rate of Climb Speed VY 7 6 7 7 Cruise 7 6 7 8 Approach 7 7 7 9 Normal...

Страница 57: ...ondition of engine mounting 5 Check mounting and condition of the exhaust system 6 Check all water hoses and hose connections 7 Check that the cowling is closed and properly secured 8 Check propeller...

Страница 58: ...ystem securing pin from emergency handle 10 Open fuel valve 7 2 Starting the Engine NEVER start the engine without being in the cabin at the controls with the doors closed and locked Now switch on the...

Страница 59: ...the engine has started Do not hold the key in that position for more than 10 seconds in order to avoid overheating the starter 3 Release ignition key immediately after the engine has started After st...

Страница 60: ...aps to 15 position 2 Set electric trim to neutral position 3 Switch on electric fuel pump if fitted 4 Move rudder and elevator to neutral position with crosswind aileron in wind direction 5 Move throt...

Страница 61: ...Rate of Climb Speed VY The maximum climb rate of 1 050 ft min with fixed pitch propeller is achieved at an airspeed of about 85 to 88 mph 73 to 76 kts Please watch oil and water temperature during lon...

Страница 62: ...e maximum permissible crosswind component demmonstrated is 17 mph 15 kts In a headwind component of more than 17 mph 15 kts it is recommended to carry out the landing with a flaps setting of 15 7 10 S...

Страница 63: ...reestablish a safe airspeed Performing a stall from level flight CG at most rearward position airspeeds as CAS Flap Position 0 15 30 40 Vmin at idle 51 mph 44 kts 47 mph 41 kts 45 mph 39 kts 44 mph 38...

Страница 64: ...ion airspeeds in CAS 30 bank Flap Position 0 15 30 40 Vmin at idle 53 mph 46 kts 49 mph 42 kts 45 mph 39 kts 44 mph 38 kts Vmin at full power 54 mph 47 kts 50 mph 43 kts 46 mph 40 kts 44 mph 38 kts As...

Страница 65: ...8 3 8 16 Changing Engine Oil 8 16 8 4 300 hr Service 8 4 8 17 Exhaust System Servicing 8 16 8 5 Cleaning and Care 8 4 8 18 Propeller Servicing 8 17 8 6 Folding Wing System 8 5 8 19 Airbox System and...

Страница 66: ...between the seats and an additional electric fuel gauge is installed on the right hand side of the instrument panel Refer to Section 2 Airplane and Systems Descriptions for further instructions regard...

Страница 67: ...rm maintenance of the engine per the engine manufacturer s recommendations 5 Visually check the engine mounting frame and the proper and secure attachment and location of all other components in the e...

Страница 68: ...and bushes for corrosion and proper seating 5 Check condition of rubber engine mounts for wear 6 Exchange engine coolant 7 Check all fuel coolant and oil hoses and fittings for wear and cracks 8 Check...

Страница 69: ...l tools are required except the special tool for attaching and removing the wing and stabilizer bolts This tool is provided with the basic equipment for the aircraft To prepare for assembling the stab...

Страница 70: ...ion has to rotate the wing to align both connection latches Care has to be taken that the surface of the wing is not damaged by the fuselage connecting latches 5 When the connection latches between th...

Страница 71: ...a V the rearward bolt by H At the end of each bolt you will find a little hole Once the bolt is installed this hole must be aligned with the appropriate hole of the stabilizer bush to fit the cowl pi...

Страница 72: ...mage to the airframe composite bodywork must be repaired by skilled and authorized persons only Repairs and services may only be conducted using REMOS genuine replacement parts The use of parts or mat...

Страница 73: ...rut covers on the steel version A visual check for scratches cracks and tire condition has to be carried out prior to each flight Repair works to the fiberglass main gear must only be conducted by ski...

Страница 74: ...single brake disc is installed to each wheel of the main gear Disassembling the wheels Composite main gear With the composite main gear installed the complete wheel brake assembly has to be removed do...

Страница 75: ...led The pad 1 thickness has to be 0 08 In at least while minimum thickness of the brake disc 3 is 0 13 In Assembling brakes and wheels Composite main gear Assembling is carried out in reverse order Af...

Страница 76: ...wheel spat retaining screws and withdraw the fairing upward if fitted Hoist the aircraft using a jack placed beneath the wheel axle bracket plate Release and remove the wheel nut and the securing wash...

Страница 77: ...ing is carried out in reverse order After assembling check thoroughly for sufficient space between brake hose and tire check that the torque bolt has engaged to it s retaining bolt at the axle bracket...

Страница 78: ...center console This layout allows to control braking performance very precisely while access is granted from both seats On the illustration to right you can see the brake master cylinder and it s com...

Страница 79: ...er the dip tube which carries a wheel fork made from steel at its lower end If desired a wheel spat can be attached to give more aerodynamic efficiency The nose gear is controlled by the foot pedals a...

Страница 80: ...information 8 17 Exhaust System Servicing The REMOS exhaust system used on the REMOS GX is manufactured from stainless steel To provide suitable cabin temperature especially in cold climates a cabin...

Страница 81: ...l to repair any failure of the lacquer finish immediately and check accomplish propeller balancing 8 19 Airbox System and Air Cleaner Element The REMOS air intake system consists of a carburetor heati...

Страница 82: ...devices for servicing or alterations Regardless we strongly recommend to contact an avioncs shop for all electrical belongings Prior to any work on the electrical system disconnect the battery Disasse...

Страница 83: ...om the installed devices Assembly Assembling is carried out in reverse order Take great care that all electrical harnesses are routed in the same manner as before disassembling Any change to the origi...

Страница 84: ...ingle part This applied process in conjunction with premium 2 component acrylic paint allows to leave out the common heavy gel coat layer which additionally contributes to the low aircraft weight Grea...

Страница 85: ...arkings Table of Contents Paragr Description Page 9 1 Placard Positioning 9 2 9 2 Airspeed Indicator Range and Markings 9 3 9 3 Operating Limitations applied to center console 9 3 9 4 Passenger Warnin...

Страница 86: ...Required Placards and Markings 9 2 Rev 01 07 01 2008 9 Required Placards and Markings 9 1 Placard Positioning Pos See page A 9 5 B 9 6 C 9 4 D 9 6 E 9 6 F 9 4 G 9 3 H 9 4 I 9 6 J 9 6...

Страница 87: ...0 Minimum airspeed with flaps extended White Arc 44 to 81 mph VS0 V FE Airspeed range for flaps extended Yellow Line 108 mph VA Maximum airspeed for full maneuverability Green Arc 51 to 123 mph VS1 V...

Страница 88: ...Required Placards and Markings 9 3 Operating Limitations applied to center console The following limitation placards are applied to the center console inside the cabin Applied to position F Applied to...

Страница 89: ...card is located in front of the rescue system area indicating that no luggage or clothes should be placed there This is a safety advisory to guarantee the proper operation of the rescue system if inst...

Страница 90: ...icates the fuel empty position When the indicated fuel quantity is level with that marked by the decal 0 5 gallons of fuel remains in the fuel tank Inside the cabin a starting checklist and related pl...

Страница 91: ...008 9 Required Placards and Markings Outside the cabin this placard is located adjacent to the fuel filler It indicates the recommended fuel qualities approved for the REMOS GX Refer to the engine ope...

Страница 92: ...ng the folding or reassembling of the wings On both sides of the fuselage beneath each static port you will find this decal Please keep in mind that both static ports have to be kept clean Dirt or wat...

Страница 93: ...ntary Information 10 1 Rev 01 07 01 2008 10 Supplementary Information Table of Contents Paragr Description Page 10 1 Flight Training Supplement 10 1 1 to 10 1 9 10 2 Towing Glider Supplement 10 2 1 to...

Страница 94: ...10 1 Flight Training Supplement Table of Contents Paragr Description Page 1 Introduction 10 1 2 2 Take Off 10 1 3 3 Climbing 10 1 4 4 Cruise 10 1 5 5 Stall 10 1 6 6 Slip 10 1 6 7 Gliding 10 1 7 8 Des...

Страница 95: ...the POH The following pages describe flight characteristics experienced during various flights configurations and weather conditions Take off Climbing Cruise Stall Slip Gliding Descent Approach Touch...

Страница 96: ...erates gently pull back on the control stick to elevate the nose slightly until the aircraft becomes airborne 6 Once airborne slowly release the back pressure on the control stick to allow the airspee...

Страница 97: ...d between 90 to 100 mph 78 to 86 kts At these speeds the aircraft will climb between 600 to 800 ft min depending on weather conditions altitude and weight of the aircraft It is strongly recommended to...

Страница 98: ...f 3 5 gph or less will result enabling a maximum range of six hours of flight time Once the aircraft is trimmed well it will maintain its altitude and heading without doing any correction to the contr...

Страница 99: ...raft we recommend to do this exercise only when accompanied by an experienced flight instructor for the first time 6 Slip The slip is a very stable flight condition and is also very easy to perform Th...

Страница 100: ...ures During descent the temperatures will decrease which could cause engine failures or carburetor icing to develop So it is strongly recommended not to exceed the lower limits of these temperatures I...

Страница 101: ...17 mph 15 kts Conducting a crosswind landing will not require special skills nevertheless if not yet familiar with the aircraft we recommend to initially exercise crosswind landings only when accompa...

Страница 102: ...onduct a slip maneuver In no case push the control stick forward this will cause higher airspeeds and result in a missed approach Conducting an approach in the slip configuration will not require spec...

Страница 103: ...iptions 10 2 4 2 1 Cockpit 10 2 4 3 Operating Limitations 10 2 5 3 1 Maximum permissible Towing Speed VT 10 2 5 3 2 Maximum Weak Link Strength 10 2 5 3 3 Maximum permissible All Up Weight of the Glide...

Страница 104: ...10 2 10 6 2 Additional Procedures 10 2 10 6 3 Failure of the Release Clutch 10 2 10 7 Normal Procedures 10 2 11 7 1 Preflight Check 10 2 11 7 2 Take Off 10 2 11 7 3 Descent and Landing 10 2 11 8 Airc...

Страница 105: ...airworthiness standards and does not conform to standard category airworthiness requirements 1 3 Quick Reference For the use as a glider towing aircraft the REMOS GX is equipped with the Tost E85 tow...

Страница 106: ...s 2 1 Cockpit Inside the cabin of the REMOS GX a tow release handle is installed You will find that handle located at the left hand side of the pilot seat colored yellow If the handle is pulled out th...

Страница 107: ...ngth of at least 165 to 200 ft 2 A weak link of Qnom 300 daN has to be installed 3 3 Maximum Permissible All Up Weight of the Glider to be Towed The maximum permissible all up weight of the glider to...

Страница 108: ...or towing operation Concerning payload there are some restrictions which have to be observed see also Section 3 within this supplement 4 2 Required Equipment The following additional equipment is requ...

Страница 109: ...d to the tow rope otherwise the structure of the aircraft may get overloaded Tow ropes made of polyamide polyester and polypropylene manufactured to aviation standards may be used if the appropriate i...

Страница 110: ...kts Take Off Distance ft Press Alt Air Pressure ft InHG ASK 13 1 120 57 50 67 58 1 560 0 29 98 Twin Astir 1 270 69 60 76 66 1 670 0 29 98 DG 1000 1 320 72 63 80 69 1 740 0 29 98 Take off distances eff...

Страница 111: ...g gives you an estimation of the values Dry grass strip 15 to 20 Dirty wings raindrops 10 to 15 High air temperatures per 18 F above ISA 10 Nose wind component per 10 knots 10 Tail wind component per...

Страница 112: ...dditional Procedures If an unallowable attitude of the glider is determined which could cause an uncontrolled flight situation the tow rope has to be disengaged immediately If the glider is located ou...

Страница 113: ...g lever of this flap should be in the open cooler position 7 3 Descent and Landing After disengaging the glider and prior to descent it is recommended to close the oil temperature regulation flap posi...

Страница 114: ...e Clutch During regular servicing intervals the tow release clutch has to be cleaned lubricated and checked to assure proper operation A general overhaul of the release clutch has to be conducted afte...

Страница 115: ...the cabin of the REMOS GX the following placards are applied when equipped for towing gliders Adjacent to the airspeed indicator Adjacent to the tow release handle 9 2 Release Clutch Outside the airc...

Страница 116: ...Pilot Operating Handbook REMOS GX ASTM Edition Editor Layout und Graphics Hans Fuchs Flight testing and advisory Josef Sporer Nikolas Sporer Copyright REMOS Aircraft GmbH Flugzeugbau REMOS 2007 2008...

Отзывы: