ReChargX
™
RX292
8am - 8pm ET Mon - Fri
© 1995-2014 ReChargX, EmptyX, TonerRefillKits, TonerRefillKits.com, the TonerRefillKits logo, the
V1.01 - 2014.06.24
800.527.3712 or 352.343.7533
ReChargX and EmptyX logos are trademarks owned by TonerRefillkits.com, LLC. All rights reserved.
Page 9 of 12
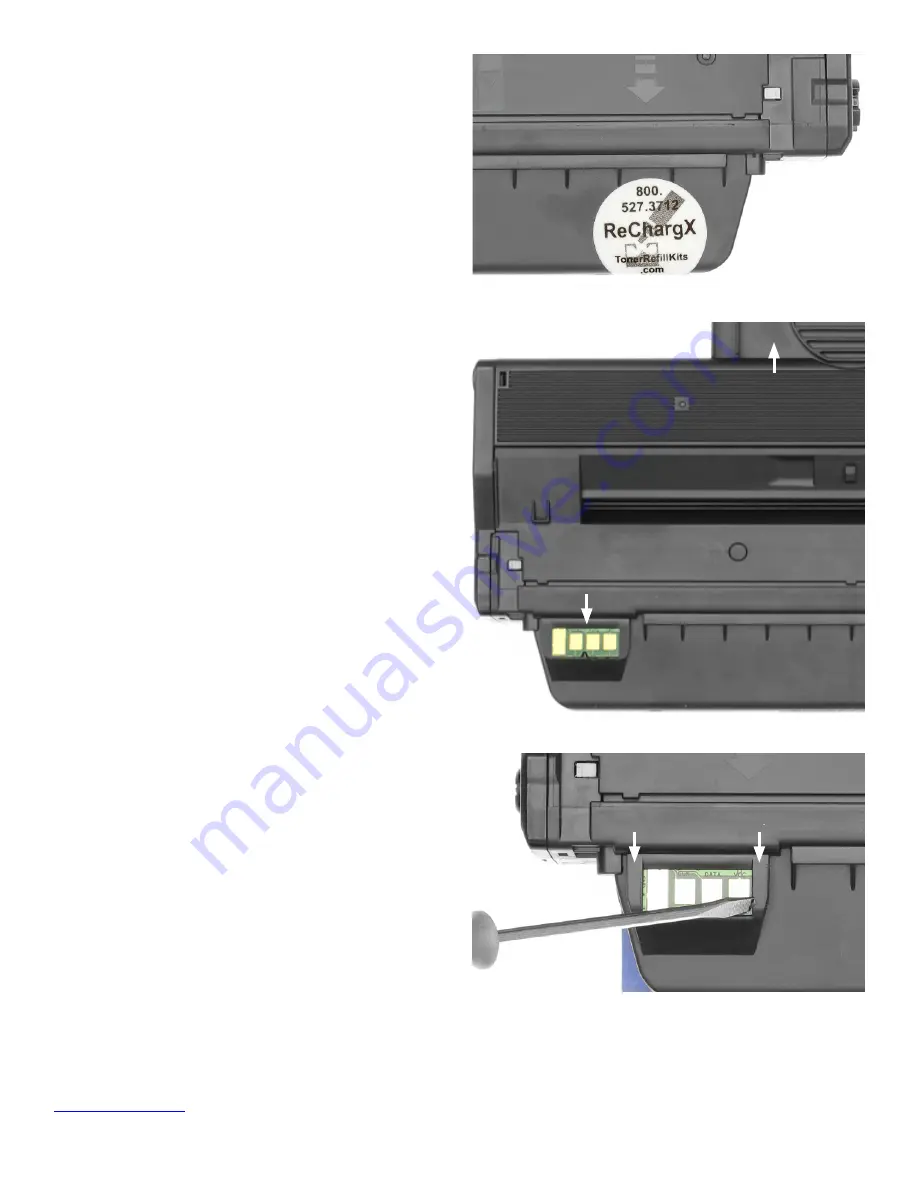
After cleaning the waste hopper hole, firmly apply
the ReChargX™ leak-proof seal to the waste hopper
opening, using a circular motion to ensure a tight
seal (figure 20-2).
Step 21: “Cartridge-killer” chip
Dell (and most other manufacturers) uses a
“cartridge-killer” chip to estimate the toner remaining
in the hopper and to prevent the cartridge from being
used if it is refilled (unless the chip is replaced).
Replacing the existing chip with the reset chip
included in the ReChargX™ RX292 toner refill kit
is very easy.
Locate the existing chip
With the cartridge in the same position as it was to
create and seal the waste toner hopper, the handle
(A) facing away from you and the waste hopper seal
toward you, the reset chip is located within a slot (B)
on the left-hand side. In this view, you can see the
green chip with four brass contacts (figure 21-1).
Step 22: Remove the plastic tabs
The toner cartridge reset chip is held in place by two
plastic tabs (A, B) (figure 22-1). These tabs must be
removed before the reset chip can be removed.
Figure 20-2:
Placement of the leak-proof seal
A
B
Figure 21-1:
Positioning the cartridge to locate the reset chip
A
B
Figure 22-1:
Using a flat-blade screwdriver to remove the tabs


