background image


P a g e


| 28


CL4000PRO User’s Manual


Reach/BTX


3.


You  can  send  the  Key  file  to  the  equipment  vendor  through  Email,  and  request  the 

vendor to generate a new license file.


The new file will be sent to you again.


4.


Click the 

Select License File 

field area, select a license file and then click

 Upload

.


After  the  new  file  is  uploaded  successfully,  the  device  is  configured  with  a  new 

connectivity capability.


4.10.4


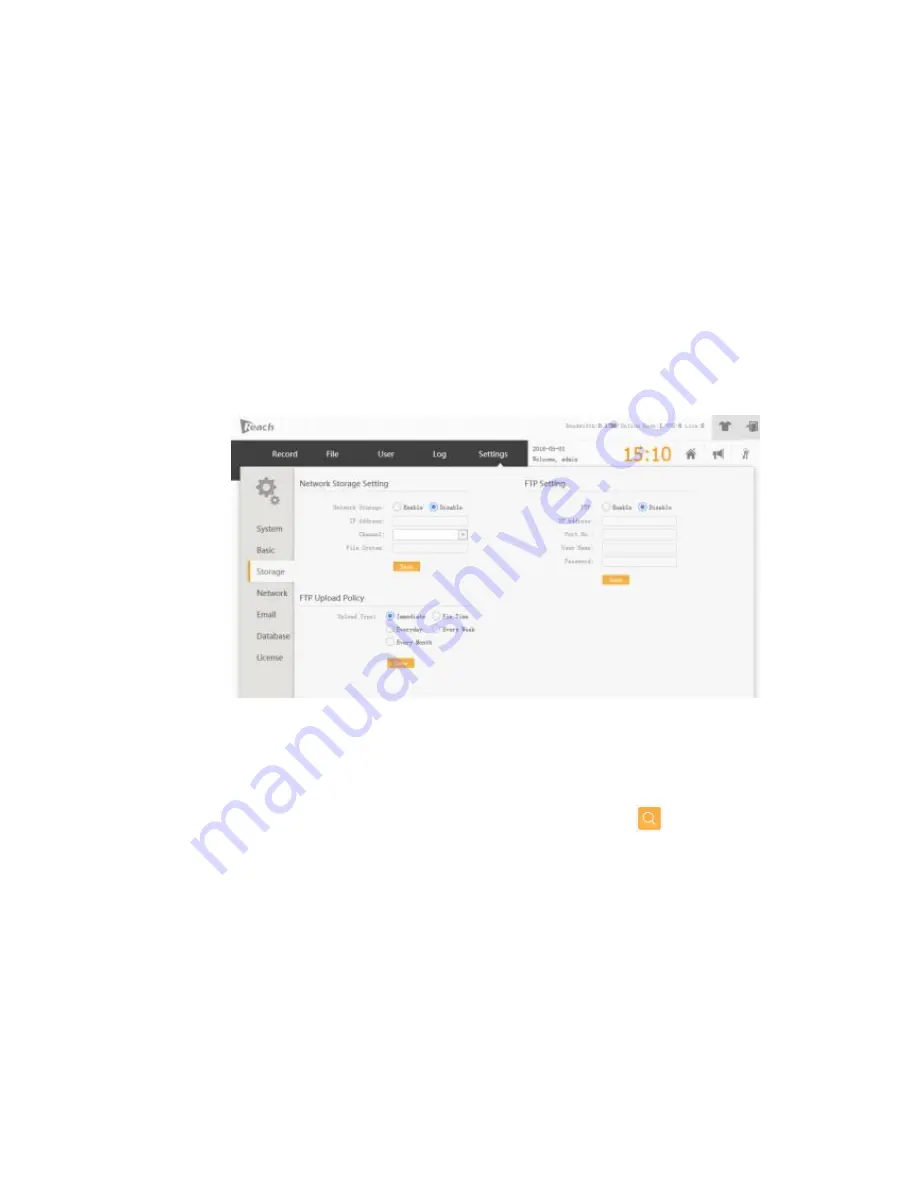
Configuring Network Storage


1.


Click

 Settings 

-> 

Storage

 to open the network storage setting page.


2.


Connect to the network storage. (optional)


a)


Set 

Network Storage

 as 

Open

.


b)


Enter  the IP  address  of  the  network  storage,  and  then  click 

  to  search  the 

channel.


c)


Select a channel, and then set the file system.


d)


Click 

Save

.


3.


Connect to the FTP server. (optional)


a)


Set 

Start FTP

 as 

Yes

.


b)


Configure each parameter for the FTP server.


c)


Click 

Save

.


Содержание Media Master CL4000Pro

Страница 1: ...P a g e 1 CL4000PRO User s Manual Reach BTX Reach Media Master CL4000Pro Modular Server User s Manual VERSION V1 0 US DATE OF ISSUE 02 14 17...

Страница 2: ...1 Operations for Administrator 8 3 4 2 Operations for Colleagues Watching Live Video 12 3 4 3 Operations for Assistant to PM Department 12 3 4 4 Operations for Colleagues Playing VOD File 13 4 OPERAT...

Страница 3: ...nfiguring Email Notification 29 4 7 6 Viewing System Information 30 4 8 ISSUING PUBLIC NOTICE 30 4 9 DOWNLOADING PLAYER 31 4 10 MODIFYING PASSWORD 31 4 11 CHANGING SKIN 33 4 12 VIEWING WARNING MESSAGE...

Страница 4: ...trademarks of Microsoft Corporation Other trademarks are the properties of theirrespective owners Note This user manual is compiled to ensure easy installation and configuration of the product Please...

Страница 5: ...the public live streaming and VOD resources without logging into the CL4000PRO When a user logs in to CL400PRO they can not only view public content but also content that has been permissioned to a us...

Страница 6: ...wers Supports simultaneous recording of high bitrate and low bitrate files The recorded file is a standard MP4 file which can be edited by any nonlinear editing software 1 2Front Panel Label Descripti...

Страница 7: ...2 DC Power Input 8 Balanced Mic in 3 RS 232 port 9 USB I O x2 4 LAN port 10 RS 232 port 5 Line level audio out 11 Expansion slot 3 6 Expansion slot 2 12 Expansion slot 4 SD module ESD Back view of SD...

Страница 8: ...s Size length X width X height 16 9 14 7 1 75 429 25 X 373 X 44 5 mm Weight kg 15 5 LBS 7kg Environmental Specifications Storage Temperature 40 176 F 40 80 C Operating Temperature 4 104 F 20 40 Relati...

Страница 9: ...the camera PTZ to the device serial port d Connect a network cable to the CL4000Pro LAN port so that the device will be connected to the network planned by the network administrator Connection to a 10...

Страница 10: ...e following table the system networking diagram is shown in Figure 3 1 Device IP Address Function CL4000PRO Server Within the predetermined IP and Subnet range decided by the IT team Allow management...

Страница 11: ...you can view the IP address displayed on the LCD screen in scrolling mode You can log in to the server through any Web browser The login procedures are as follows 1 Enter the IP address of the server...

Страница 12: ...then click Login to log in to the server The default user name is admin and the default password is also admin Open the background management page by default after the login There are five function bu...

Страница 13: ...icense 4 2Application Scenarios A Project Manager wishes to transfer knowledge to his local and remote team concerning new best practices for the deployment of Insulated Concrete Forms to gain a compe...

Страница 14: ...meeting Enable the recording and live streaming function of the sharing meeting Create a live user group create live users for a part of colleagues and then add these live users to the live user grou...

Страница 15: ...og box pops up c Configure information for the live user group For details please refer to the following table Parameter Value Name PM skill sharing group Group Type Common Group d Click Save 3 Assign...

Страница 16: ...ser a Click User User to open the user management page b Click Add An Add dialog box pops up c Configure information for the live user For details please refer to the following table Parameter Descrip...

Страница 17: ...streaming and click or to live streaming 6 Click to end the meeting 7 Set the meeting video as a public resource a Click Resource to open the resource management page b At the left side of the page s...

Страница 18: ...video to watch the video 4 4 3 Operations for Assistant to PM Department After the sharing meeting video is recorded the assistant to PM department needs to save a copy of the video and publish it to...

Страница 19: ...the VOD file as per the following steps 1 Enter the IP address of CL4000PRO Server 192 168 10 100 in the address bar of the browser and then press ENTER 2 In the VOD area click the sharing meeting vid...

Страница 20: ...D file in the following ways Play the VOD file by using ReachPlayer After you are logging in to ReachPlayer playing the VOD file as described in A 4 Play the VOD file at the foreground management page...

Страница 21: ...se record Click button to pause recording 5 Resume record Click button to resume recording 6 Stop record Click button to stop recording 7 Live Select the living video and audio sources and fill in the...

Страница 22: ...recording light is put out you can pause the recording Press the record button again the device will resume recorded 3 When device is recording press the stop button stop recording light is lit at the...

Страница 23: ...Schedule to open the scheduled meeting page 2 Click Schedule A Scheduled Task dialog box pops up 3 Configure parameters for the scheduled task 4 Click Save A meeting scheduled successfully will be di...

Страница 24: ...y the information of the scheduled meeting Click the button to delete the scheduled meeting 4 8Managing User and User Group Click User to open the user management page You can perform the following op...

Страница 25: ...types of user group Common Group you can grant only the viewing authorization to this group Operator Group you can grant both the viewing and operating authorization to this group c Click Save 3 Gran...

Страница 26: ...up b Tick off one or multiple user s to be added to the group Common users can only be added to the common group while operators can only be added to the operator group c Click Save The buttons are de...

Страница 27: ...l Reach BTX Button Description Click the button to delete the group 4 8 2 Managing User 1 Click User User to open the user management page 2 Create a new user a Click Add An Add dialog box pops up b C...

Страница 28: ...efer to Configuring Email Notification c Click Save 3 Reset a user password optional a Tick off one or multiple user s b Click Reset Once the user password is reset it becomes 123456 The buttons are d...

Страница 29: ...nual Reach BTX resources files of various types 2 Create a new category a Click Manager A Manager dialog box pops up Click to modify the existing category click to delete the existing category b Click...

Страница 30: ...tegorize resource files a Tick off resource file s to be categorized b Click Set Category A Set Category dialog box pops up c Tick off the category d Click Save 4 Grant operation authorization to reso...

Страница 31: ...escribed in the following table Button Description Tick off one or multiple resource file s and then click the button to delete one or multiple file s Click the button to modify the information of the...

Страница 32: ...for the Device Configuring Basic Information Configuring Network Storage Configuring Email Notification Managing Database Viewing System Information 4 10 1 Configuring IP Address for the Device 1 Cli...

Страница 33: ...OK to set a communication port for the Web optional 5 Click Upgrade and then select an upgrade file to upgrade the system version optional 6 Click Rollback to return the current system version to the...

Страница 34: ...loaded successfully the device is configured with a new connectivity capability 4 10 4 Configuring Network Storage 1 Click Settings Storage to open the network storage setting page 2 Connect to the ne...

Страница 35: ...Email to open the email setting page 2 Fill in information about the email The parameters are described in the following table Parameter Description SMTP Server Fill in the network address of the SMT...

Страница 36: ...ck Save 4 10 6 Viewing System Information Click Settings System to open the system details page 4 11 Issuing Public Notice 1 Click in the background management page A Notice Management dialog box pops...

Страница 37: ...cessfully you can watch live video and play VOD file by using the player For the usage of ReachPlayer please refer to Error Reference source not found 4 13 Modifying Password If you with the authoriza...

Страница 38: ...urrent Password New Password and Confirm Password 3 Click Save In the foreground management page the method of password modification is as follows 1 Click Change Password in Homepage 2 Enter Current P...

Страница 39: ...ement page to change skins 4 15 Viewing Warning Message and System Log 1 Click Warn Log to open the warning and log page 2 You can view warning messages in the Warning page 3 You can view system logs...

Страница 40: ...ame and Password The parameters are described in the following table Parameter Description Server IP Enter the IP address of the CL4000PRO Server User Name Enter the login name of the CL4000PRO Server...

Страница 41: ...Click to switch to HD mode Click the button to switch to full screen mode A 3 Receiving Multicast Signals 1 At the upper left corner of ReachPlayer select Receive Multicast A Receive Multicast dialog...

Страница 42: ...on these pictures by selecting Option menu Click the button to select the layout mode of the video images or Click to switch to SD mode Click to switch to HD mode Click the button to switch to full sc...

Страница 43: ...er s Manual Reach BTX Remote control and control the camera position and control the camera focal length select camera speed Title Select one video input setting the title coordinates default coordina...

Страница 44: ...s Manual Reach BTX A 6 Meeting management Click Meeting management operation as below Button Description Start or stop meeting record Pause or resume recording Turn on or turn off live streaming Turn...

Страница 45: ...minal who is watching the broadcast Upon confirmation the color of the user s image in the users list will turn from colorless to colorful Remove After clicking of a user you can remove the user right...

Страница 46: ...cal files Click on the upper left corner of the player and select Open file or Open Folder to play local video file When selecting Open Folder the choice must be the complete decompression folder of t...

Отзывы: