background image

5.


Microphone: Detects & transmits the sounds from Monitor to Camera. 

6.


Power On/Off: Press and hold to switch the monitor on/off. 

7.


Speaker: Produces the sound from the camera. 

8.


Kick Stand: Enables the table stand for the monitor. 

9.


Battery: Rechargeable lithium battery for portable use.   


Getting Started 


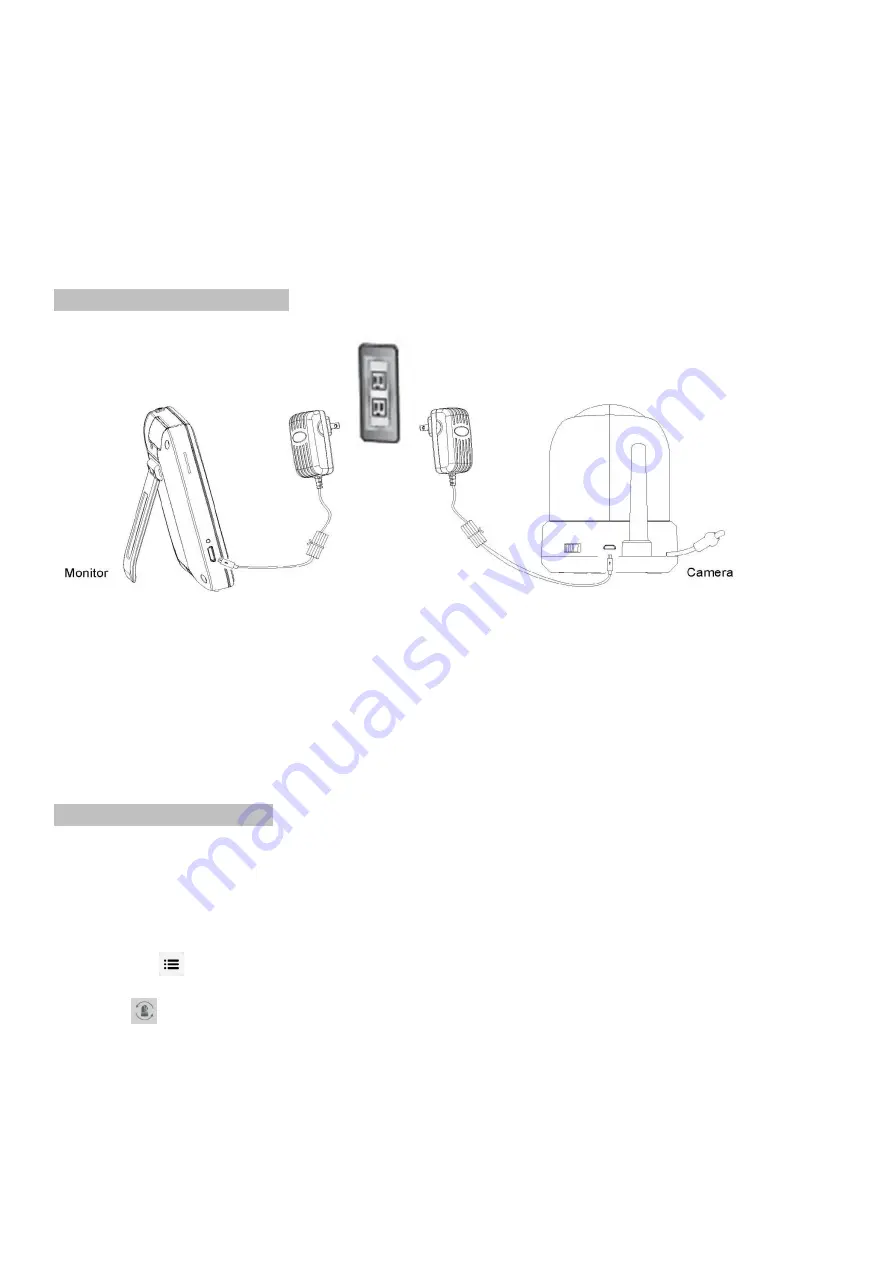
Installing the Monitor & Camera 


1.


Fully charge the monitor via power adapter or charging cradle before use. Camera must be plugged in 
at all time. 

2.


Place the camera in the preferred position. You can place it on the table/cabinet, or mount it on a wall 
via mounting frame. 

3.    Press the power button for about 4-5 second to turn on the monitor. 
4.    Slide the power switch to turn the camera on. 


Pairing the Monitor & Camera 
 
The units already come paired for your convenience. 
If you have additional camera, pair your camera as follow: 

1. 

Power on wireless monitor and wireless camera. 

2. 

Touch the live view screen on the monitor to make the settings icon appear. 

3. 

Press the [ 

  ] button at the bottom left corner of the monitor. 

4. 

Press [ 

  ] icon and select camera number. 

(The monitor will search for the camera when set to pairing mode

Select the channel you want to pair the 

camera to,


and touch to confirm, a countdown clock will appear at the middle of the screen and will start 

counting from 30 to 0). 

5. 

Press the [PAIR] button found on the bottom of the camera. 

6. 

If the monitor successfully pairs with the camera within the 30 seconds, it will automatically switch to 

Содержание BC200PRO

Страница 1: ...1 USER MANUAL Wireless P T HD Camera Model No BC200PRO...

Страница 2: ...and heat sources such as radiators heat registers cooking devices e g stoves and ovens and other appliances that produce heat e g amplifiers televisions and stereos Ensure that the product is well ve...

Страница 3: ...y or quad display Multiple 6 language selection Camera with night vision and sound trigger Lullaby and temperature display 2 way audio monitor or cell phone can talk back to camera 5 touch screen moni...

Страница 4: ...s signals to or from the monitor 6 DC 5V Power Input Input for the power adapter 5V 1A 7 Power Slide Switch Slide to turn on off the camera 8 Reset Button Press this button to reset the camera or chan...

Страница 5: ...n on the monitor 4 Slide the power switch to turn the camera on Pairing the Monitor Camera The units already come paired for your convenience If you have additional camera pair your camera as follow 1...

Страница 6: ...tatus Battery Status A battery charge state indicator within the LCD will show the level of charge indicating five states including alert flashing red battery outline 1 4 1 2 3 4 and full Low battery...

Страница 7: ...volume setting is same as lullaby play level select Operation Key By tapping any position on the screen then Operation keys come out If user tapes screen without touching any function key or time is o...

Страница 8: ...previous page 10 Home Return to Live View Mobile Application Setting up camera to connect to your home router for remote access To ensure better connection better turn off the monitor in setting up p...

Страница 9: ...om _ Note if the password is wrong there will be a pop up message to say Wrong Password pls enter the correct one in the blank and confirm you can input any name 5 After changed password press the ico...

Страница 10: ...the camera You can take snapshot check the snapshot files turn on off the volume and talk back under live view You can also change Video Quality and Alert Interval from Edit Device ADVANCED AP mode Wi...

Страница 11: ...assword should contain at least 6 characters one uppercase letter one lowercase letter one digit and one special character choose from _ 5 After changed password press the icon Edit Device find WiFi S...

Страница 12: ...12 You can take snapshot check the snapshot files turn on off the volume and talk back under live view You can also change Video Quality and Alert Interval from Edit Device ADVANCED SETTING...

Страница 13: ...ing to your environment Camera Image sensor type 1 4 Color CMOS Image sensor Effective Pixel 1280 H x 1024 V Power requirement 5V DC 1A Image Resolution High MAX 1 7Mbps 10fps 1280 720 Low MAX 0 7Mbps...

Страница 14: ...ot installed and used in accordance with the instructions may cause harmful interference to radio communications However there is no guarantee that interference will not occur in a particular installa...

Отзывы: