21
22
Select TV source for example. (Press SOUCE bu on to select TV mode)
1.
Press the POWER bu on to turn the LED TV on.
2.
Press the MENU bu on on the remote control to display the Main menu, and use the
Ż
/
Ź
bu ons to select the SETUP.
3.
Use the
Ÿ
/
ź
bu ons to highlight an individual SETUP
, use the
Ż
/
Ź
to
change the se
and press the MENU
to exit.
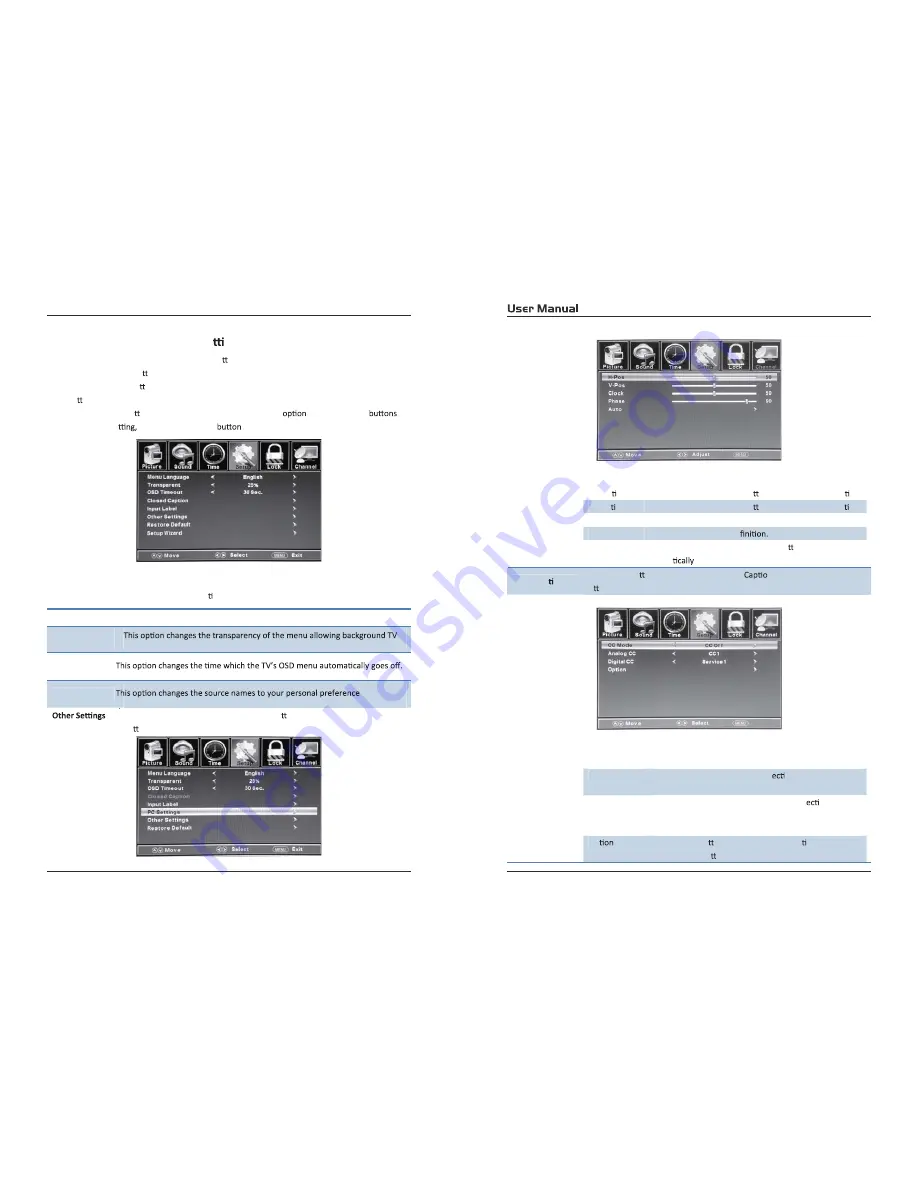
The SETUP menu includes the following op ons:
Menu Language
Allow you to select menu language among: English, Français and Español.
Transparent
OSD Timeout
Input PC signal
Į
rst, then press SOURCE bu on to select PC mode, press
Ź
bu on to con
Į
rm.
H-Posi on
Allow you to use the
Ż
/
Ź
bu ons to adjust the H Posi on.
V-Posi on
Allow you to use the
Ż
/
Ź
bu ons to adjust the V Posi on.
Clock
Allow you to prolong the image.
Phase
Allow you to adjust the de
Auto
Select “Auto” and press the
Ź
bu on, the unit will
automa
adjust all items to achieve a best e
ī
ect.
Close Cap on
Use the
ź
bu on to highlight the Close
n item, then press the
Ź
bu on to enter into the following menu.
CC Mode
Allow you to select the CC Mode among:
On
O
ī
,
and CC
on Mute.
Analog CC
Allow you to select the basic sel
on among: CC1, CC2,
CC3, CC4, Text1, Text2, Text3 and Text4.
Digital CC
Allow you to select the advanced sel
on among:
Service1, Service2, Service3, Service4, Service 5 and
Service6.
Op
Use the
ź
bu on to highlight the “Op on” item, then
press the
Ź
bu on to enter into the following menu.
Customizing the SETUP Se
ngs
4.4.
Exit
Input Label
images to show through.
Exit
Содержание RLEDV2488A-H
Страница 1: ...RLEDV2488A H 24 ...
Страница 3: ......
Страница 4: ......
Страница 7: ...Selects the screen size sound from speakers NUMBER KEYS tuned ...
Страница 17: ...CLASS 1 LASER PRODUCT ...
Страница 18: ...34 ...
Страница 19: ......
Страница 20: ......
Страница 21: ...TV TV TV ...
Страница 22: ...and RLEDV2488A H 1366 x 768 220 3000 1 40W USB For service 7 AC 100 120V 60Hz 8 5ms ...


