background image

12

Interactive Setup

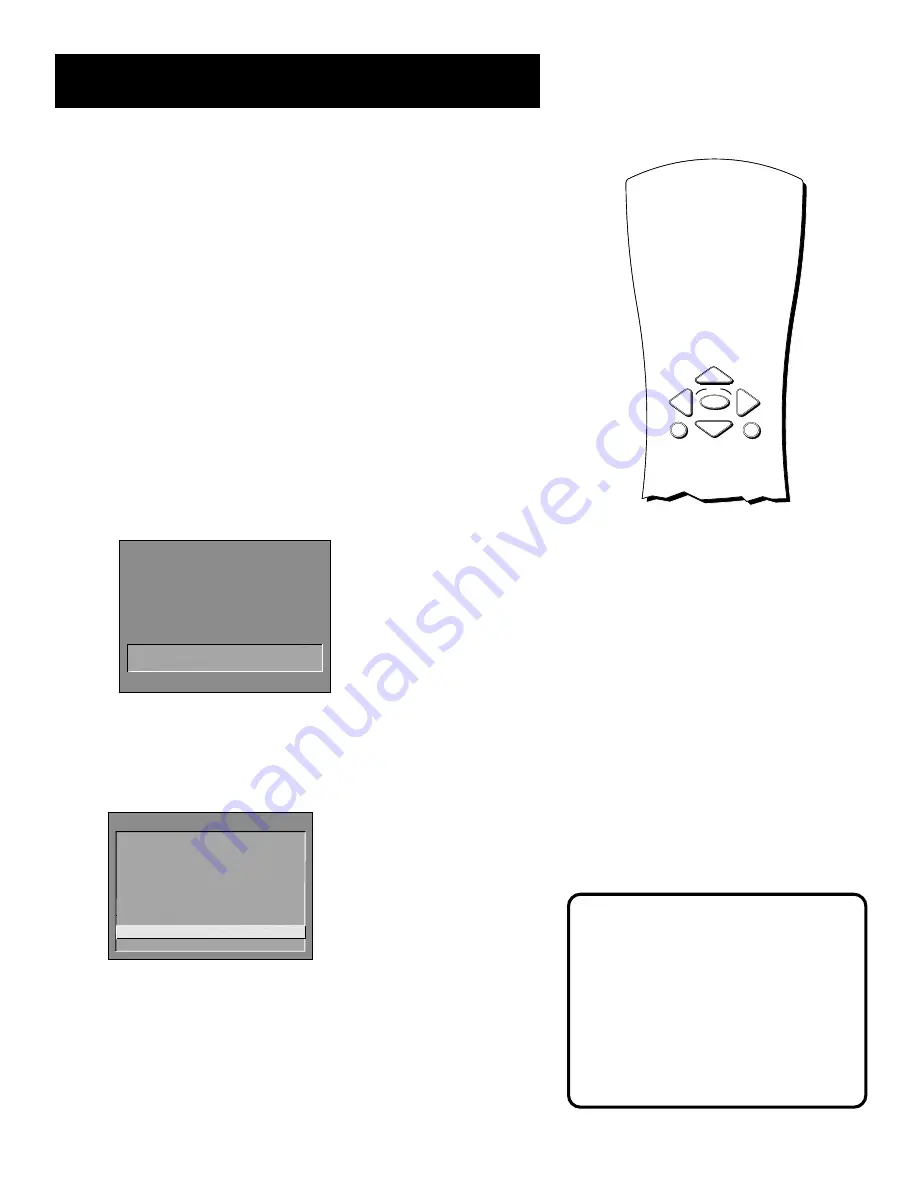
Using Point and Select

You only need to know one rule when using the remote to access on-
screen menus and control panels: point and select. The point and select
method has two steps.

1.

Point

 to a menu item using the MOVE arrows on the remote.

To point up or down, press the up or down arrows. To point left or
right, press the left or right arrows.

2.

Select

 a menu item by pressing OK.

Selecting an item tells the TV’s menu system to go ahead and make
the change or go to a place you have indicated.

Entering Setup

The first screen of the Interactive Setup appears automatically when
you turn on your TV for the first time or after a power outage.

You can also select a menu item by
entering the item number with the
number buttons on the remote.

Press CLEAR at any time to remove all
displays from the screen and return to TV
viewing.

Many VCR user manuals refer to a
PROGRAM button. The MENU button on
this remote works as a PROGRAM button
in VCR mode. Other manuals may refer to
a SELECT button. The OK button on this
remote works as a SELECT button.

MENU

OK

CLEAR

Point and Select

buttons

SETUP

When first used or after a power 
outage, your television needs 
to be set up. 
Would you like to begin now?

Press MENU to begin setup or
Press CLEAR to exit.

1.

Press MENU to begin setup or CLEAR to exit.

You can also access the Interactive Setup through the Main menu:

1.

Press MENU to bring up the Main menu.

TV MAIN MENU

1 Audio
2 Picture Quality
3 Screen
4 Channel
5 Time
6 Parental Control
7 GUIDE Plus+ Menu

8 Setup

0 Exit

2.

Point to 

Setup 

and press OK. The first Setup screen comes up,

asking you to confirm that you want to begin.

Содержание P60921

Страница 1: ...isioncolortelevisioncolortel evisioncolortelevisioncolortelev isioncolortelevisioncolortelevisi oncolortelevisioncolortelevision colortelevisioncolortelevisionco lortelevisioncolortelevisioncolo rtele...

Страница 2: ...tional Electrical Code Section 54 of the Canadian Electrical Code Part 1 which provides guidelines for proper grounding and in particular specifies that the cable ground shall be connected to the grou...

Страница 3: ...sing Point and Select 12 Entering Setup 12 Selecting a Language 13 Auto Channel Search 13 The GUIDE PIus System 14 Setting Up the GUIDE PIus System 14 Setting the Time 16 Setting the VCR1 Channel auto...

Страница 4: ...In Out of the Guide PIus System 39 Downloading Data 39 The Different GUIDE PIus System Menus 39 Grid Guide 40 Sort 41 News 41 Schedule 42 Messages 43 Editor 43 PIP Picture in Picture Operation 45 Cha...

Страница 5: ...Reference section in the back of the book contains troubleshooting tips care and cleaning instructions accessory ordering information and your warranty Well if your TV s out of the box let s get star...

Страница 6: ...or satellite receiver Advanced Connections If you re going to make multiple connections hooking up the TV to a VCR and a satellite receiver Cable information and illustrations are given for each type...

Страница 7: ...ENNA TV INPUT 1 VIDEO R S VIDEO L AUDIO CABLE ANTENNA INPUT VCR CONTROL R INPUT 2 VIDEO S VIDEO L AUDIO R AUDIO OUTPUT AUDIO L How to View the VCR To watch the VCR in this connection tune TV to Channe...

Страница 8: ...nd video from the component You will program this later in the Interactive Setup S Video This optional connection can be used for better video quality picture Input 1 Connect any of the following comp...

Страница 9: ...tion press TV to put the remote control into TV mode then press WHO INPUT to toggle through the video VID inputs In the Interactive Setup section you can program the TV to automatically tune to the VI...

Страница 10: ...SPEAKER SELECTION EXTERNAL INTERNAL SPEAKERS VCR DVD PLAYER SATELLITE RECEIVER CH3 CH4 OUT VIDEO L R IN FROM ANT OUT TO TV S VIDEO L R VIDEO OUT IN FROM ANT OUT TO TV SATELLITE IN S VIDEO CABLE CABLE...

Страница 11: ...ontroller directly over the sensor If the IR location is not labeled on your component you need to use to use the component s remote control to locate the sensor 1 Hold the component s remote control...

Страница 12: ...UIDE Plus system see the next section Interactive Setup To get out of the GUIDE Plus System Press OK to exit the GUIDE Plus system and tune to the highlighted channel Press GUIDE to exit the GUIDE Plu...

Страница 13: ...DE Plus menu system Select a menu language Search for available channels Set up the GUIDE Plus system Set the time Set the VCR1 channel Set the VCR2 channel Set the DVD channel Set the SAT CABLE chann...

Страница 14: ...mber with the number buttons on the remote Press CLEAR at any time to remove all displays from the screen and return to TV viewing Many VCR user manuals refer to a PROGRAM button The MENU button on th...

Страница 15: ...lect that language Auto Channel Search The next part of the setup routine asks you if you want the TV to search for all channels viewable through your antenna or cable TV system This is sometimes call...

Страница 16: ...o the Setup and Connections section for additional information Select your Country and enter your ZIP or Postal code The next series of screens asks you about your cable TV setup If you have a cable b...

Страница 17: ...been identified you need to set the cable box s output channel Enter the channel you use to view channels through your cable box usually 3 or 4 Consult your cable box s instruction book or your cable...

Страница 18: ...irst download it sets the time for you automatically SETUP Would you like to set the time on the TV 1 Set time 2 Skip this step 1 Press MENU or OK to bring up the SET TIME control panel SET TIME AM En...

Страница 19: ...TV with a VCR 2 Skip this step 1 Press MENU or OK to bring up the VCR1 choice list SET VCR1 CHANNEL 1 Not connected 2 Channel 3 3 Channel 4 4 Video 1 Input 5 Video 2 Input 2 Point to the choice that m...

Страница 20: ...tting the DVD Channel auto tuning The next step lets you set the DVD channel When you set the DVD channel you re telling the TV what channel to tune to when you press the DVD button on the remote Indi...

Страница 21: ...ee Auto Tuning in the Using the Menus section SETUP Would you like to use a cable box or satellite unit with your TV 1 Use with cable or satellite 2 Skip this step 1 Press MENU or OK to bring up the S...

Страница 22: ...letters listed in your newspaper s TV section for ideas on labeling the channels 4 Repeat this process for each of your channels Then press MENU or OK to continue The TV can store up to 27 labels in...

Страница 23: ...OSCAN component you may not need to program it at all Setup and connections Interactive Setup 1 2 Using the Menu System Using the remote 3 4 Features and Controls 5 Reference 6 Modes of Operation Beca...

Страница 24: ...e and if auto tuning is enabled it will turn on the TV and tune to the correct channel MUTE Reduces the TV s volume to its minimum level Press again to restore the volume SKIP Press once before changi...

Страница 25: ...le in the PIP Caption Display menu then you will be able to toggle closed captioning between the main screen and the PIP window by pressing the PIP button SWAP Swaps the main picture with the PIP wind...

Страница 26: ...VCR2 etc While holding the device button press and hold ON OFF until the red light on the remote turns on then release both buttons 3 Press and release PLAY then wait 5 seconds or until the LED stops...

Страница 27: ...al modes triggered by the component buttons For example if you want the remote to control the TV you would press the TV button to put the remote into TV mode before you could control the TV Front Pane...

Страница 28: ...2090 2091 2107 2115 2120 2125 Radioshack Realistic 2002 2011 2013 2014 2021 2022 2023 2026 2029 2049 2050 2096 2131 Radix 2014 Randex 2014 Ricoh 2128 Runco 2104 Samsung 2005 2013 2015 2033 2053 2112 S...

Страница 29: ...ginning with some information on using menus and control panels Each menu is then outlined and special features are detailed to help you get the most from your TV Setup and connections Interactive Set...

Страница 30: ...Audio 2 Picture Quality 3 Screen 4 Channel 5 Time 6 Parental Controls 7 GUIDE Plus Menu 8 Setup 0 Exit Menus take you to another menu or a control panel There are two ways to select a choice in a men...

Страница 31: ...o exit Numeric Entry A numeric entry control panel is used to enter numbers or letters A pointer appears underneath the column you are changing SET TIME AM Enter01to12forthehour Press MENU to exit 1 U...

Страница 32: ...Audio Menu Mute Press OK to reduce the TV s volume to its minimum level Press OK again to restore the volume Tone Controls Displays the slider controls for adjusting the TV s treble bass and balance A...

Страница 33: ...TV s speakers off and allows variable output from the TV s audio output jacks Fixed Output Speakers Off This setting turns the TV s speakers off and allows fixed output from the TV s audio output jac...

Страница 34: ...l Picture Preset Choose the setting that is best for your viewing environment Auto Color Displays a choice list that lets you turn on the feature that automatically corrects the color of the picture T...

Страница 35: ...st that lets you choose which captioning mode is used for displaying captioning information within the PIP window Menu Language Displays a choice list that lets you select your preferred language for...

Страница 36: ...s you may prefer to leave the closed captioned mode set to CC1 which displays complete text of the program in the primary language in your area Closed Captioning Modes The TV offers eight closed capti...

Страница 37: ...the up and down arrows to indicate whether the channel number indicated is included Yes or is not included No in the Normal channel list Chan Label Use the up and down arrows to enter a six character...

Страница 38: ...is connected to the VIDEO jack on the back of the TV and you want the TV to tune to VID S VID if you used an S Video cable input channel when you press the specified component button Time Menu Sleep T...

Страница 39: ...4 Features and Controls 5 Reference 6 How to use the Features and Controls This section introduces you to the features and controls with which your TV is equipped In this section you will learn how t...

Страница 40: ...m being displayed when you use the TV button on the remote to turn on the TV GUIDE Plus Label Displays the GUIDE Plus label menu On Displays the station name when you change channels Off Disables the...

Страница 41: ...wer is restored make sure the setup information is still correct The GUIDE Plus program will complete a download at the next available time Channel Mapping If more than one cable company services your...

Страница 42: ...am highlighted in the Channel listing If you have a cable box changing channels on the TV will not cause the cable box channel to change while recording The Program information window will display a c...

Страница 43: ...ne help for further options Placing a timer in the Schedule will cause the TV to turn on and tune to the program highlighted in the Channel listing at the predetermined time When the TV turns on the G...

Страница 44: ...aily once or weekly of a scheduled event access the Schedule Menu from the Menu bar 1 Press GUIDE to bring up the GUIDE Plus system 2 Press MENU to highlight the Menu bar 3 Use the arrows to highlight...

Страница 45: ...screen 5 Then use the Messages Menu Action Button as described in the next section Messages Menu Action Button When viewing the Messages menu the following Action button will appear on the bar Remove...

Страница 46: ...reen with any additional and or promotional information regarding that particular program Pressing the INFO button again exits the expanded information screen Troubleshooting Troubles sometimes are ca...

Страница 47: ...v When you press the CH CTRL the channel control switches to the main picture You can now change channels in the main picture by entering digits or pressing CH v Press CH CTRL again to return the cha...

Страница 48: ...to tune the PIP window to the correct video input channel Check out the auto tuning feature in the Interactive Setup and Using the Menus sections Sample displa ys on a Channel Mark er 12 01 CC ESPN 60...

Страница 49: ...by adults and may be unsuitable for children under 17 It contains one or more of the following content themes graphic violence V explicit sexual activity S or crude indecent language L Parents Strong...

Страница 50: ...ck 6 Lock Parental Controls 0 Exit C o n t e n t V CHIP TV RATING LIMIT R a t i n g S t a t u s T V M A V I E W D L S V F V V V V R A T I N G S T A T U S T V M A V i e w T V 1 4 V i e w T V P G V i e...

Страница 51: ...the rating listed to the left and all higher ratings automatically changes to Block and B C o n t e n t V CHIP TV RATING LIMIT Rating Status TV PG Block D L S V FV B B B B RATING STATUS TV MA Block TV...

Страница 52: ...t 1 Determine the lowest level of content you do not want the child to watch 2 Use the left and right arrows to highlight the Rating Field 3 Use the up and down arrows on the remote to scroll through...

Страница 53: ...such as the B under language L corresponding with TV 14 5 Press the up or down arrows to change its status back to V Your child would then be able to watch programs with TV 14 adult language content b...

Страница 54: ...ewing Movie Ratings After you block movie ratings you have the option of changing some of the rating status buttons back to View 1 Highlight the rating field and press the up and down arrows to find t...

Страница 55: ...ss to any remote capable of controlling the front panel while you have the Front Panel blocked Don t forget to lock parental controls after you change the status If you do not the front panel block wi...

Страница 56: ...remote will control TV Maybe batteries in remote are weak dead or installed incorrectly Try replacing batteries Note if you remove the batteries you may have to reprogram the remote to control other c...

Страница 57: ...connected only through antenna input make sure TV is tuned to channel 3 or 4 same as CH3 4 switch on VCR Also check to make sure the TV VCR button on the VCR is in the correct mode Sound okay picture...

Страница 58: ...as ammonia based cleaners or abrasive powder These types of cleaners will damage the TV While cleaning do not spray liquid directly on the screen or allow liquid to run down the screen and inside the...

Страница 59: ...ice Center ask your dealer look in the Yellow Pages or call 1 800 336 1900 Show the Authorized Service Center Representative your evidence of purchase date or first rental What your warranty does not...

Страница 60: ...cables that have RCA type phono connectors Color Coded Jacks The jacks on the TV s monitor panel are color coded for ease of use The video jacks are yellow the right audio jacks are red and the left...

Страница 61: ...ase complete other side also All accessories are subject to availability Screw on antenna cable 3 ft VH81 4 95 Screw on antenna cable 6 ft VH82 6 95 Push on antenna cable 6 ft VH89 5 95 Monaural VCR D...

Страница 62: ...r r s TM Charge your order on your VISA MasterCard or Discover Card by filling in below USE YOUR CREDIT CARD IMPORTANT Copy complete account number from your VISA card IMPORTANT Copy complete account...

Страница 63: ...L Labels 20 35 Language 13 33 Languages Selecting 13 List Labels 20 Locating IR sensors 9 M Main Menu 12 Memory 35 MENU button 12 Menu Language 13 33 Menus 28 Messages 43 Mono 30 Mute 30 N Normal Lis...

Страница 64: ...vision manufacturing facilities around the world Thomson collects and returns over 1 5 million pounds of glass and furnace dust to the glass making process annually Thomson has launched worldwide ener...

Отзывы: