background image

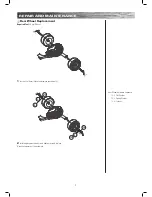
To tighten tension

To loosen tension

12

Need Help?

 Visit our web site for replacement parts, product support, a list of authorized service centers in the US and customer service contact information 

at 

www.razor.com

. Please have the product I.D. code (located on the white label of your product) available for better assistance. Additional Customer Service 

contact information is listed at the back of this manual.

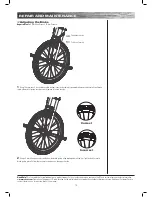
 Adjusting the Brake


Required Tools: 

5 mm Allen Wrench, 10 mm Wrench

1

 Using 10 mm wrench, loosen brake cable locknut (counter clockwise), squeeze brake lever and carefully pull brake 

cable outward to tighten tension or push inward to loosen tension. 

2

 Using a 5 mm Allen wrench loosen bolt on the brake pad to align brake pad with the rim. Tighten bolt to secure 

brake pad in place. Follow these same instructions on the opposite side. 

REPAIR AND MAINTENANCE

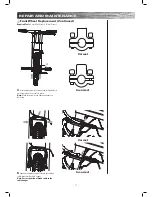
Correct

Incorrect

Содержание DXT

Страница 1: ...are for demonstration purposes only Illustrations may not reflect exact appearance of actual product Specifications subject to change without notice Please have your product along with the 22 characte...

Страница 2: ...drift trike Never use near steps sloped driveways hills roadways alleys or swimming pool areas Do not ride a drift trike in wet weather Drift trikes are intended for use on solid clean and dry surface...

Страница 3: ...ems even if the box has a few scars or dents Estimated Assembly and Set Up Time Allow up to 15 20 minutes for assembly Two 2 person assembly recommended WARNING DO NOT USE NON RAZOR PRODUCTS WITH YOUR...

Страница 4: ...per and lower crown and re insert the steering bolt Securely tighten using a 5 mm Allen wrench and a 13 mm wrench 5 Re tighten the two 2 13 mm bolts on the upper crown WARNING Failing to properly tigh...

Страница 5: ...Note Make sure brake lever is on the left from sitting position 2 Align the handlebars parallel to the front fork Using a 6 mm Allen wrench tighten all four 4 bolts securely to the upper crown Note Wh...

Страница 6: ...auge is working then use very short bursts to inflate to the correct PSI If you inadvertently over inflate the tire release the excess pressure immediately In ating the Tire The tire is inflated when...

Страница 7: ...Use extra caution on steep or long hills Avoid excessive speeds Never ride in traffic or on the street and watch your surroundings for pedestrians bikers boarders and skaters Maintain a hold on the h...

Страница 8: ...dal to avoid contact with wheel Such turns present increased risk of injury Note Keep both feet on the foot pedals when unit is in motion 7 USAGE Riding the DXT Stopping the DXT To stop the unit apply...

Страница 9: ...t our web site for replacement parts product support a list of authorized service centers in the US and customer service contact information at www razor com Please have the product I D code located o...

Страница 10: ...l Hardware Sequence 13 2 Flat Washer 13 3 Spring Washer 13 4 Locknut 1 Loosen the 16 mm locknut and remove rear wheel s 2 Install replacement wheel s and tighten securely in place Note the sequence of...

Страница 11: ...nce Additional Customer Service contact information is listed at the back of this manual REPAIR AND MAINTENANCE Front Wheel Replacement Required Tools 5 mm Allen Wrench 10 mm Wrench 3 Using 5 mm Allen...

Страница 12: ...lace Note Make sure clamps are tightened evenly on both side Correct Correct Front Wheel Replacement Continued Required Tools 5 mm Allen Wrench 10 mm Wrench 5 Squeeze caliper brake together and place...

Страница 13: ...mer Service contact information is listed at the back of this manual Adjusting the Brake Required Tools 5 mm Allen Wrench 10 mm Wrench 1 Using 10 mm wrench loosen brake cable locknut counter clockwise...

Страница 14: ...parts When a wheel develops play this is an indication of excess wear and replacement is necessary Replace immediately with only genuine Razor wheels Worn tires wheels bearings are considered normal w...

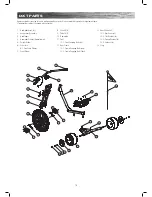
Страница 15: ...without notice DXT PARTS 1 Handlebar Grips x2 2 Brake Lever Assembly 3 Handlebars 4 Handlebar Clamps Upper Lower 5 Caliper Brake 6 Front Fork 6 1 Front Fork Clamps 7 Front Wheel 8 Crank L R 9 Pedal L...

Страница 16: ...y 8 00 AM 5 00 PM Pacific Time DISTRIBUTED IN THE UK BY Re creation Limited 2 Meadows Business Park Station Approach Blackwater Camberley Surrey GU17 9AB United Kingdom 44 0 118 973 6222 Tel 44 0 118...

Отзывы: