background image

SeaNet-Alarm Users Manual


Configuration

SeaNet-Alarm comes with a USB cable and a configuration software for a standard PC. 
The configuration software is available for Microsoft Windows and for Linux. 

USB Driver installation

SeaNet-Alarm has a standard USB Port chip ( FT232 ). On many systems the driver 
software is already installed. If it's not already installed on your Windows system - you'll 
find all the necessary drivers for Microsoft Windows on the CD 
Every modern Linux system already has the necessary driver installed. Under Linux, 
normally there is no need for a special driver installation.

For Windows, the driver has to be installed BEFORE you connect SeaNet-Alarm to your 
computer. Please check the driver subdirectory on the CD for the driver installation 
manual. 

Configuration software

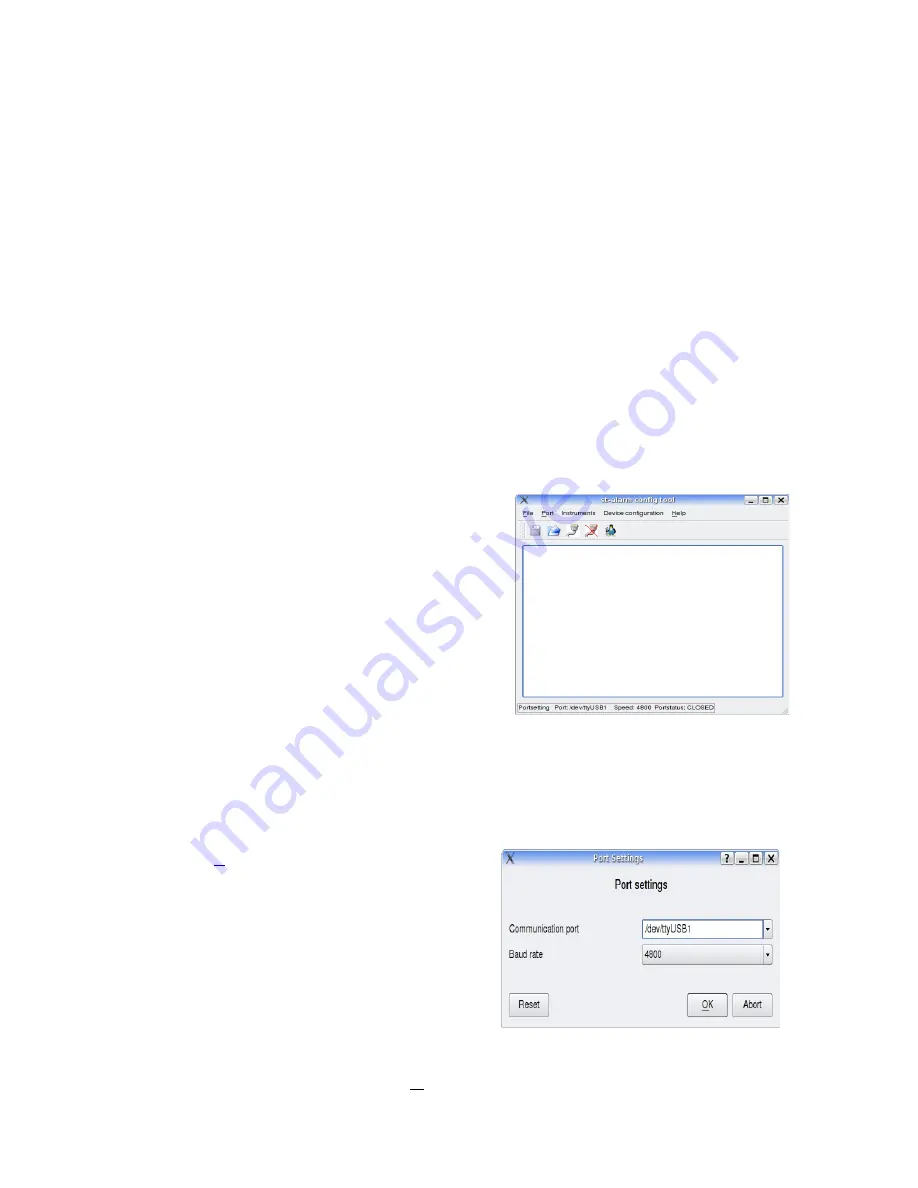
The configuration software does not require any 
installation procedure. It consists of just one 
programme file. Under Windows there are also a 
few DLL's. Copy the programme file (and the DLL's) 
into a subdirectory on your computer and just start it. 
The programme can also be started from the CD 
directly. 

Port settings

When the programme is started for the first time, you have to set the communication port 
to SeaNet-Alarm. 

Click on the 

Port →   Parameter....

  in the menue 

bar. The port settings dialog window will open. 

Type in the port at  “Communication port”
Select “4800” at Baud rate.

Communication port could be 
     Windows: COM1, COM2, COM3,...
     Linux: /dev/ttyUSB0, /dev/ttyUSB1,...

The actual port depends on your system and on other serial devices that might be 
connected to your computer.      Press OK when finished. 

SeaNet-Alarm V1.0 

Page 9 of 19

Содержание SeaNet-Alarm

Страница 1: ...aNet Alarm USB Installation and Operation Manual Hardware Version V 1 1 Software Version 1 00 March 2009 2004 All Rights Reserved http www gadgetPool de 2004 Alle Rechte vorbehalten alarm gadgetPool d...

Страница 2: ...9 CONFIGURATION SOFTWARE 9 Port settings 9 The command buttons 10 Logging Status window 10 Port Status 11 Configuration window 12 Alarm Types 13 Delay 13 Duration 14 Status 14 Parameter 14 LED 14 Beep...

Страница 3: ...r and of any connected device are possible at any time The protocol converter could cause damage to connected devices Liability cannot be accepted for any damages personal injuries or malfunctions of...

Страница 4: ...Powers supply and alarm power independent from SeaTalk network Configuration via USB connection to PC and configuration software SeaTalk Instruments are normally installed in the cockpit or wheelhous...

Страница 5: ...SeaTalk network failure internally generated Shallow water alarm from depth instrument Anchor alarm from depth instrument Transducer defective from depth instrument High low windspeed alarm from wind...

Страница 6: ...14 An alarm will be retriggered if the appropriate alarm is reset on the SeaTalk Bus and later set again If an alarm stays active on the seatalk bus and the alarm output is switched off by the acknowl...

Страница 7: ...cted to SeaTalk Network Power Supply Alarm Power supply SeaNet Alarm requires a 12 Volt power supply This power supply is isolated from the SeaTalk network This galvanic isolation protects the SeaTalk...

Страница 8: ...tage and overload protection and current limitation Nominal maximum alarm current 3 5 A Alarm current will be limited to 7 0 A The Alarm output is a Low Side Switch Make sure to have the alarm horn la...

Страница 9: ...driver subdirectory on the CD for the driver installation manual Configuration software The configuration software does not require any installation procedure It consists of just one programme file U...

Страница 10: ...e next programme start automatically Manually load previously saved port settings Connect config programme to SeaNet Alarm Disconnect config programme from SeaNet Alarm Open configuration window Toggl...

Страница 11: ...ill transferred to the PC and printed on the screen This causes a lot of normaly unnecessary data communication In normal SeaNet Alarm operating mode it could even cause loss of an alarm Use this func...

Страница 12: ...et Alarm the configuration window will be activated by pressing Main config Window The software will read the current setting from SeaNet Alarm Changes in the settings are sent to SeaNet Alarm by pres...

Страница 13: ...instrument activated it s High Windangle or it s Low Windangle alarm true or apparent windangle Transducer This alarm will trigger when the depth instrument activated it s Transducer defective alarm...

Страница 14: ...e until the operator presses the acknowledge pushbutton or the alarm is cleared by the SeaTalk device that triggered it Status Function Enable or disable an alarm Select Enabaled or Disabled An alarm...

Страница 15: ...ith this function it can be heard which alarm has been activated The number entered here is the number ob beep s for this alarm Example Beeps set to 3 The Alarm will sound 3 times for one second after...

Страница 16: ...an check the boat and the cruising environment During daytime this function might not be needed It can be switched off without having to have the computer connected Press the pushbutton for more than...

Страница 17: ...et Alarm is switched on it will run in hardware test mode for 10 seconds During hardware test mode the led s will be switched on one after the other When the pushbutton is pressed the alarm output wil...

Страница 18: ...C using USB Port Open a terminal programme i e hypertern and set it to 4800 Baud 8 Bit no parity no handshake Type xxx and press ENTER The device responds with xxx If you receive the xxx connection to...

Страница 19: ...page http www gadgetPool de or you can send mail to alarm gadgetPool de Technical Data Power input 9 15 Volt DC Current draw 16 8 mA all LED s off 1 2 mA per LED Maximum switched current 3 5 A 11 15...

Отзывы: