50
Raymarine H6 - System Installation Manual
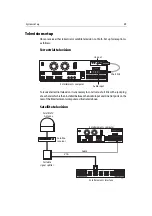
For satellite television a suitable signal splitter must be sourced and installed between
the satellite receiver and the Entertainments computer and interface. The signal
splitter should split the satellite signal into VGA and audio channels and be connected
as follows:.
• Audio - Signal splitter to Audio Input - rear of Entertainments computer.
• VGA - Signal splitter to ENT 2 - ear of Entertainments interface.
3
rd
Party software setup
It will be necessary to register and setup 3
rd
party software to ensure that the
information is displayed correctly.
Navtex
With the Navtex antenna installed and connected to the modem serial port of the
Navigation computer and H6 running:
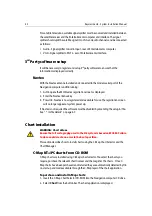
1. As H6 opens the MCI Navtex registration screen is displayed.
2. Enter the Navtex license key.
3. Press O.K. Navtex is now registered and available for use. The registration screen
will no longer appear at system power up.
If Navtex is not required the software must be disabled by amending the setup.ini file -
See “ *.ini file details” on page 67.
Chart installation
WARNING: Chart datum
Ensure that all cartography used in the H6 system is based on WGS84. Failure
to do so could create an error in the boats position.
This section describes how to install charts using the C-Map Chart Selector and the
Chart Manager.
C-Map NT+/PC charts from CD-ROM
C-Map charts are installed using C-Map’s chart selector. You select the charts you
require, purchase the relevant chart licences and then register the charts. Once C-
Map charts have been purchased and installed they are automatically detected by H6
on start-up and made available through the C-Map layer of the chart application.
To purchase and install C-Map charts:
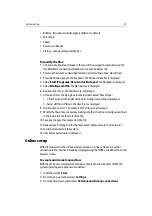
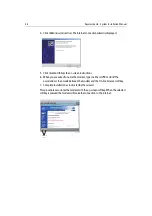
1. Insert the C-Map Chart Selector CD-ROM into the Navigation computer CD drive.
2. Select
Chart
from the button bar. The chart application is displayed.
Содержание H6
Страница 1: ...System Installation Manual Document number 87035_1 Date November 2004 D7579_1...
Страница 6: ...4 Raymarine H6 System Istalation Manual...
Страница 16: ...10 Raymarine H6 System Installation Manual...
Страница 17: ...11 This page should be replaced with the A3 sheet System Schematic...
Страница 18: ...12 Raymarine H6 Installation Manual...
Страница 26: ...20 Raymarine H6 System Installation Manual...
Страница 27: ...21 This page should be replaced with the A3 sheets Cables...
Страница 28: ...22 Raymarine H6 Installation Manual...
Страница 48: ...42 Raymarine H6 System Installation Manual...
Страница 62: ...56 Raymarine H6 System Installation Manual...
Страница 72: ...66 Raymarine H6 System Installation Manual...
Страница 98: ...92 Raymarine H6 System Installation Manual No Check Confirmed...
Страница 103: ...Raymarine H6 Connection diagrams Raymarine 2004...
Страница 104: ...98 Raymarine H6 System Installation Manual...
Страница 110: ...104 Raymarine H6 System Installation Manual...
Страница 112: ...106 Raymarine H6 System Installation Manual Not used VGA input from Navigation interface unit Not used Power IN D7534_1...
Страница 121: ...115 This page should be replaced with the A3 sheet VGA Connections...
Страница 122: ...116 Raymarine H6 Installation Manual...
Страница 123: ...Installation templates D7579_1...

