5
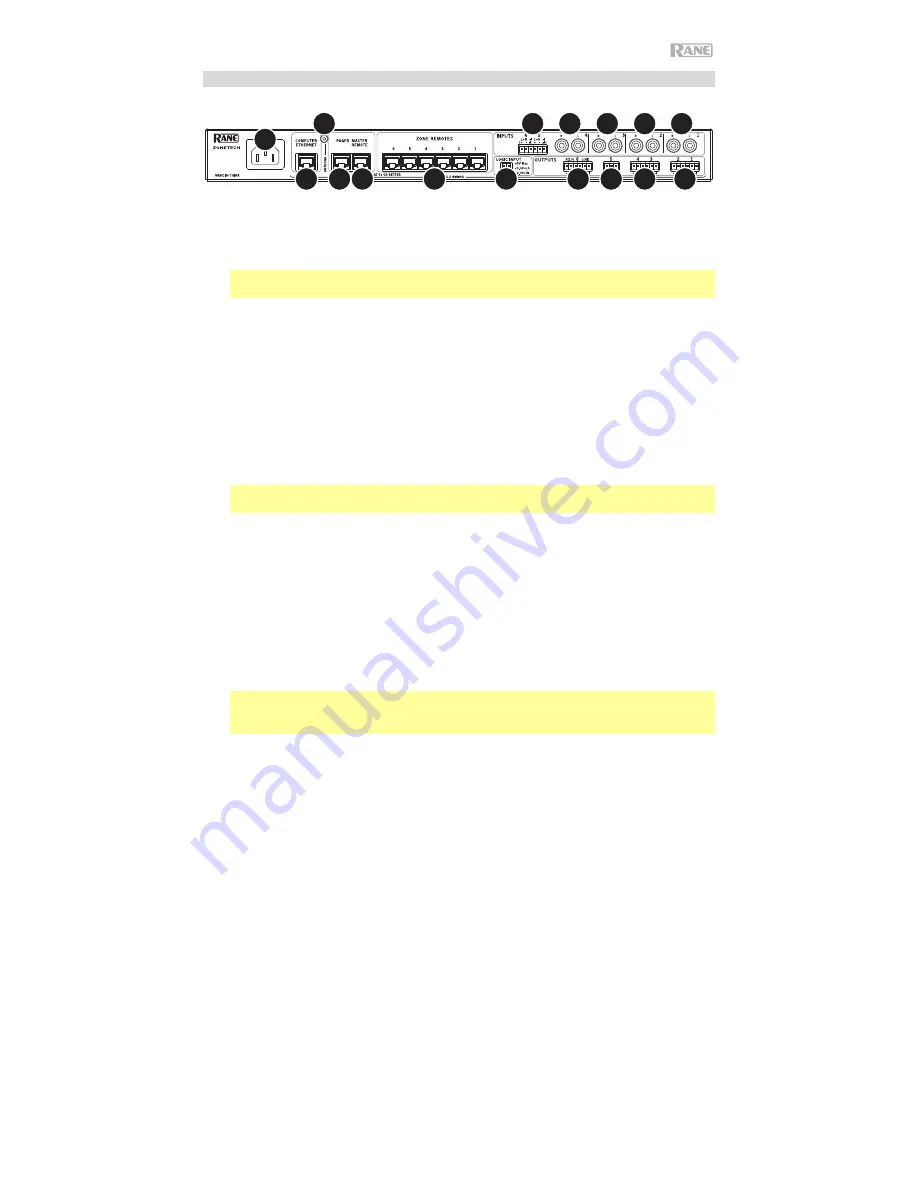
Rear Panel
1
2
4
3
3
3
3
5
5
5
5
6
7
8
9
10
1.
Power Input
(IEC): Use a standard IEC cable to connect this input to a power outlet.
2.
Bluetooth Antenna Connector
(SMA): Connect the included Bluetooth antenna here.
Important
: For compliance, you must use the included antenna only. No substitutions or
modifications to the antenna are permitted.
3.
Inputs
(stereo RCA): Connect audio sources to these stereo input pairs.
4.
Inputs
(Euroblock): Connect balanced or unbalanced audio sources to these mono inputs.
5.
Outputs
(Euroblock): Connect line-level (-10 dBV to +4 dBu) devices to these balanced
outputs. The outputs for Zones 1–5 are mono; the Zone 6 output is stereo. Alternatively,
you can configure the Zone 6 output for mono use with a subwoofer (connected to the
R
(
LO
) output) and main loudspeaker (connected to the
L
(
HI
) output).
6.
Logic Input
(Euroblock): Connect normally open external control contacts (relay or
equivalent) to these terminals. When the terminals are connected to each other (i.e., when
the switch is closed), all outputs will be muted. This would typically be used with a fire
alarm system to silence audio output during an emergency.
Note
: When this mute function is active, all front-panel controls will be locked.
Mute
will
appear in the
display
with a red background.
7.
Zone Remotes Ports
(RJ45, shielded Cat5e or Cat6 cables): Connect optional Rane
DRZH devices to these ports, which will allow you to select sources and adjust levels for
the zones remotely.
8.
Master Remote Port
(RJ45, shielded Cat5e or Cat6 cables): Connect an optional Rane
DR6 remote control to this port, which will allow you to select sources and adjust levels
for all zones remotely.
9.
Pager Port
(RJ45, shielded Cat5e or Cat6 cables): Connect an optional Rane RAD device
(e.g., RAD16z, RAD26, etc.) to provide analog audio and logic inputs. Available functions
will depend on the RAD model. Please see
for additional
information.
Note
: If you do not need the pager function, you can connect an optional Rane DR6 to
this port instead. This will provide the same functions as a DR6 connected to the
Master
Remote port
(see #
8
above).
10.
Computer Ethernet Port
(Ethernet): Connect this port to a router or similar access point
during setup. After Zonetech is properly configured, you can connect a computer to
another port on the same router or access point, allowing you to use a web browser to
access an interface to control Zonetech. See
for more information.


