Manual-17
FINE DELAY
The Fine Delay block has 20 microsecond
(0.02 msec) minimum delay steps and is
intended to allow individual driver alignment
in speaker stacks or for lobe steering. Twenty
microseconds is approxi-
mately 0.02 feet (about
¼") or 0.00635 meters
(which gets rounded to
0.01 meters in the RPM
26).
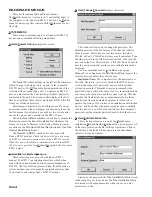
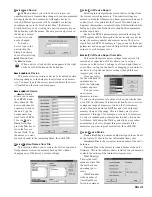
The Fine Delay
block and Fine Delay
detail window are shown
to the right. Like the
Coarse Delay block, the
Fine Delay block
provides up and down
arrows for incrementing
and decrementing,
however the Fine Delay
has 20 microsecond steps that are always displayed as 0.02
milliseconds. The Fine Delay detail window provides three
ways to edit the delay value; single steps by clicking the left
and right arrows, 0.20 millisecond steps by clicking between
the Thumb and the arrows or clicking and dragging the
Thumb itself. Click directly in the edit box to display the
cursor and type in a new value.
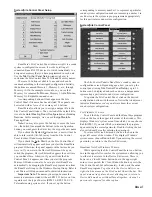
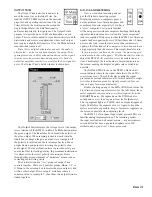
The
Global Settings
for
Delay Units
(milliseconds, feet
and meters) and
Temperature
are displayed in both the
Coarse and Fine detail windows. These are global settings,
meaning that once changed, the changes appear throughout
the RPM 26. To change all displayed delay settings to
different units, click the down arrow in any
Delay Units
selection box and select the new units from the list. Edit the
Temperature
by clicking the up or down arrows or click
directly in the edit box to display the cursor and type in a new
Temperature
. Click one of the radio buttons to display the
Temperature
in either ‘
F
’ for Fahrenheit or ‘
C
’ for Celsius.
Only when distance units (feet or meters) are used does
the
Temperature
setting impact the displayed units. The
Temperature
is calculated with dry air for the displayed
distances. The RPM 26 does not alter the delay time when the
Delay Units
are changed, only the way the delay is displayed
is altered. Also, even though the displayed values may be in
feet or meters, clicking the scroll bars and arrows still changes
the delay times in milliseconds (1 msec. for Coarse Delay and
0.02 msec. for Fine Delay).
The
Link
selection box in the Fine Delay detail window,
“ties” groups of Fine Delays together. Select the down arrow
to the right of the selection box to assign
Link
groups. There
are 4 possibilities,
None
,
1
,
2
or
3
.
None
in the selection box
indicates the given delay is tied with no other delay. If two
delays’
Link
boxes share a common value, for example,
2
,
then those two delays are
Link
ed together. When
Link
ed, the
selection box’s number—
1
,
2
or
3
—also appears in red in the
Fine Delay block on the Device Edit Screen. This indicates
which
Link
group a given delay block is in without needing to
open the detail window.
CROSSOVERS
Both 2- and 3-way crossover blocks are
found in various DSP Programs in the RPM.
Up to a mono 6-way crossover can be
implemented with the RPM’s powerful
Extended Parametric EQ, see the EX-
TENDED PARAMETRIC (PEQ+) section on
page Manual-15 for details on implementing
more than a 3-way crossover. The 2- and 3-
way crossover interfaces are similar. Only the
3-way is covered here. The 2-way interface
simply removes one band. The 3-way
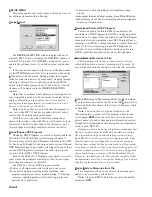
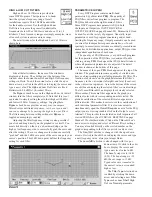
crossover block is shown here:
The current crossover frequency settings
are shown on this block, making it unneces-
sary to open the detail window to check the
crossover’s current frequency settings. The
high frequency output of the crossover block
is graphically always on top with the lowest frequency
outputs displayed on the bottom.
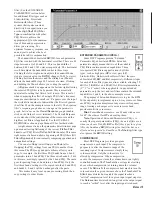
Double-clicking on the Crossover block brings up the
Crossover detail window shown at the bottom of the follow-
ing page. The graph displays the calculated frequency
response of the RPM’s outputs. For viewing ease, each
frequency band is displayed in a different color. Below the
graph are edit boxes, one for each crossover frequency point.
Edit each frequency by clicking the up or down arrows or
click directly in the edit box to display the cursor and type in
the new crossover frequency directly. The RPM 26 accepts
crossover frequency in 1 Hertz steps and all values must be
typed in Hertz.
Editing of the crossover frequency values is also possible
by clicking directly on the graphed curve. Click directly on
the intersection of the two curves to successfully grab and edit
the crossover frequency. The curves change color when
successfully grabbed. The horizontal position of the cursor
dictates what frequency value is assigned once you drop the
cursor.
Note: It is wise to alter crossover frequencies directly on
the graph only when the outputs are muted or when the RPM
26 is not connected to amplifiers and speakers. This avoids
the potential disasters of slipping with the mouse or reaching
for your latté and accidentally clicking the mouse! For these
reasons, the area to successfully grab the crossover curve is
small.
For both the 2-way and 3-way crossover blocks, the
default crossover filter type is Linkwitz-Riley, 24 dB/Oct. (4
th
order) filters. The crossover frequency points are also locked
together making all adjustments equivalent to familiar analog
crossovers. For those with the proper analysis tools to
properly adjust other crossover filter types, the RPM’s
crossovers contain an Advanced mode. In the crossover detail
window, clicking the right mouse button pops up a menu that
provides access to the Advanced mode. A Warning box is
displayed before one can enter Advanced mode. Check the
Don’t ask me again
box if you “know what you’re doing”
and this whole warning business is beneath you. Click
OK
only if you have the proper equipment to ensure your cross-
over adjustments are helping, not hindering your efforts. Hit

