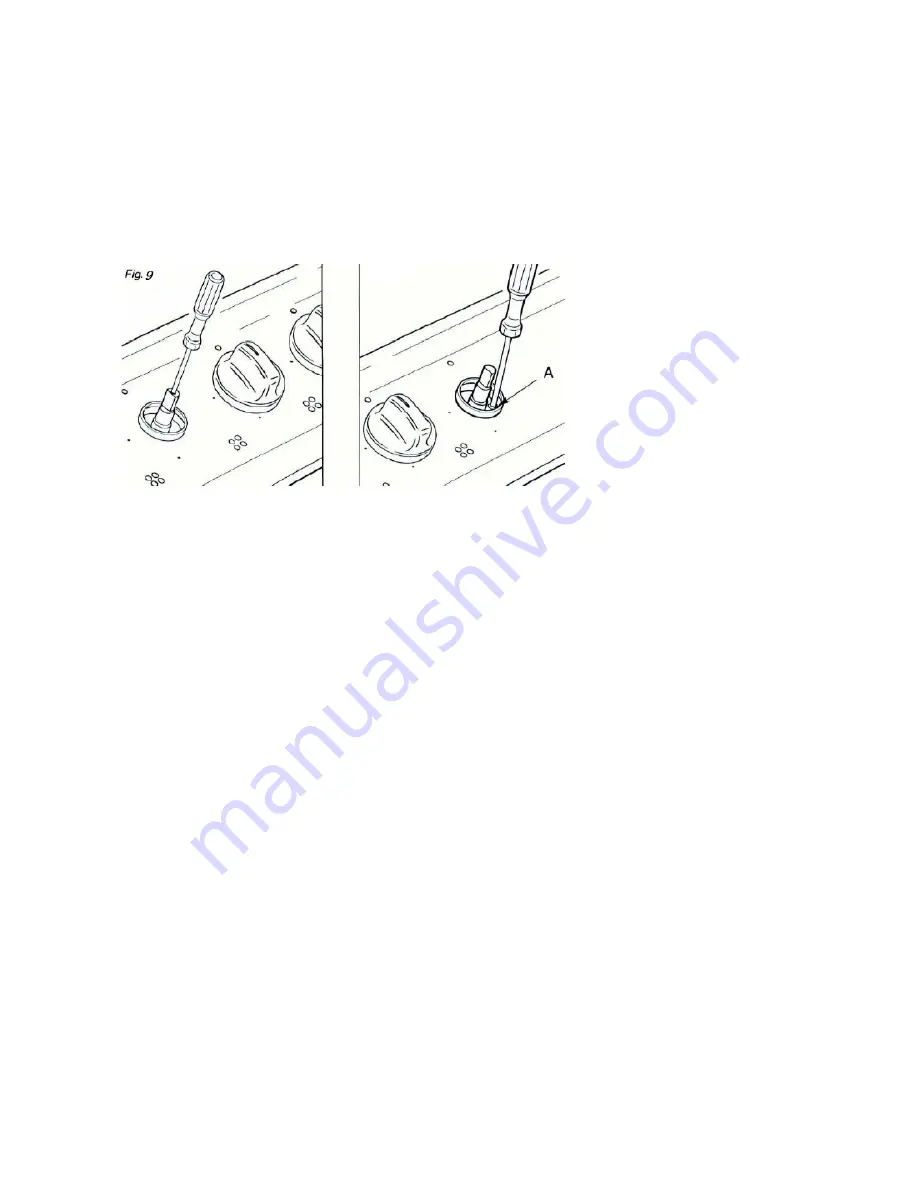
Turn the knob to minimum level
The adjustment screw is located in the center of the shaft (fig.9). Please remove/pull out the
control knob to access it.
Using a screwdriver with max. Diameter 3 mm, turn the screw inside the tap until the
correct setting is obtained.
C) Leakage Test
To prevent gas leaks,
put pipe joint compound on, or wrap pipe thread tape with Teflon around,
all male (external) pipe threads.
Install a manual gas line shut-off valve in the gas line in an easily accessed location
outside of the range. Make sure everyone operating the range knows where and how to
shut off the gas supply to the cooktop.
Install male 1/2” flare union adapter to the 1/2” NPT internal thread at inlet of regulator.
Use a backup wrench on the regulator fitting to avoid damage.
When installing the range from the front, remove the 90° elbow for easier installation.
Install male 1/2” or 3/4” flare union adapter to the NPT internal thread of the manual
shut-off valve, taking care to back-up the shut-off valve to keep it from turning.
Connect flexible metal appliance connector to the adapter on the cooktop. Position
cooktop to permit connection at the shut-off valve.
When all connections have been made, make sure all cooktop controls are in the off
position and turn on the main gas supply valve. Use a liquid leak detector at all joints and
connections to check for leaks in the system.
WARNING: FIRE HAZARD: DO NOT
use a flame to check for gas leaks.
When using test pressures greater than 1/2 psig to pressure test the gas supply system of
the residence, disconnect the cooktop and individual shut-off valve from the gas supply
10
Содержание GC2-48N
Страница 13: ...13...


