


Page 7
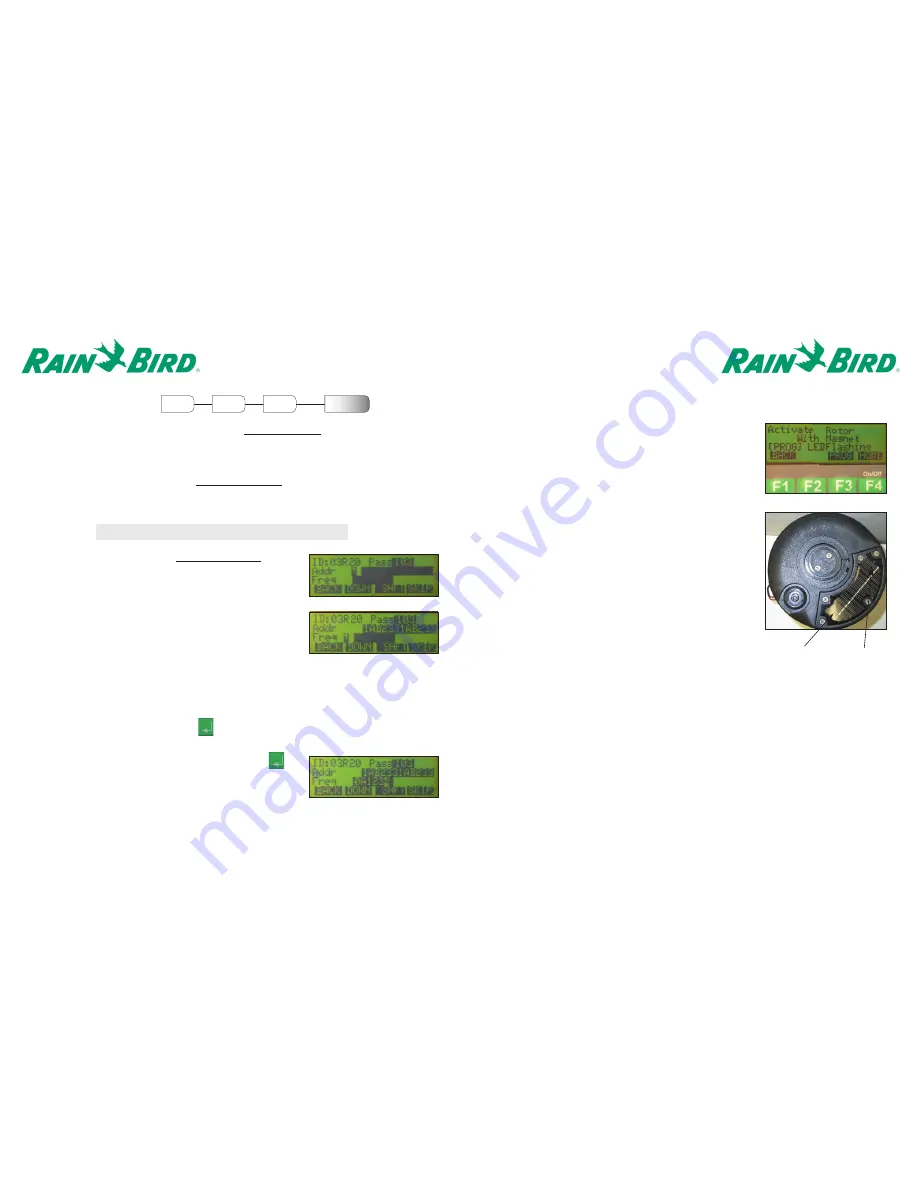
5. The Handheld is now ready to configure the Rotor.
Once the “Activate Rotor With Magnet” screen
appears, activate the rotor by passing a magnet
across the LED display area of the
Solar Panel. The magnet should pass over the LED
once with the surface of the magnet slightly
brushing along the top of the solar panel.
Observe the flashing of the LED on the Solar Panel.
Once the LED begins to flash approximately once
every second, press the Prog <F3> key on the
Handheld.
After approximately 30 seconds, the solenoid should
click twice to indicate that the Rotor has been
successfully configured.
6. By default, the handheld will prompt for the next
Rotor ID to be configured. To enter another Rotor ID,
return to step 1 of this section. If finished, press the
Home <F4> to return to the main menu.
Page 6
CONFIGURING A ROTOR
Prior to being able to perform any of the functions for
Controlling a Rotor,
the Rotor configuration
data must be input into the Handheld and then transferred into the Rotor with the use of a magnet.
The configuration data for the Wireless Rotor requires that the Capcode and Frequency be converted
into hexadecimal code. Rain Bird will supply the converted codes. In addition to assigning a logical
address to each Rotor as discussed in the
Entering the Rotor ID
section, a unique PassCode must
also be assigned. This three-digit numerical code allows each rotor to determine whether or not a
particular command from the Central Control Software or Handheld pertains to itself.
F1
F2
Enter
Rotor ID
Enter Config
Data
MAIN
MENU
Menu
Conf
1. Enter the Rotor ID as shown in the
Entering the Rotor ID
section.
2. At the Configuration Data Screen, begin by entering the
PassCode using the keypad. After entering the third digit, the
cursor will automatically move to the Address line.
3. Enter the Address information provided by Rain Bird. After
the last character has been entered, the cursor will automatically
move to the Frequency line.
4. Enter the Frequency information provided by Rain Bird.
After the last character has been entered, press <enter>
on the keypad. Remember to use the Shft <F3>
followed by the number 1-6 to enter A-F.
Note: It is best to configure the rotor prior to installation
Some addresses and frequencies contain the characters A-F. To enter one of these characters,
press the Shft <F3> followed by the number 1-6, where 1 represents A and 6 represents F.
If other Rotors have been previously programmed into the Handheld, you can scroll through each
address by continuously pressing the Down <F2> key until the correct address is found. Once the
correct address is found, press <enter> on the keypad.
Solar Panel
LED


