background image

72

SPECTRALIS

3.4.2 Step-sequencer basics - tonal sequences

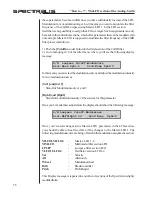
In the second part of the step-sequencer description we will attempt to program a
little melody sequence. First we’ll have to select an existing factory preset prepared
for this purpose. You can find one in song 6, pattern 5. Stop the Sequencer, select
song ”6” and then chose pattern ”5”. The sequencer will start right away – even
though you won’t hear anything yet, as we have turned off all note-triggers in sequence
line 11.
By adding a number of  trigger-points now, more and more notes will be generated.
To simplify these first steps, we already have set the pitch-information. - so you will
get to hear decent results even without pitch changes when you are switching on
individual trigger points. The sequencer line responsible for the triggering of the synth
voice, which also allows the input of the pitch, is sequencer line L11 

“Tgrp1”. 

Push

the 

[Function]

-button in the "Sequence-Edit"-section now and select sequencerline

11 with the first display encoder.
Press and hold the 

[Function]

-button in the sequence section again and push the

numeric button 

[1]

. This shortcut selects parameter page 7 of the stepsequencer

menu. However - this page can be selected by pressing the 

[Page-Up]

 button

repeatedly:

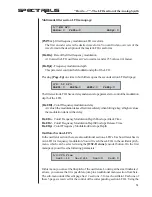
7/7:Fnc TrigSet->TGrp1        Stp:01-16
Seq:L11   Pitch:A3   Len:1    Vel:100

The page you have reached allows the activating/deactivating of already defined
triggerpoints in a sequence.
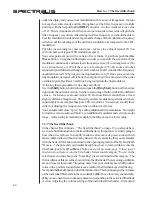
You will now see the indicator lights moving corresponding to the sequence position
and you can turn individual notes on and off using the numeric buttons  

[1]-[16]

.

If you would like to change the pitch of a note, you can do so by adjusting the
corresponding encoder 

(1)

-

(16)

 to the desired pitch.

Once you have created a melody line you like, the step sequencer will allow you a
host of options to make changes. You can change the direction of the melody, skip
single or multiple steps, mute steps and determine the length and the resolution of the
line. By holding down the 

[Function]

-button in the sequence-edit-section, you can

access all of these sequencer functions directly via the numeric-buttons.

Changing Playback Direction:

Push the 

[Function]

-button in the sequence-edit-section, hold it down and push one

of the numeric buttons 

[6]-[9]

. These have corresponding descriptions right under

the numbers.

[FWD]

-

The selected line will be played forward.

[BWD]

-

The selected line will be played in reverse.

[F&B]

-

The selected line will be played back alternating in forward
and backward mode.

[RND]

-

The tones will be played in random fashion.

Trigger:

The trigger sends out

control  information

which can initiate a

predeter-mined action.

In our

case the trigger starts

the envelopes, which

are part of a sound

being played. Doing

this will open enve-

lope-controlled

amplifiers and filters.

Step sequencer basics - Tonal sequences

Содержание Spectralis

Страница 1: ...1 SPECTRALIS Spectralis...

Страница 2: ...gn process for any of our new products continues even aftertheyarereleasedtothepublic Technicalchangesareimplementedatanytime withoutpriornotification ifwefeeltheyservetoimprovetheproduct Accordingto...

Страница 3: ...complies with regulations for radio interference of electronic devices EMVG dated August 30th 1995 Thefollowingstandardshavebeenusedtodetermineconformity EN 50082 1 1992 EN 50081 1 1992 EN 60065 1993...

Страница 4: ...andSmart MediaCards 18 2 3 11 Power connection 18 2 4 Explanations of basic terms 18 2 5Frontpaneloverview 21 2 5 1 Part button section 21 2 5 2 Num Button Assignment section 22 2 5 3 Sequence Edit se...

Страница 5: ...ying the Analog synthesizer 45 3 3 1 Differences to other synthesizers 46 3 3 2 Let s go Getting familiar with the analog filters 47 3 3 3 Short excursion oscillators and envelopes 49 3 3 4 Back to an...

Страница 6: ...ng chain 98 3 11 External synchronisation and metronome settings 100 3 11 1 External synchronisation 100 3 11 2 Metronome settings 100 3 12 Part activity monitoring 101 3 13 The arpeggiator 102 3 14 S...

Страница 7: ...ender the warranty null and void Repair of non registered products or products with a lapsed warranty will be performed at customer s expense We stronglyrecommendedthatcustomersaskforanestimateofcosts...

Страница 8: ...it only with the correct and sufficient power sources Positionthepower cordcarefully sonobodywillfalloverit Onlyuseundamagedandfullyfunctioningpower cords Turnyourunitoffandremovethepower cordbeforemo...

Страница 9: ...tation and can handle complete music production jobs due to its sampling engine which comes with digital multimode filters What the Spectralis has to offer A pattern based 17 track sequencer with uniq...

Страница 10: ...s connected to it Make sure to follow the instructions described in the rack setupinstructions 2 2 3 Firmware update WecurrentlyareworkingfullsteamonaddingmoreandmorefeaturestotheSpectralis firmware F...

Страница 11: ...analog sounds and the analog filters we have are using the term analog synth on the frontpanel to create a clearer distinction between samplebased tone generation and the hybrid synth From here on in...

Страница 12: ...naltomultipleMIDITHRUports 2 3 3 The USB port and storage media Using the USB port on your Spectralis you can easily exchangedatawithyourcomputer save your data Transfernewsamples dofirmwareupgrades T...

Страница 13: ...can Ifyoudon tdoitdatawillnot be written completely In a worst case scenario incomplete data or interrupted data transfer can lead to data loss on your media III Avoid renaming files directly on the S...

Страница 14: ...even when you have turned off the unit The clock is powered by a goldcap a special capacitor with a very big capacity However after around three months without any power the goldcap will not have eno...

Страница 15: ...recalled inside the song chain editor or the pattern jam mode Patterns can easily be transfered with the computer by copying a pattern from one song folder to another But take care to not overwrite an...

Страница 16: ...MB of your Flash Memory default spt Default pattern settings Thisfileisadefaultpattern Ifyoudeleteapatternorwhenyoustartyourpattern programmingwithanemptypattern thesound andmotif datawillbereadfrom...

Страница 17: ...function is done please reboot the Spectralis 2 3 9 Switching the Sample Set file type from fix to dynamic loading At the Spectralis panel press and hold the Shift button and press Browse The filebrow...

Страница 18: ...er which can be operated from 100 to 240 Volts and at 50 and 60 Hz This means the Spectralis will work just fine in other countries which may have differentvoltagethanyours You should unplug the power...

Страница 19: ...bit to refer to any instrument with more than one filterasafilterbank Thiscanberatherconfusingfortheuser whichiswhywewould liketodescribewhatactuallyconstitutesafixedfilterbank Thereareveryfewmusical...

Страница 20: ...20 SPECTRALIS 2 5 Frontpanel Overview...

Страница 21: ...buttons For instance you can access the analog synth part by pushing numeric button 12 Mute The Mute button allows you to mute individual parts using the numeric buttons Once you ve muted one or more...

Страница 22: ...available yet but will be available starting with firmware version 0 94 Transpose With the Transpose button you can transpose the pitch of a selected pattern Thepatternwillbeplayedinitsoriginalkeywhe...

Страница 23: ...analog synth trigger note events for the DSP and the analog synth and can control external MIDI equipment 2 5 4 Groove Edit section in the middle of the panel directly above the encoders 1 16 In the g...

Страница 24: ...sfrequencies above the highest bandpass pass through Usingencoder11 FBLevel youcanadjustthesum volumeofthefilterbankto theleveloftheoverallsignaloftheSpectralis Using encoder 12 FB FX1 und13 FB FX2 yo...

Страница 25: ...end The FX1 Send and FX2 Send buttonsassignthecontrolovereffect intensityfor thetwoeffect processorstoencoders1 16 Encoders1 15controltheeffect intensity for the Parts 1 15 and encoder 16 for the subg...

Страница 26: ...the analog synth which is why we ve also included a basic overview of this powerful synthesizer in a dedicated How to chapter on page 43 2 5 10 Transport section the section with the green button If...

Страница 27: ...ges frequently encountered with traditionalpotentiometers Tomakesurethatyouwon tmissoutonreal potentiometer feeling these encoders have a high resolution and in most cases can cover the whole value ra...

Страница 28: ...oder button Example Edit Thereareadditionalencoderfunctionsinthemenusforeditingofsounds Justpush the encoder button OSCWAVE in the oscillator section right after turning on the Spectralis Youwillseeth...

Страница 29: ...e master volume of the Spectralis e You can now use one of the numeric buttons to start a pattern and can start raising thevolume SLOWLY Trytoavoidrunningyoursystemintheredallthe time evenifyoulikeyou...

Страница 30: ...do next Push the Mute button in the part section next Now the Mute button will be lit while the Pattern Buttonlightisturnedoff Tip The buttons of the Num Button Assignment section and the buttons of...

Страница 31: ...d individual sounds are too loud or soft Let s change that now First push the Volume button in the Mixer section Now adjust the levels corresponding to your taste using encoders 1 15 Additionally you...

Страница 32: ...tisnecessaryforallsample based sounds to avoid unnecessary sample loading during your sound search But you can overcome this by simply hitting the page up and page down buttons for selecting and activ...

Страница 33: ...save the changed pattern to a different slot than the one containing the originalpattern Confirmbypushing Song andyoushouldseethefollowingdisplay message Choose Pattern Number s and Save Havealookatth...

Страница 34: ...s III Allmotifsused IV Themixersettings V The mute and solo settings of the pattern What s not saved ForanumberofreasonsthesamplesoftheDSP syntharenotbeingsavedwithin apattern Youwillhoweverreceiveawa...

Страница 35: ...g NO willenablethePatterntochangeandyourchangeswillbelost YES If you confirm YES the changes are being saved into the active Pattern This is the equivalentofsavingapatternwiththeoption Current inthepr...

Страница 36: ...sanymore Load Load providesthefollowingoptions Ask Thewarningmessageswillappearwhenatthesametime Save hasbeen set to Yes Ignore The alerts won t appear again regardless whether the write protection Sa...

Страница 37: ...the numeric button 2 The Control elements have now been assigned to the snare drum 3 2 2 Selecting a sample or multisample for the sound The DSP based synthesizer for the drums and polyphonic synthesi...

Страница 38: ...rconfirmation Init The Init functionallowstoinitializethesynthparameterstodefaultvalues 3 2 3 Tuning the sample set The standard pitch of the sample oscillator can be adjusted in the oscillator sectio...

Страница 39: ...ckmodes Poly Standardpolyphonicplaymode Mono MonophonicPlaymode Uni2 8 Unisono2 4and8arethedifferentunisonoplaybackmodesthatcancreate very rhich sounds and flanging FX depending on the settings Unison...

Страница 40: ...ar the changes of an envelope directly just start any pattern select the desired part as described above and solo it While solo ing is not necessary it makes it much easier to hear the full range of t...

Страница 41: ...sed type of filter as it offers the most musical sound The reasonisthatwehaveatendencytofeelsoundsasbeing warm whentheystrongly emphasizethefundamental Thesoundsofcoursecanbeglisteninglybrightwhenthe...

Страница 42: ...ndthefilterfrequency is already set to it s highest frequency the envelope will not affect the sound at all a For your first try use the 12dB LP button to activate the lowpass mode b Set the cutoff fr...

Страница 43: ...reeencoders LFO WAVE MOD DEPTH and MOD RATE intheLFOsection allowsforeditingoftheseparametersdirectforbothLFOs Pushingtheseencoderbuttons opens up the menu for independent parameter tweaking of both L...

Страница 44: ...erentmodulationsourcesfor the Cutoff Frequency the two LFO s aftertouch breath controller and the pitchbend wheel Are you may missing velocity and the modulation wheel in this dialog Don tworry thesev...

Страница 45: ...ory SynBass and chose the sound Classc1 In case you can t find this sound or instead of the sound nameallyouseeis inyourdisplay itislikelythatthesoundbank Analogy SSB is notstored on the Spectralis fl...

Страница 46: ...chwe dliketo pointoutrightatthestart toimprovethesuccess ratioforyourinitialprogramming efforts a Eachofthemodulesgeneratingasignalforsoundcreation oscillator noise has I it sownamplifierwithenvelope...

Страница 47: ...oyourSpectralisandhaveitsettosendonMIDI channel 1 Now push the Part Select button and select part 12 Analog Synth Forthisexamplewearealsogoingfromtheassumptionthattheoriginalfactorypresets arestillpre...

Страница 48: ...sized now but the funda mentalisgettinglouder Ifyouincreasetheresonancefurther thelowpassfilteralmosttakesonthecharacter of a bandpass filter emphasizing the range of the overtones around the cutoff f...

Страница 49: ...d and start questioning the usefulness of this chapter you might want to re read the introduction to the chapter It ll take you to a smallSidebar 3 3 3Short Excursion oscillators and envelopes Corresp...

Страница 50: ...continueeven after you release the key Turn the VCO EG Bypass button back to 0 We still want to have a look at versionII Push the OSC Wave button once again and use the Page Up button to select menu p...

Страница 51: ...is being played Whichever waveform you are chosing they all will have a zero pass position If the waveform is started in the zero position of course you won t hear any click even if the attack is hard...

Страница 52: ...ilter Otherwise we d obviously behearingtheighpass effectevenwhenthelowpassisclosed Themultimode filter is only sending its signal to the 24dB lowpass filter To clarify this even more we havecreatedad...

Страница 53: ...choice appears to be the more sensible one as it requires fewer parameters to be edited to accomplish the goal and also because you stand to get a bettersignal noiseratiobysimplyremovingananalogfilte...

Страница 54: ...etely open TIP Have you noticed that the EgAm encoder can also be set to a negative value Just imagine a mirror image of the envelope around the 0 level axis With the help of a negative value you will...

Страница 55: ...s the modulation rate of the fourmaster LFO s Theencodersonthecontrolpanelalwayssimultaneouslyaffectall4 master LFO s When you are pushing the one of the encoders the corresponding parameters for all4...

Страница 56: ...nuof thisLFO Whenpushingtheencoderthefollowingdisplaymessagewillappear 1 4 LFO1 Depth Control Envelope LEDl 0 LEAt 0 LERl 0 LEDp 0 LED 0 LFO Envelope Delay Hereyoucanadjustwhethertheuseoftheenvelopeis...

Страница 57: ...ofthewaveform Asaresulttheamountofaparameterchange usingtheLFO swillbedifferentwitheachkeystroke Asaresultaselfoscillating LFO is a simple way to create lively sounds Pushthe LFO Wave Encodertoopenthe...

Страница 58: ...canselectthemodulationsourceandadjustthemodulationintensity for twomodulationsources Src1 and Src2 Stand for Modulationsource 1 and 2 Dph1 and Dph2 Standformodulationintensityofthesourcesforthisparame...

Страница 59: ...play Youshouldseethefollowingdisplay message 1 2 VCO1 Wave Shape 100 Pwm 1 Sync 0 3 Push the PWM encoder button in this menu You should now see the following alreadysomewhatfamiliardisplaymessage VCO1...

Страница 60: ...Src1 None Dph 0 Src2 None Dph2 0 The resonance modulators page for the MM filter follows at page 5 7 LFO sections BynowyoushouldbesomewhatfamiliarwithsomekeydetailsoftheLFOs However we have notyet dis...

Страница 61: ...ediatelywhenhittingakey athighervalues themodulationstartswithadelay FmEDa CutoffFrequencyModulationDepthEnvelopeAttackTime FmEDr CutoffFrequencyModulationDepthEnvelopeReleaseTime FmEDp CutoffFrequenc...

Страница 62: ...veseeninthedescriptionofthemaster LFOs thesectionLFO scanalsobe usedformultiplemodulationtargetsatthesametime Thisisveryuseful whentwo or more parameters have to be modulated with the same frequency...

Страница 63: ...ethefollowingdisplaymessage 7 8 LP FM Exp from LPFMX 0 LPFMX 0 LPFMX 0 LPFMX 227 You can now see the menu for setting the exponential filter frequency modulation The four parameters represent the modu...

Страница 64: ...nce at around minus 100 Both oscillators should have at least slightly different frequencies This will generate modulation patterns which are considerablymorecomplexthanpureLFOwaveforms Youcannowmodif...

Страница 65: ...ble sources for feedback both of the analog filters are resonating up to self oscillation something also referred to feedback It will be fairly easy to differentiate this noise source from routing fee...

Страница 66: ...h the obligatory attack decay sustain and release parameters FBBP This is the previously mentioned bypass control which allows you to pass the filterbanksignalthroughanadditionalenvelopecontrolledampl...

Страница 67: ...st filterVCA and VCF envelopesofbothanalogfiltersaredistributedonfourparameter pages AsanadditiontotheenvelopeeditpagesintheVCO fixedfilterbankandVCFsections wehavecreatedduplicatesforallvolume envelo...

Страница 68: ...igitalkeycontrolanadditionalnoteprioritybecamepopular the so called last note priority Now the pitch of a note wasn t the decisive factor in pitch determination but the last note played With the intro...

Страница 69: ...artheresultifyouchangethesettingsthere Pleasekeepinmindthatyoucan save the settings for note priority and triggersetting for each separate sound When you arechoosingadifferentsound theoriginalsettings...

Страница 70: ...s to 0 VII As a final step in your preparations set the bypass parameter FBBP at the this menu page of the filterbank menu to a value of 255 We will now use the step sequencer to automate the gain con...

Страница 71: ...rameters After such change the following trigger steps willusethenewvalues You may now chose different sequencer lines anywhere from 1 10 and use the above describedmethodtosetdifferentstep envelopesf...

Страница 72: ...0 The page you have reached allows the activating deactivating of already defined triggerpointsinasequence Youwillnowseetheindicatorlightsmovingcorrespondingtothesequenceposition and you can turn indi...

Страница 73: ...numeric button 1 Trig Using the Mute function You can access the Mute function by holding down the Function button and simultaneouslyselectingnumeric button4 Mute Onceyou veaccessedthefunction you ll...

Страница 74: ...Sequence edit menu all you have to do is push the Tempo Shuttle Button Addingafiltermodulation Bynowyoushouldbefamiliarwithanumberofoptionsforcontrollingthesettingsof the step sequencer Still our lit...

Страница 75: ...pearmorelively becausestepsarenotnecessarilybeing triggeredeverytimeduringeachsequence Glide Theparameter glide isbeingusedtodetermineifanote glides tothenextnoteor if the next note pitch is reached d...

Страница 76: ...ayalreadyhavenoticedalittlearrowpointingupwardsin frontoftheentries Pitch Length and Velocity Thisarrowindicates thatthere is an additional menu page which you can access by pushing the according enco...

Страница 77: ...whichyouwantto assignthenewlength to Using the encoderbutton SET ALL youcanassignthenewvaluetoallnotesatthe sametime Changing the velocity Onmenupage4 4youwillfindthemenuforchangingvelocityofallsteps...

Страница 78: ...ep hold it down and play the desired note on your connected MIDI keyboard 3 5 6 Line rotation In chapter 4 13 3 we already have explained many basic functions such as change of direction skip resoluti...

Страница 79: ...IDI control tracks have no envelopes Most of the demo patterns in the Spectralis RAM already have presetstep sequencertargets ThesedatebacktotheearlydesignphaseoftheSpectralis when targets still remai...

Страница 80: ...connected MIDI keyboard won t be transmitted to the Hybrid Synth but to the selectedMIDIinstrument Thisallowsyoutohearimmediatelyhowthesequencer linewillsoundontheselectedMIDIchannel Tip Please make s...

Страница 81: ...trolledbystandard MIDIcontrollers onlytheirlevel envelopesarebeingtriggered Youmightaskyourself why we re going into such detail to describe this subject Basically most of it sounds likenormalMIDImult...

Страница 82: ...houldnowbeable toplayvarioussoundsbyselectingthetriggergroups 3 7 2 The definition of triggergroups The definition of the trigger groups is rather simple Select Part Select and hold downthenumericbutt...

Страница 83: ...nk allow for routing of the output signal not only to an output but also additionally into the effect section This means you can even add some effect to the three parts separately from each other use...

Страница 84: ...with thesettingsafterwards Ifyouhitastepnumber thatalreadyisactivatedwithadiffe rentparametersetting thestepgetsupdatedwiththenewvalues Ifyouhitanalready activatedstepwithasimilarparametersettingagai...

Страница 85: ...tcornerofthedisplay Thetempo shuttleencoder togglesbetweentempocontrolandsegmentshiftingbypushingtheencoderbutton Skip function The third page of the sequence menu assigns the skip function to the num...

Страница 86: ...ute FBV 390 Hz Stp 01 16 Seq L03 Len 17 3 8 2 Triggerpoint muting and overwriting Menupage7isanotherdialogweaddedforimprovingtheworkflowalittlebit This menuallowsyoutomute unmutetriggerpointsandtoente...

Страница 87: ...chedfromthefirstandtheseventhmenupage ofthesequenceeditmenu Selectthesequencemenubyhitting Function andselectthe 1storthe7thmenupage Youshouldseethefollowingmenu 1 7 Fnc TrigMod FBV 390Hz Stp 01 16 Se...

Страница 88: ...e following functions S 01 Use the first encoder to chose the song in which you want to select a motif P 01 Use the second encoder to select one of the patterns 1 32 from which a motif is to be extrac...

Страница 89: ...change Motif for Part Kick S01 01 P 01 M Kick EDIT Up to now we have not discussed the Edit command in the motif menu By pressing the Edit encoderbutton theeditmenuwillappearinthedisplay Thiseditmenua...

Страница 90: ...he song from which one wants to load a drum groove into the current pattern P Pattern Selection Thesecondencoderselectsthedrum groovecorrespondingtothepatternnumber you are selecting The selection mus...

Страница 91: ...mple arms the DSP synth part 1 III SelectthePattern modewiththe Pattern buttoninthenum buttonassignment section IV Access Record menu by pushing the Rec button Thefollowingrecord modeselectiondialogwi...

Страница 92: ...efollowingdisplaymessage Keep Recorded Events Replace DISCARD REPLACE Replacesanalreadyexistingmotifwiththenewquantizedrecording DISCARD Discards your most recent recording and reverts to the previous...

Страница 93: ...sform Push Transform then the Play button to listen back to your pattern 3 9 8 Chord Record recording independent note and rhythm input May we will find a better name for this special recording mode i...

Страница 94: ...u will hear the metronome and you now canrecordtherhythmicpatternforthechord memoriesusingyourkeyboardorthe Spectralis Mini Keyboard again Itdoesnotmatterwhichkeysyounowareplaying only therhythmicpatt...

Страница 95: ...reached with the Tempo Shuttle Encoder Now let s get started First select an empty song and within the song an empty pattern Next push the Step Accent button in the Groove Edit section You will see th...

Страница 96: ...happy with the result of the velocity control it could be the result of you not having activated velocity control for your selected sound or you may have it set to a very low value Access the correspo...

Страница 97: ...16 with and without holding down the Shift button Allpatternsmustbe placed into these songfolders If you want to use a pattern from another song just copy this pattern from the other song to the compu...

Страница 98: ...edited patterns in case they they are in use inside the songchain 3 10 3 Editing a song chain Editingasong chainisveryeasyandcanalsobedoneontheflywithoutstoppingthe sequencer Select Song insidethenum...

Страница 99: ...imes you want to truncate the end of an pattern in order to jump to the next songstep earlier than after a completed pattern The End truncate function allows to truncate the end of an pattern in steps...

Страница 100: ...xternalMIDIgearcapableofsendingMIDI Realtime messages Please press and hold the Shift button and push the Tempo Shuttle rotaryencoderbuttontoopenthefollowingdisplaymenu 1 2 Metronome Sync Settings Cou...

Страница 101: ...itorisstraightforward Justselectthe patternmode by hitting Pattern and press and hold Shift and push the volume buttoninthemixingdesksection Nowthepartnumberbuttonsshouldflashcorresponding tothemotifs...

Страница 102: ...ore the Arpeggiator a little bit Select a part you want to arpeggiate select a cool sound for the arpeggiator and enter the edit menu by pressing Arpeggiator Now you can activate the arpeggiator and e...

Страница 103: ...ote velocities one has played on the keyboard AsPlayed If AsPl is selected rotating the encoder does not hing But if one presses the encoderbutton the display will change from AsPl to a value between...

Страница 104: ...parameter will control the playback of arpeggiator notes in case that one has pressed more notes than the length of the arpeggio settings allows to play The arpeggiator will then play a different mot...

Страница 105: ...ttern 15 of the factory presets Are younoticinganything ThispatterncontainsaDSP partwithaplayedchordmotif whichhasbeenprocessedrhythmicallywithbythefilterbankandthestep sequencer You can hear the effe...

Страница 106: ...route the chord motif into the low pass filter Doesn t that sound cool 3 14 2 Routing external signals to the analog synth The Spectralis has two external signal inputs which can be routed to the sou...

Страница 107: ...e example of a kick drum In the Mixer section chose the Volume button Next push the encoder button 1 Kick This will open the channel strip for the Kick Drum Part 1 4 S01 Song 01 P15 Chords Part01 Vol...

Страница 108: ...on should ensure that all yoursoundbankswillfitinflashrom WewillbepostingnewsoundsregularlyontheSpectralisUserWebpage Ifyouwishto useoneofthesesoundbanksinyourSpectralis justdownloadthebanktoyourcompu...

Страница 109: ...sagewilllook likethis Select Memory Location and press SAVE C A Synth S F SNDBANK C category Using the rotary encoder you can selecte a main category from a list This main category can only be selecte...

Страница 110: ...t sound storage Of course you can also leave the save menu by pushing EXIT 3 15 2Creating a new soundbank If you wish to create a new soundbank proceed exactly as before Use the SAVE button to prompt...

Страница 111: ...d the LFO section are being recombined into a brand new sound using various randomly selected sound components Judging by our own experiments this process almost always results in new interesting ofte...

Страница 112: ...stemisalsonicetokeepthesamplenamesshort Most of the information about an sample is already specified in the category and subcategory The sample name itself can give additional info Just imagine you ha...

Страница 113: ...unction Refer to the DSP Synth Editing section of this manual to create newsoundswiththenewsample instruments 3 18 Controlling external MIDI gear Wealreadycoveredtheassignmentofindividualstepsequencer...

Страница 114: ...ernal MIDI instrument After selecting a MIDI channel number you will notice another softbutton in the display MIDI Redirekt for Part DSyn1 MDef MIDIDEF The MIDIDEF encoderbutton allows you to call up...

Страница 115: ...to undefined indicated by a crossed line Alternatively the MIDI definitions can be set up in a dedicated menu inside the song edit section as well Pushing the Song Select button opens an editpage Thi...

Страница 116: ...ress the encoder button underneath FbQ Thiswillopenthefollowingmessage Filterbank Q adjust see FILTERBANK 5 Now you already know that FbQ controls the Q factor of the fixed filterbank filters Butyouma...

Страница 117: ...ying withyournewInstrument Wewilldefinitelycontinuetoupdatethismanualandto expandthe Howto section Ofcoursetherewillalsobeafull referencemanual availablefortheSpectralisbeforelong whichwillhavemoredet...

Отзывы: