Racal Instruments 1257, Руководство пользователя
"Думас 1257" - бесплатный пользовательский мануал для вашего удобства. Загрузите его с нашего сайта, чтобы получить подробную информацию о продукте. Этот руководство поможет вам быстро и легко разобраться в функциях и возможностях "Думас 1257". Не упустите шанс загрузить его прямо сейчас с manualshive.com.
Поделиться
Скачать


Отзывы:
Нет отзывов
Похожие инструкции для 1257

2600 Series
Бренд: Farris Engineering Страницы: 12

BT-100
Бренд: Eastern Times Technology Страницы: 4

10
Бренд: Vacon Страницы: 18

SolarCell Remote
Бренд: Samsung Страницы: 2

MWR-SH11N
Бренд: Samsung Страницы: 20

PDWE 8 A2
Бренд: Parkside Страницы: 65

CV10
Бренд: Saftronics Страницы: 13

C5S110
Бренд: ZKTeco Страницы: 6

PAB-FC2
Бренд: Partizan Страницы: 7

2K COMFORT
Бренд: WAGNER Страницы: 128

RC4
Бренд: Hiwin Страницы: 99

PTPESTACREPA
Бренд: Pestill Страницы: 4

EFG10 Series
Бренд: FEAM Страницы: 14
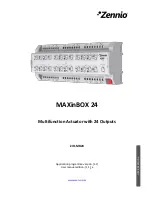
MAXinBOX 24 ZIO-MB24
Бренд: Zennio Страницы: 24

USB-GT
Бренд: Meilhaus Electronic Страницы: 19

BBWO1
Бренд: Bardiani Valvole Страницы: 65

U-verse TV Standard Remote Control
Бренд: AT&T Страницы: 2

MERLIN LEGEND Release 7.0
Бренд: Lucent Technologies Страницы: 1082


