background image

Restore power to the ceiling fan and test 
for proper operation.

A. The fan 3-speed control knob is used to 
control the fan blade speed as follows:
0= Turns the fan off
1= High Speed
2 = Medium Speed
3= Low Speed

“OFF-ON” Button:
This button is used for oscillating 
operation. Press “ON” to set the fan to a 
45 degree oscillation. Press ‘OFF” to turn 
off the oscillation. The fan will stay at the 
same direction where the oscillation is 
turned off.

1.

 A wall fan is an environmentally smart 

choice to cool your home or office. Adjust 
your HVAC thermostat during fan use to 
save additional energy and money on your 
air conditioning utility bills. You should 
see a significant reduction in your cooling 
costs by regular use of your fan.

2.

 A clicking or a rattling noise is a sure 

indication of loosening screws. Since 
screws will invariably work loose over 
time, at least once a year, tighten all the 
screws for this fan.

3.

   Clean you fan periodically using only 

a cloth dampened with a mild detergent 
solution for all hardware - never use 
solvents. The finish plating is lacquered to 
prevent tarnishing. Use a lint-free cloth 
with clean water to clean blades.

4.

   You will never need to oil or lubricate 

your fan. Its permanently sealed bearings 
will provide trouble free, silent operation 
for many years.

5.

   If repairs or servicing are ever 

required, to avoid possible electric shock, 

turn off the electricity

 at the main fuse 

or circuit panel before you  begin.

6. FAN OPERATION AND CARE

Fig. 8

Rotation

Содержание The Veranda

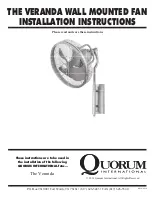
Страница 1: ...read and save these instructions These instructions are to be used in the installation of the following QUORUM INTERNATIONAL fans The Veranda P O Box 961008 Fort Worth TX 76161 817 626 5483 FAX 817 626 5540 IO220 01 14 2014 Quorum International All Rights Reserved ...

Страница 2: ...estions regarding the warranty or the procedures for obtaining service please call us at 817 626 5483 Monday thru Friday 8 00 a m 5 00 p m CST technical skill competence or experience of the user 8 Light bulbs glass or acrylic components or accessories 9 Minor occurrences of wobble are accepted as normal and should not necessarily be considered a defect WHO MAY ENFORCE WARRANTY This warranty may b...

Страница 3: ... the National Electrical Code If you are unfamiliar with electric wiring please use a qualified and licensed electrician 4 When cutting or drilling into wall or ceiling do not damage electrical wiring and other hidden utilities 5 Before applying power visually re inspect the installation Make sure that all guards and protective devices are securely in place and all visible screws and bolts are tig...

Страница 4: ...l junction box or make sure the existing box is secured directly to the building structure Use appropriate fasteners and building materials CAUTION TO REDUCE THE RISK OF PERSONAL INJURY INSTALL THE PRIMARY MOUNTING MEANS AND USE ONLY THE HARDWARE PROVIDED WITH THE FAN 3 MOUNTING OPTIONS WARNING TO REDUCE THE RISK OF ELECTRIC SHOCK FIRE OR PERSONAL INJURY MOUNT THE FAN ONLY TO AN OUTLET MARKED ACCE...

Страница 5: ...he wall mounting plate ensure the two hanging bars sliding into the notch of hook completely Figure 5 NOTE Make sure the two wire connectors are revealed through the wireway passage after hanging the fan motor assembly onto the wall mounting plate 7 Make the connection for the two wire connectors and then tuck the wires inside the fan base Figure 5 8 Re install the fan base screws that removed pre...

Страница 6: ...unit Remove the existing wall plate and switch from the wall junction box Connect blue wire labeled FOR OSCILLATION from wall control to blue or red wire from wall junction box Connect black wire labeled TO MOTOR L from wall control to black wire from wall junction box Connect the black white wire labeled AC IN L from the wall control to the black wire from A C supply source If your wall junction ...

Страница 7: ...hould see a significant reduction in your cooling costs by regular use of your fan 2 A clicking or a rattling noise is a sure indication of loosening screws Since screws will invariably work loose over time at least once a year tighten all the screws for this fan 3 Clean you fan periodically using only a cloth dampened with a mild detergent solution for all hardware never use solvents The finish p...

Страница 8: ... cage motor etc 1 Check to see that all screws are tight in the fan cage connection to the motor face plate 2 Turn off the power Loosen the fan base and check that the wiring and or wire nut connectors are not resting against the fan base possibly vibrating while the fan is on 3 Use of a standard light rheostat or an unapproved fan wall control to control the fan speed will always cause an annoyin...

Отзывы: