

ISO
|
9
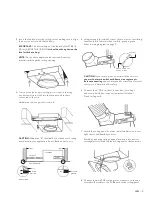
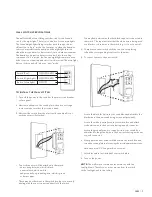
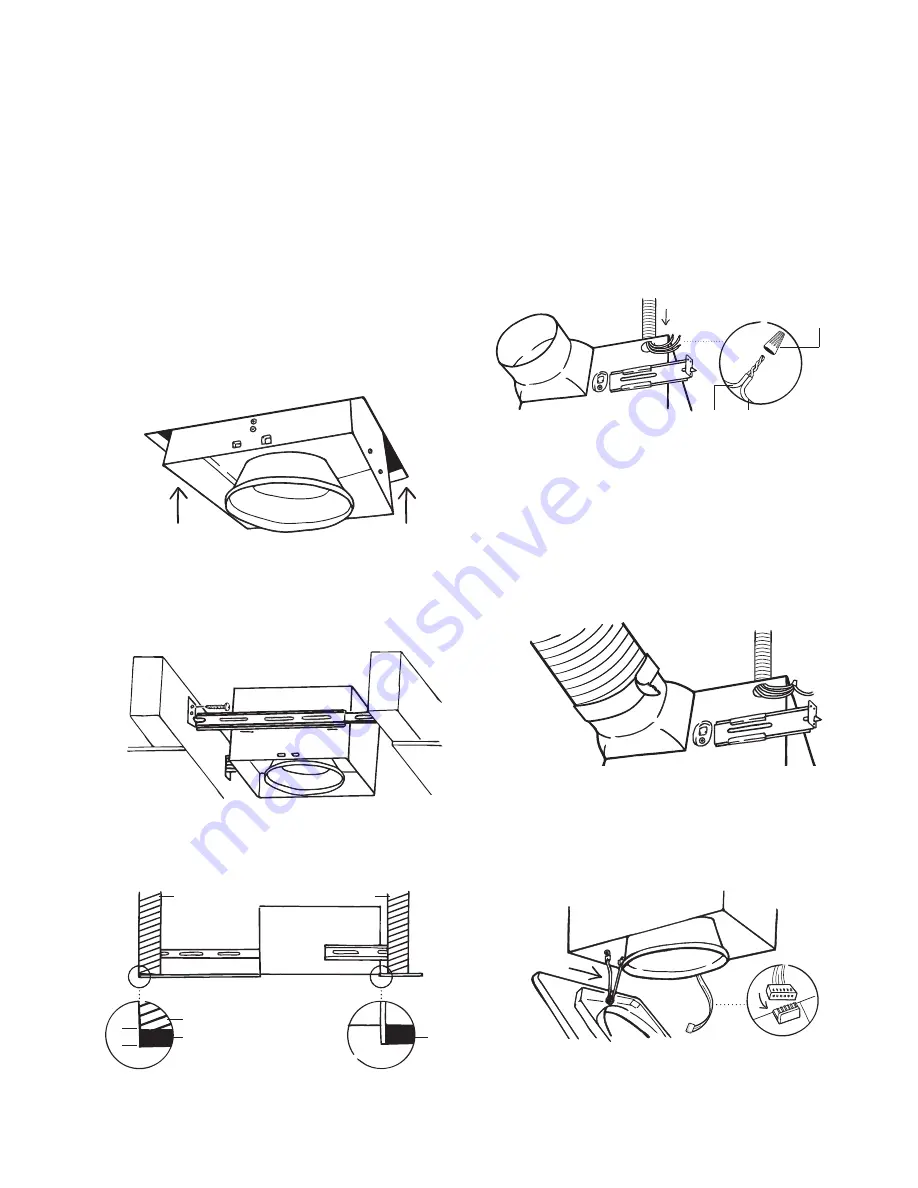
3 Insert the fan body into the ceiling cut out making sure to align
the duct connector with the fan body.
IMPORTANT:
The bottom edge of the fan body MUST BE 3/4”
(1.9 cm) ABOVE THE CEILING (
it should not hang down or be
level with the ceiling
).
NOTE:
Duct/outlet adapter can be removed for easier
installation through the ceiling opening.
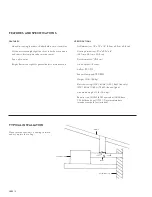
4 To mount the fan body to ceiling joists – screw in the long
wood screws (six in total) into the suspension brackets
connected to the joist.
Hardware used: Long wood screw x 6
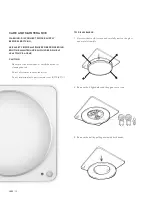
CAUTION:
Dimension “B” should allow for thickness of ceiling
board used in your application. Do not flush mount to joist.
FAN BODY
FAN
JOIST
JOIST
0.7”
CEILING
BOARD
DIMENSION B
CEILING
BOARD
CEILING BOARD
JOIST
BRACKET
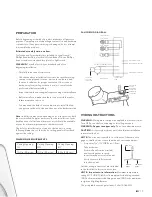
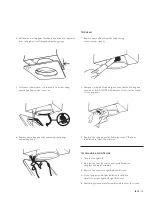
5 Using wire nuts (provided), connect house wires to ventilating
fan wires: black to black; white to white; green to green;
(refer to wiring diagram on page 7).
CAUTION:
If your house wires do not match these colors,
you must determine what each house wire represents
before connecting
and you may need to consult an electrical
contractor to determine this safely.
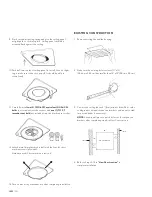
7 Attach the ceiling panel (contains the infrared motion sensor,
light sensor, and humidity sensor):
• Pinch first mounting spring on panel and insert into narrow
rectangular slots inside the fan housing next to the fan motor.
6 Connect the 4” (10.2 cm) duct to vent duct (in ceiling)
and secure it with duct tape or clamps (not included).
Finish ceiling work.
8 Connect the main PCB via the plastic connector on the end
of rainbow flat cable to the PCB board on the ceiling panel.
WIRE NUT
PRODUCT
WIRES
HOUSE
WIRES
Содержание ISO
Страница 2: ...ISO 2...


