background image

3

1-888-QUIETCOOL

Choosing the Right Location 

Choose a location to install your QuietCool roof mounted fan that allows for balanced airflow throughout 
the attic space. We always recommend the fan to be installed centrally located on the roof three feet 
below the ridge line. This will allow you to access the fan very easily. Your roof mount fan should not be 
installed any closer than within 5 feet to an existing passive vent, ridge vent, or additional fan unit.

IMPORTANT: DO NOT CUT THROUGH ANY RAFTERS OR STRUCTURAL MEMBERS WHILE CUTTING THE VENT 

HOLE. ONLY CUT OUT THE ROOF DECKING.

2. INSTALLATION

2.2  Installing AFR (Attic Fan Roof) model fans 

1. 

Determine in which area you would like to install your QuietCool Attic Roof Mount Fan.


IMPORTANT: 

After choosing the location where your roof mount attic fan will be installed, find the 

closest rafter to that location and determine if your roof has either 16” on center or 24” on center 
rafter spacing.

Installation Video:

Watch the video by 
scanning the QR 
code or visit


www.

QuietCoolSystems.com/
support

READ BEFORE ATTEMPTING TO INSTALL AN 

AFR 

OR

 RM 

FAN

Getting Started

Always follow Local Building Codes

 because the fan may require specific fasteners or anchoring systems 

not discussed in this installation guide. 

Installation should be done by a licensed roofing contractor.

Safety Information

Safety precautions should be taken when performing the roofing work described in this installation 
guide. You can significantly reduce your risk of danger by following the below recommendations: 

• 

Do not install the fan in wet or windy conditions

• 

Tie-off both yourself and your equipment when working on steep pitched roofs to avoid falls

• 

Wear safety glasses and protective gloves when using power tools 

• 

Always wear slip-resistant shoes when working on the roof 

• 

Do not cut through any rafters or structural members of the roof during installation 

Ventilation Requirements 

If the fan is being installed as an attic fan, in order for it to operate at maximum performance, your attic 
must have enough intake ventilation (net free area) to support the amount of air that your fan is moving. 
We always recommend 1 SQFT of attic venting per 750 CFM in the system.

Materials Needed

• 

Cordless Drill with Nut 
Driver

• 

Self-Tapping Screws with 
Rubber Bonded Washers 

• 

Reciprocating Saw

• 

Measuring Tape 

• 

Weatherproof Roofing 
Grade Sealant

• 

Roofing Knife 

• 

Ladder Marker or Carpenter 
Pencil

Содержание AFR SMT-2.0

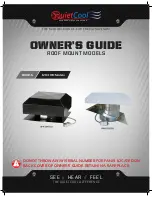
Страница 1: ...IETCOOL DIFFERENCE ADVANCED WHOLE HOUSE FANS THE NATURAL CHOICE FOR ENERGY SAVINGS OWNER S GUIDE ROOF MOUNT MODELS DO NOT THROW AWAY SERIAL NUMBER FOR FAN IS LOCATED ON BACK COVER OF OWNER S GUIDE RET...

Страница 2: ...Only qualified service personnel should service the QuietCool system The user should not attempt to service the product 7 Building Codes Always follow Local Building Codes when installing appliances...

Страница 3: ...en warehouse buildings The QuietCool Roof Mount Fans offer great versatility for any system you are looking to put in QuietCool Roof Mount Fans can be used as an attic fan as a whole house fan with a...

Страница 4: ...y or effectively as it could with 1 750 attic venting But don t worry the system will still operate if there is not enough venting Insufficient venting is a very simple problem to fix Roofing contract...

Страница 5: ...ing Started Always follow Local Building Codes because the fan may require specific fasteners or anchoring systems not discussed in this installation guide Installation should be done by a licensed ro...

Страница 6: ...g in a sweeping motion under the shingles cutting through any roofing nails or staples Continue cutting counterclockwise around the vent hole until reaching the 9 o clock position Using a roofing knif...

Страница 7: ...the center of the vent hole Partially insert a screw into the center point mark NOTE If you have a tile roof you will need to move the tiles out of the way before tracing and cutting See Figure 2 24...

Страница 8: ...wall studs and mark the location for the box to be installed Figure 2 3B Using a drywall saw cut out the drywall Figure 2 3C Place the ceiling box if applicable over the ceiling cut out Figure 2 3D A...

Страница 9: ...Roof With Duct Works with CRB and FLT Models Sloped Roof With Duct Works with SLP Models EXTREMELY IMPORTANT It is very important that you install the RM fans correctly as shown in the following diag...

Страница 10: ...ction box 3 With a wire nut tie the white common wire together Then tie the black wires together 4 Ground the green wire from the fan and the ground wire from the Romex to the junction box NOTE When t...

Страница 11: ...the fan s junction box tie the black wire from the fan to the taped white wire 7 Tie the two remaining black wires together Then tie the remaining copper wires together Figure 3 2A Ground the fan to...

Страница 12: ...screw ground the green wire from the fan to the handy box 5 With a wire nut tie the black wire from the fan to the red wire from the timer 6 Then tie the black wire from the power source to the black...

Страница 13: ...2030 2116 Watts 15 26 35 47 62 81 104 129 159 170 All specs are approximate For the most up to date specs please visit QuietCoolSystems com The QuietCool Smart Attic Fan will help your attic stay cool...

Страница 14: ...trouble installing or operating your new QuietCool Specialty Series Fan please visit our website at www QuietCoolSystems com or call us at 951 325 6340 for support QuietCool is Proudly Designed and B...

Страница 15: ...riginal date of purchase C This warranty does not cover any of the following 1 Incidental or consequential damage resulting from the operation of our equipment or any malfunction thereof 2 Cost of ser...

Отзывы: