Page 19
March 2000
GB 40 I - FIREPLACE INSERT
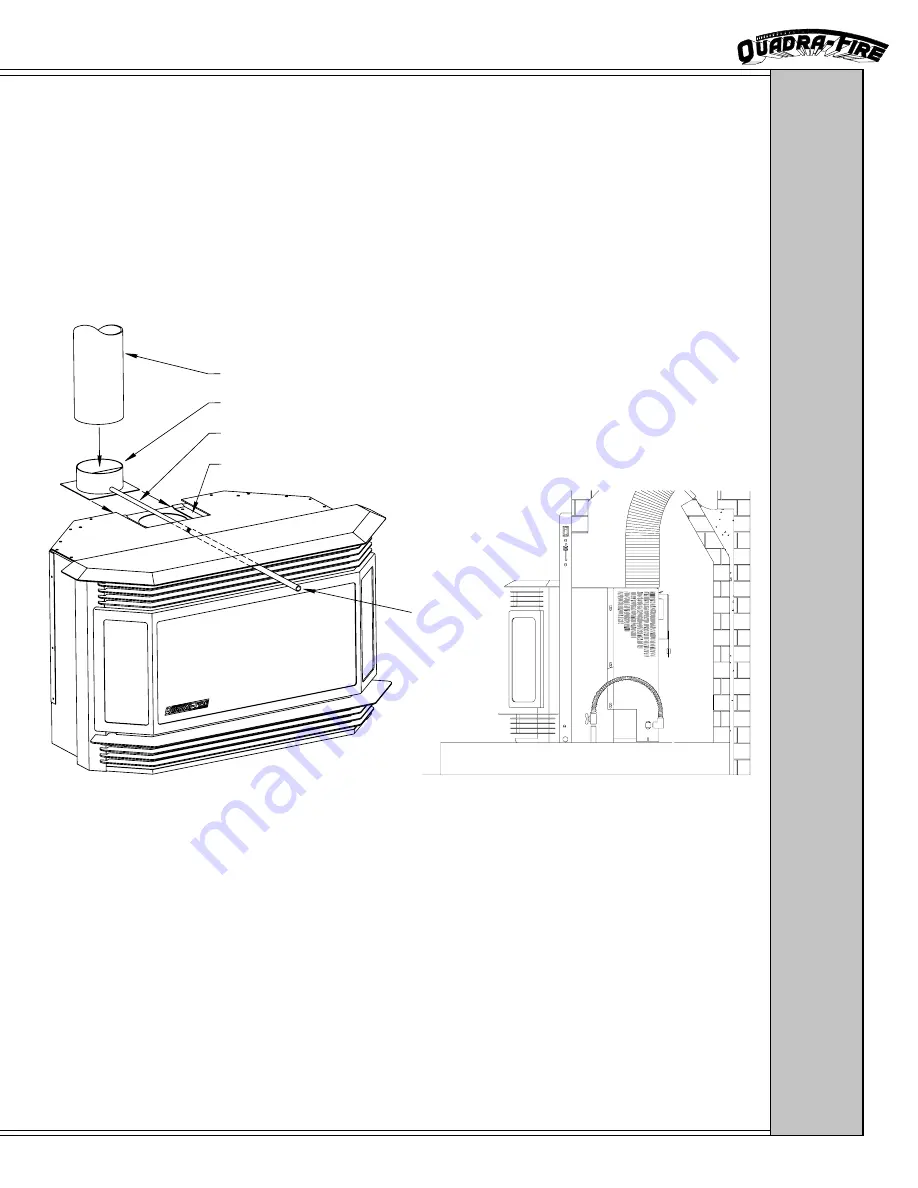
After running the 4” liner down the existing flue, make sure that the damper plate is removed or welded in the
open position (use only listed approved 4” liner). Pull the flue collar toward the back of the appliance; it will
slide off. The spill tube will act as your handle when reattaching the flue collar to the unit. Securely attach the
flue collar to the liner using set screws or hose clamps. When you are sliding the insert into position, guide the
collar back into the original position. Adjust and level the insert.
NOTE: WHEN THE SHUTOFF VALVE IS INSTALLED IN THE FIREPLACE, THE OP-
TIONAL PANEL SET WITH ACCESS DOOR MUST BE INSTALLED.
Fig. 1
Fig. 2
Flue
Flue Collar
Spill Tube
Guides
Spill Tube
Extension
VENT ATTACHMENT TO FLUE COLLAR
The GB40-I is equipped with a detachable flue collar. The draft hood is stationary to the insert. This allows
you to make the connection in a very confined area. It can be reattached from the front of the unit as
shown below.
A spill tube extension is included with the insert. It can be screwed onto the existing spill tube (accessed
through the upper grill, under the top) to facilitate spill testing (see page 23) as well as positioning the insert
(see below). It should be removed after the insert is installed.
INST
ALLA
TION:
VENT TO
FLUE COLLAR


