

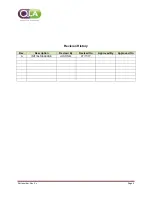


Part number, Rev 2.x
Page 12
3.
Once the desired temperature is located, select it with the control dial.
4.
Your desired temperature is now set.
5.
You can now highlight and select
RUN
from main menu to start your HC1000 Heater
/ Circulator.
6.
If your desired temperature is higher than the current bath temperature, the red
HEATER
light will illuminate, signifying that the heater is active.
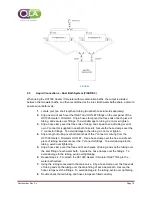
5.3
External Temperature Probe Calibration
An external temperature probe (sold separately) can be used with the HC1000 Heater /
Circulator. The temperature reading is displayed as “Probe” next to the bath temperature reading
for easy comparison. If an external probe is not in use, a dashed line will take the place of the
temperature reading.
1.
Turn on the unit.
2.
Highlight and select
CONFIGURE
from the main menu.
3.
Highlight and select
PROBE CALIBRATION
from the Configure Menu.
4.
From the Calibration Menu, highlight and select
CALIBRATE EXTERNAL PROBE
.
5.
Insert the 30°C calibration standard into the RC jack on the rear panel of the unit, and
highlight and select
OK
.
6.
Once the unit is done calculating, you will be prompted to insert the 40°C calibration
standard into the RC jack.
7.
Once the 40°C calibration standard is inserted, highlight and select
OK
.
8.
After the unit calculates, you are finished calibrating the external temperature probe.
The unit will return you back to the main menu.
9.
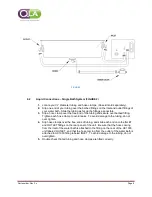
Plug your external temperature probe into RC jack on the rear of the unit, and pace
the probe into your water bath.
10.
The reading from your external temperature probe is now displayed
as “Probe” next
to the bath temperature on the Main Menu screen.
The temperature sensor will trigger an automatic shutdown of the system if the heater
exceeds 65°C. Simply switch off restart the unit. If a problem persists, contact a QLA Lab Services
Professional, or authorized QLA engineer.
5.4
Setting Time and Date
1.
From the menu highlight and select
CONFIGURE.
2.
Highlight and select
SET CLOCK
from the Configure Menu.
3.
From the Clock Menu use the control dial to select the time and date.
4.
Date is changed by the Month / Day / Year
5.
Time is changed by the Hour : Minute : Second. Time is displayed in a
24-hour format.


